Difference between revisions of "Translations:Quick Start Guide/26/en"
From Larnitech wiki page
Jump to navigation
Jump to search
Latest revision as of 13:59, 31 October 2023
Information about message (contribute ) This message has no documentation.
If you know where or how this message is used, you can help other translators by adding documentation to this message.
Message definition (Quick Start Guide )
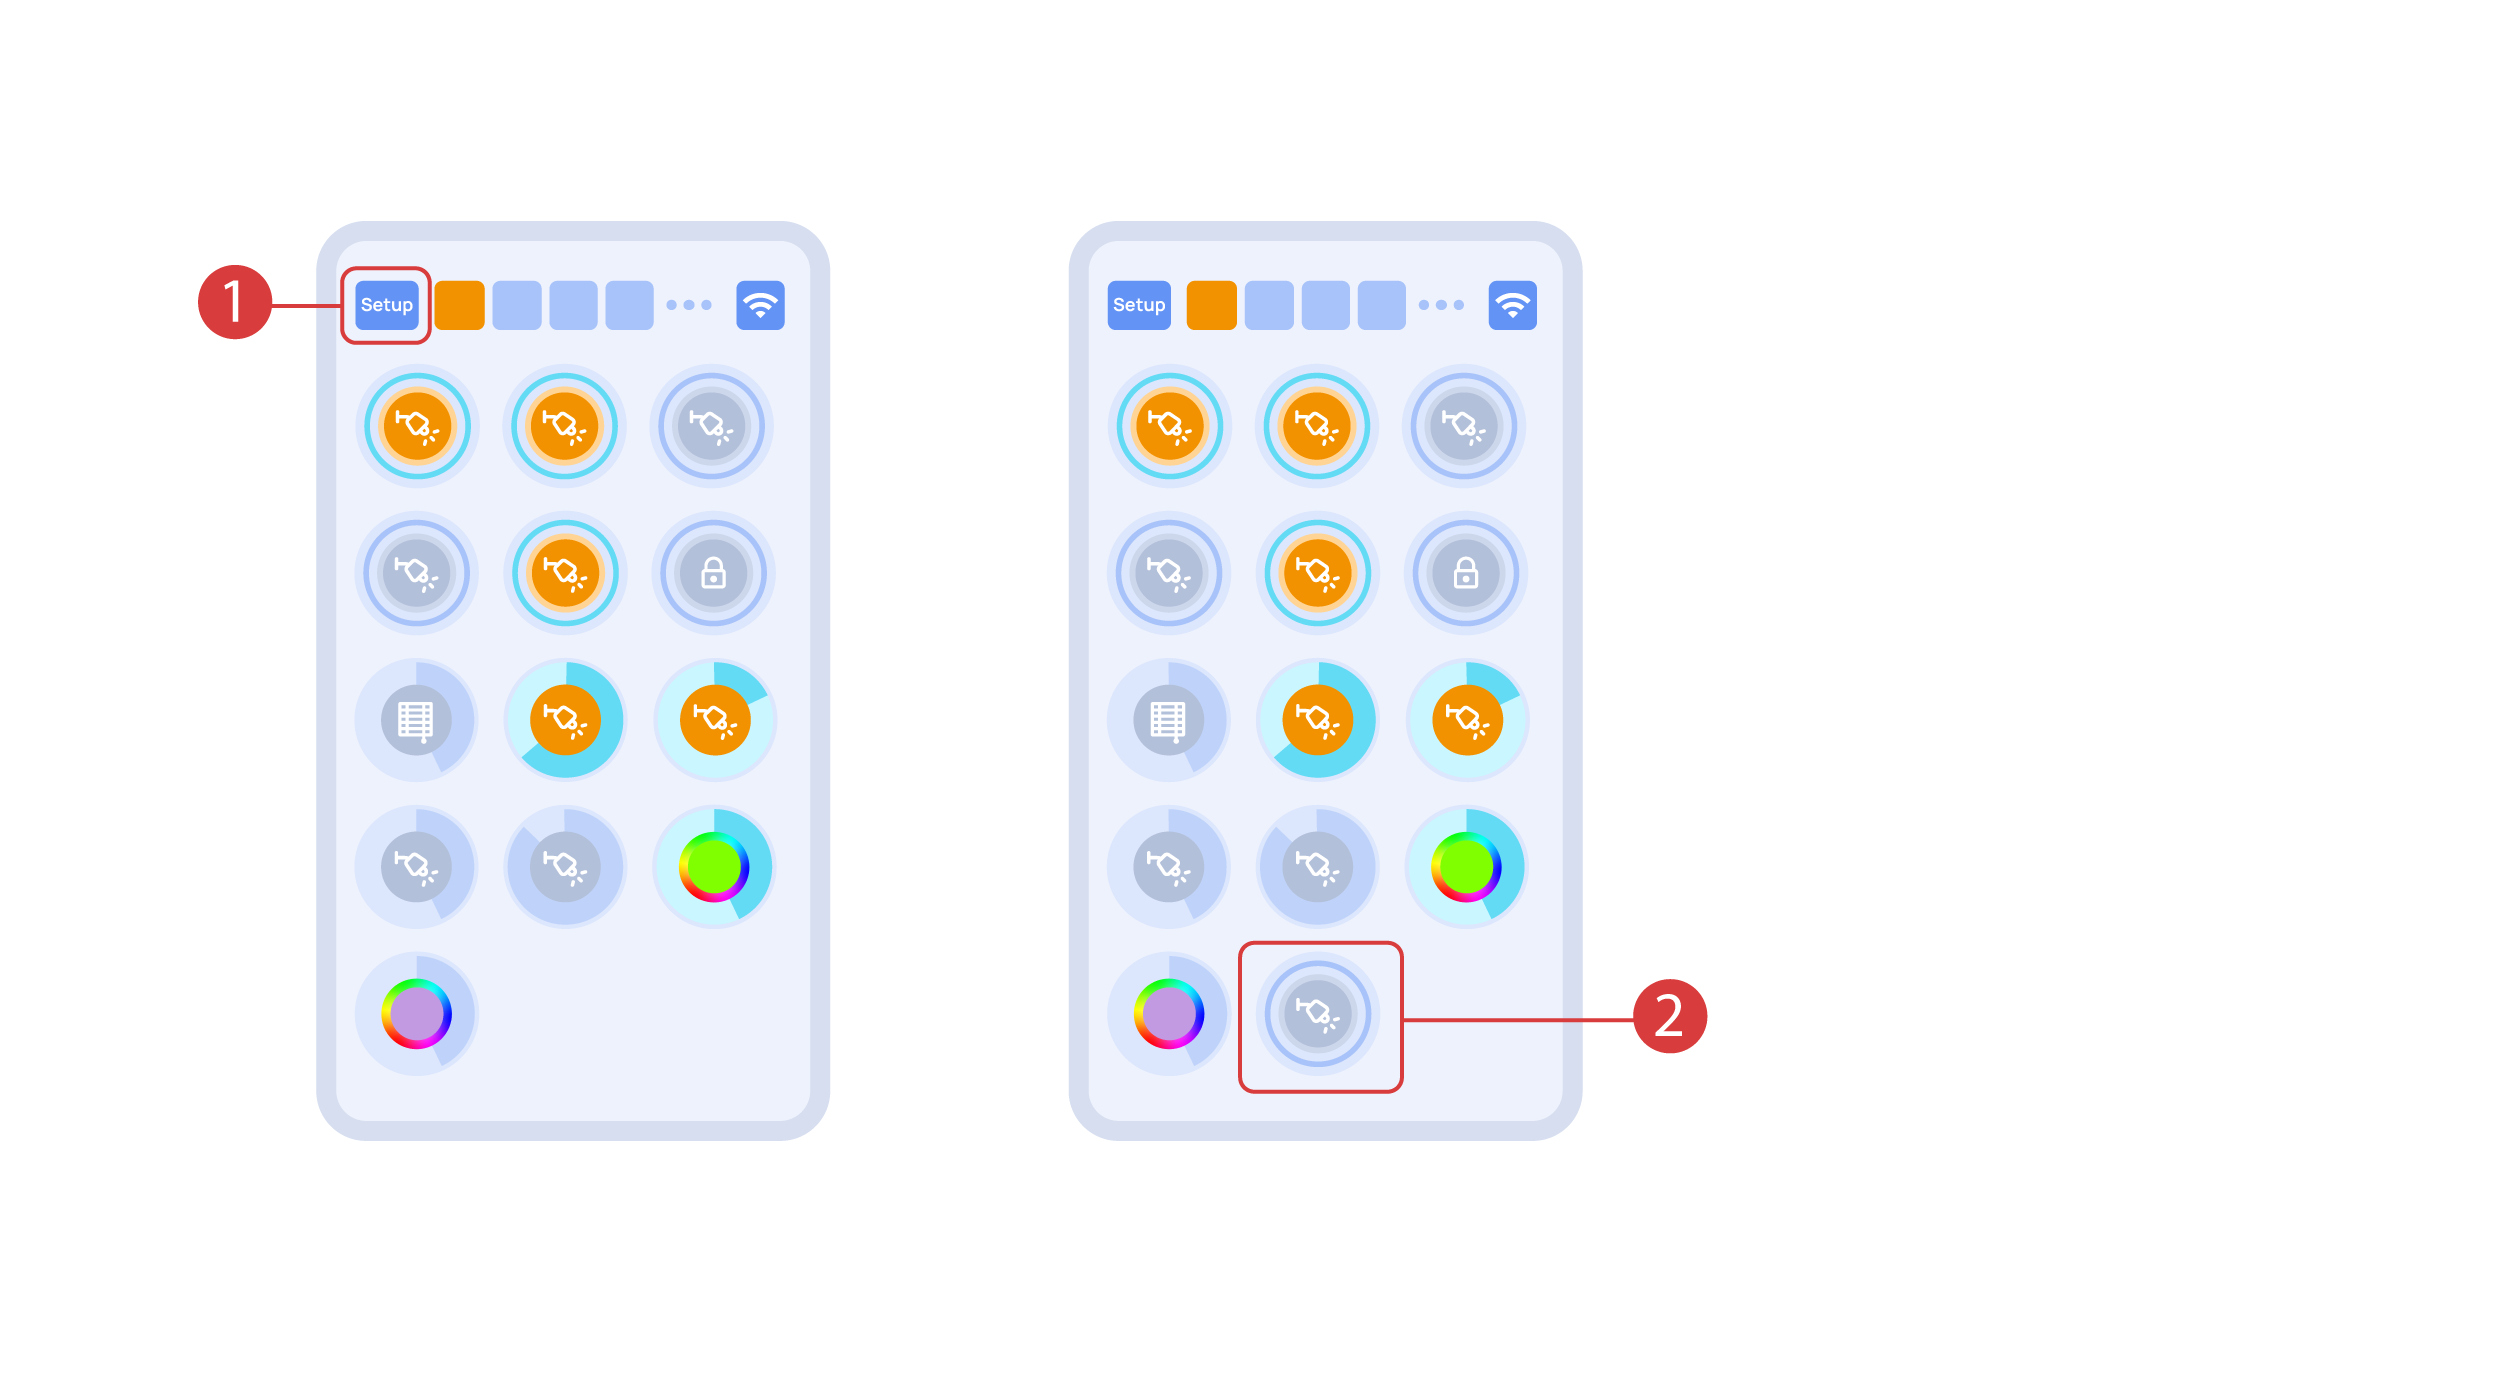
In order to demonstrate the Plug and Play function, we open the executors in the Setup area <span style="font-size: 30px; vertical-align: middle;">①</span> and connect the module to the CAN bus. The system automatically detects the new module and adds it to the ‘Setup’ area, <span style="font-size: 30px; vertical-align: middle;">②</span> where we are able to control the new module instantly.
In order to demonstrate the Plug and Play function, we open the executors in the Setup area <span style="font-size: 30px; vertical-align: middle;">①</span> and connect the module to the CAN bus. The system automatically detects the new module and adds it to the ‘Setup’ area, <span style="font-size: 30px; vertical-align: middle;">②</span> where we are able to control the new module instantly.
[[File:DemoCase9.png|1000x800px]]
<hr> Translation In order to demonstrate the Plug and Play function, we open the executors in the Setup area <span style="font-size: 30px; vertical-align: middle;">①</span> and connect the module to the CAN bus. The system automatically detects the new module and adds it to the ‘Setup’ area, <span style="font-size: 30px; vertical-align: middle;">②</span> where we are able to control the new module instantly. In order to demonstrate the Plug and Play function, we open the executors in the Setup area ① and connect the module to the CAN bus. The system automatically detects the new module and adds it to the ‘Setup’ area, ② where we are able to control the new module instantly.
