Difference between revisions of "Translations:Quick Start Guide/33/en"
From Larnitech wiki page
Jump to navigation
Jump to search
Latest revision as of 13:59, 31 October 2023
Information about message (contribute ) This message has no documentation.
If you know where or how this message is used, you can help other translators by adding documentation to this message.
Message definition (Quick Start Guide )
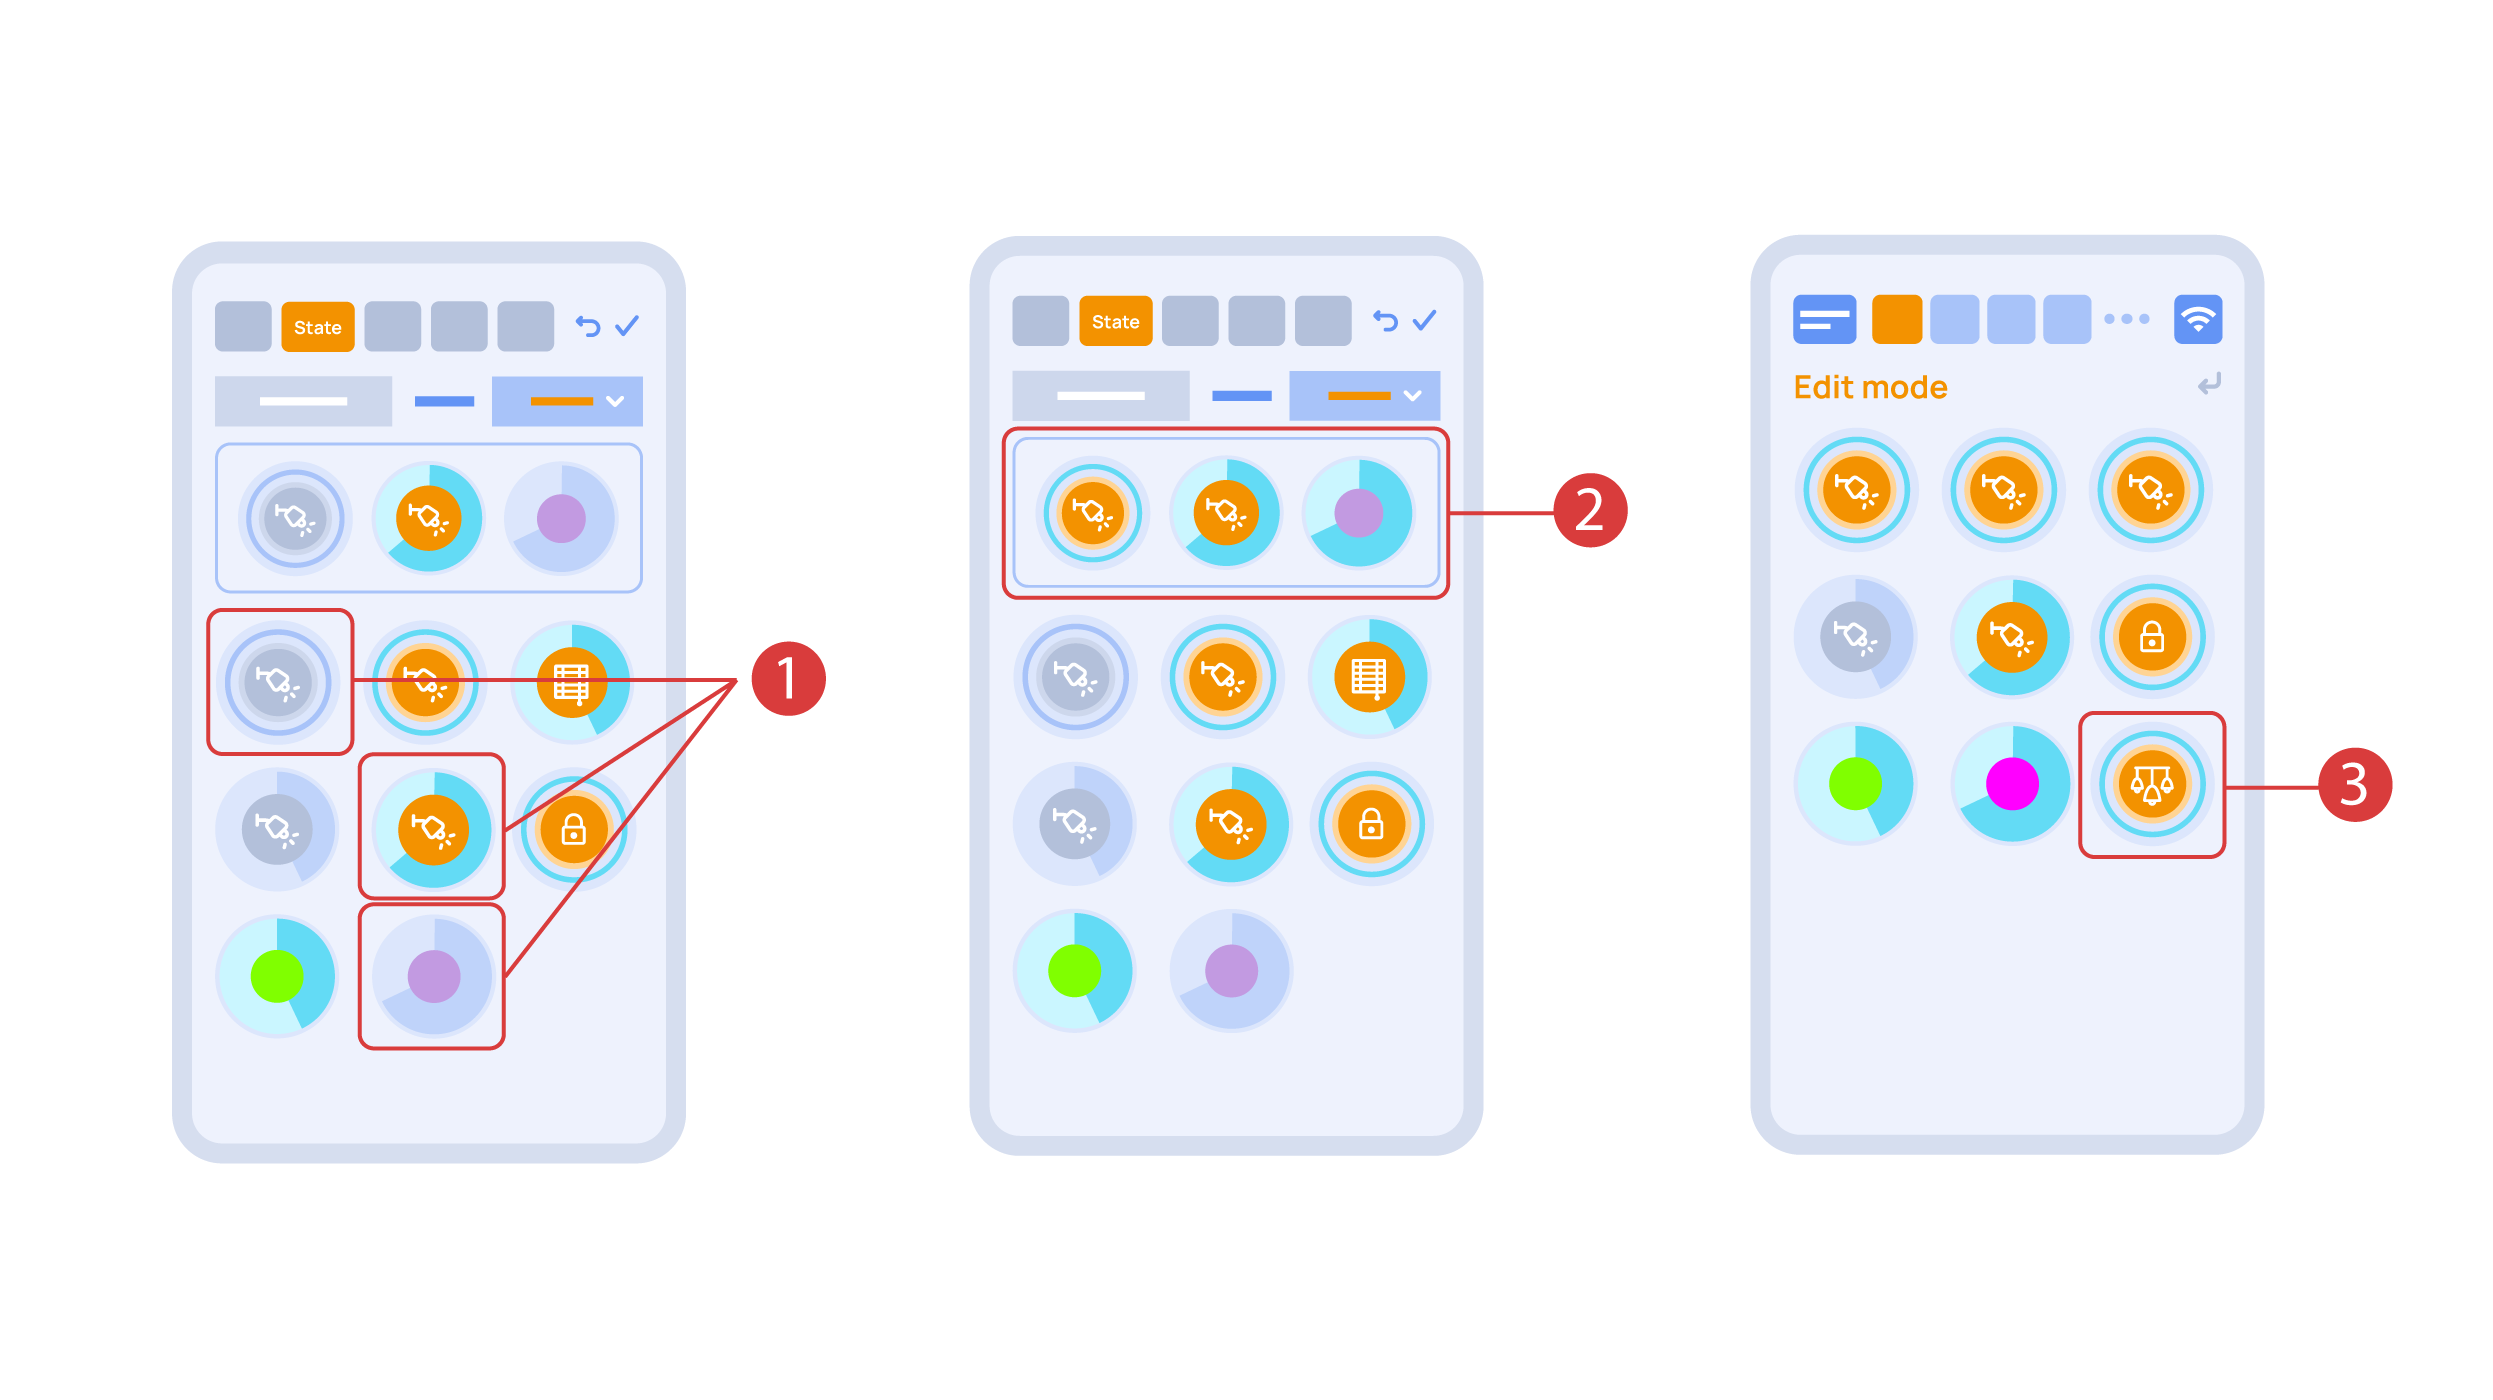
In the ‘State’ tab, use a long press to add the lights we want to use into the light scene <span style="font-size: 30px; vertical-align: middle;">①</span> and set up their state <span style="font-size: 30px; vertical-align: middle;">②</span>. ‘Auto’, ‘Schedule’, ‘Switch’ tabs are the same for all the executors.
In the ‘State’ tab, use a long press to add the lights we want to use into the light scene <span style="font-size: 30px; vertical-align: middle;">①</span> and set up their state <span style="font-size: 30px; vertical-align: middle;">②</span>. ‘Auto’, ‘Schedule’, ‘Switch’ tabs are the same for all the executors.
Save the changes and we are able to use the newly-created light scheme <span style="font-size: 30px; vertical-align: middle;">③</span> immediately.
[[File:DemoCase16.png|1000x800px]]
<hr> Translation In the ‘State’ tab, use a long press to add the lights we want to use into the light scene <span style="font-size: 30px; vertical-align: middle;">①</span> and set up their state <span style="font-size: 30px; vertical-align: middle;">②</span>. ‘Auto’, ‘Schedule’, ‘Switch’ tabs are the same for all the executors. In the ‘State’ tab, use a long press to add the lights we want to use into the light scene ① and set up their state ② . ‘Auto’, ‘Schedule’, ‘Switch’ tabs are the same for all the executors.
Save the changes and we are able to use the newly-created light scheme ③ immediately.
