Latest revision as of 14:37, 13 January 2022
Information about message (contribute ) This message has no documentation.
If you know where or how this message is used, you can help other translators by adding documentation to this message.
Message definition (Automation )
==Creating an Interval==
==Creating an Interval==
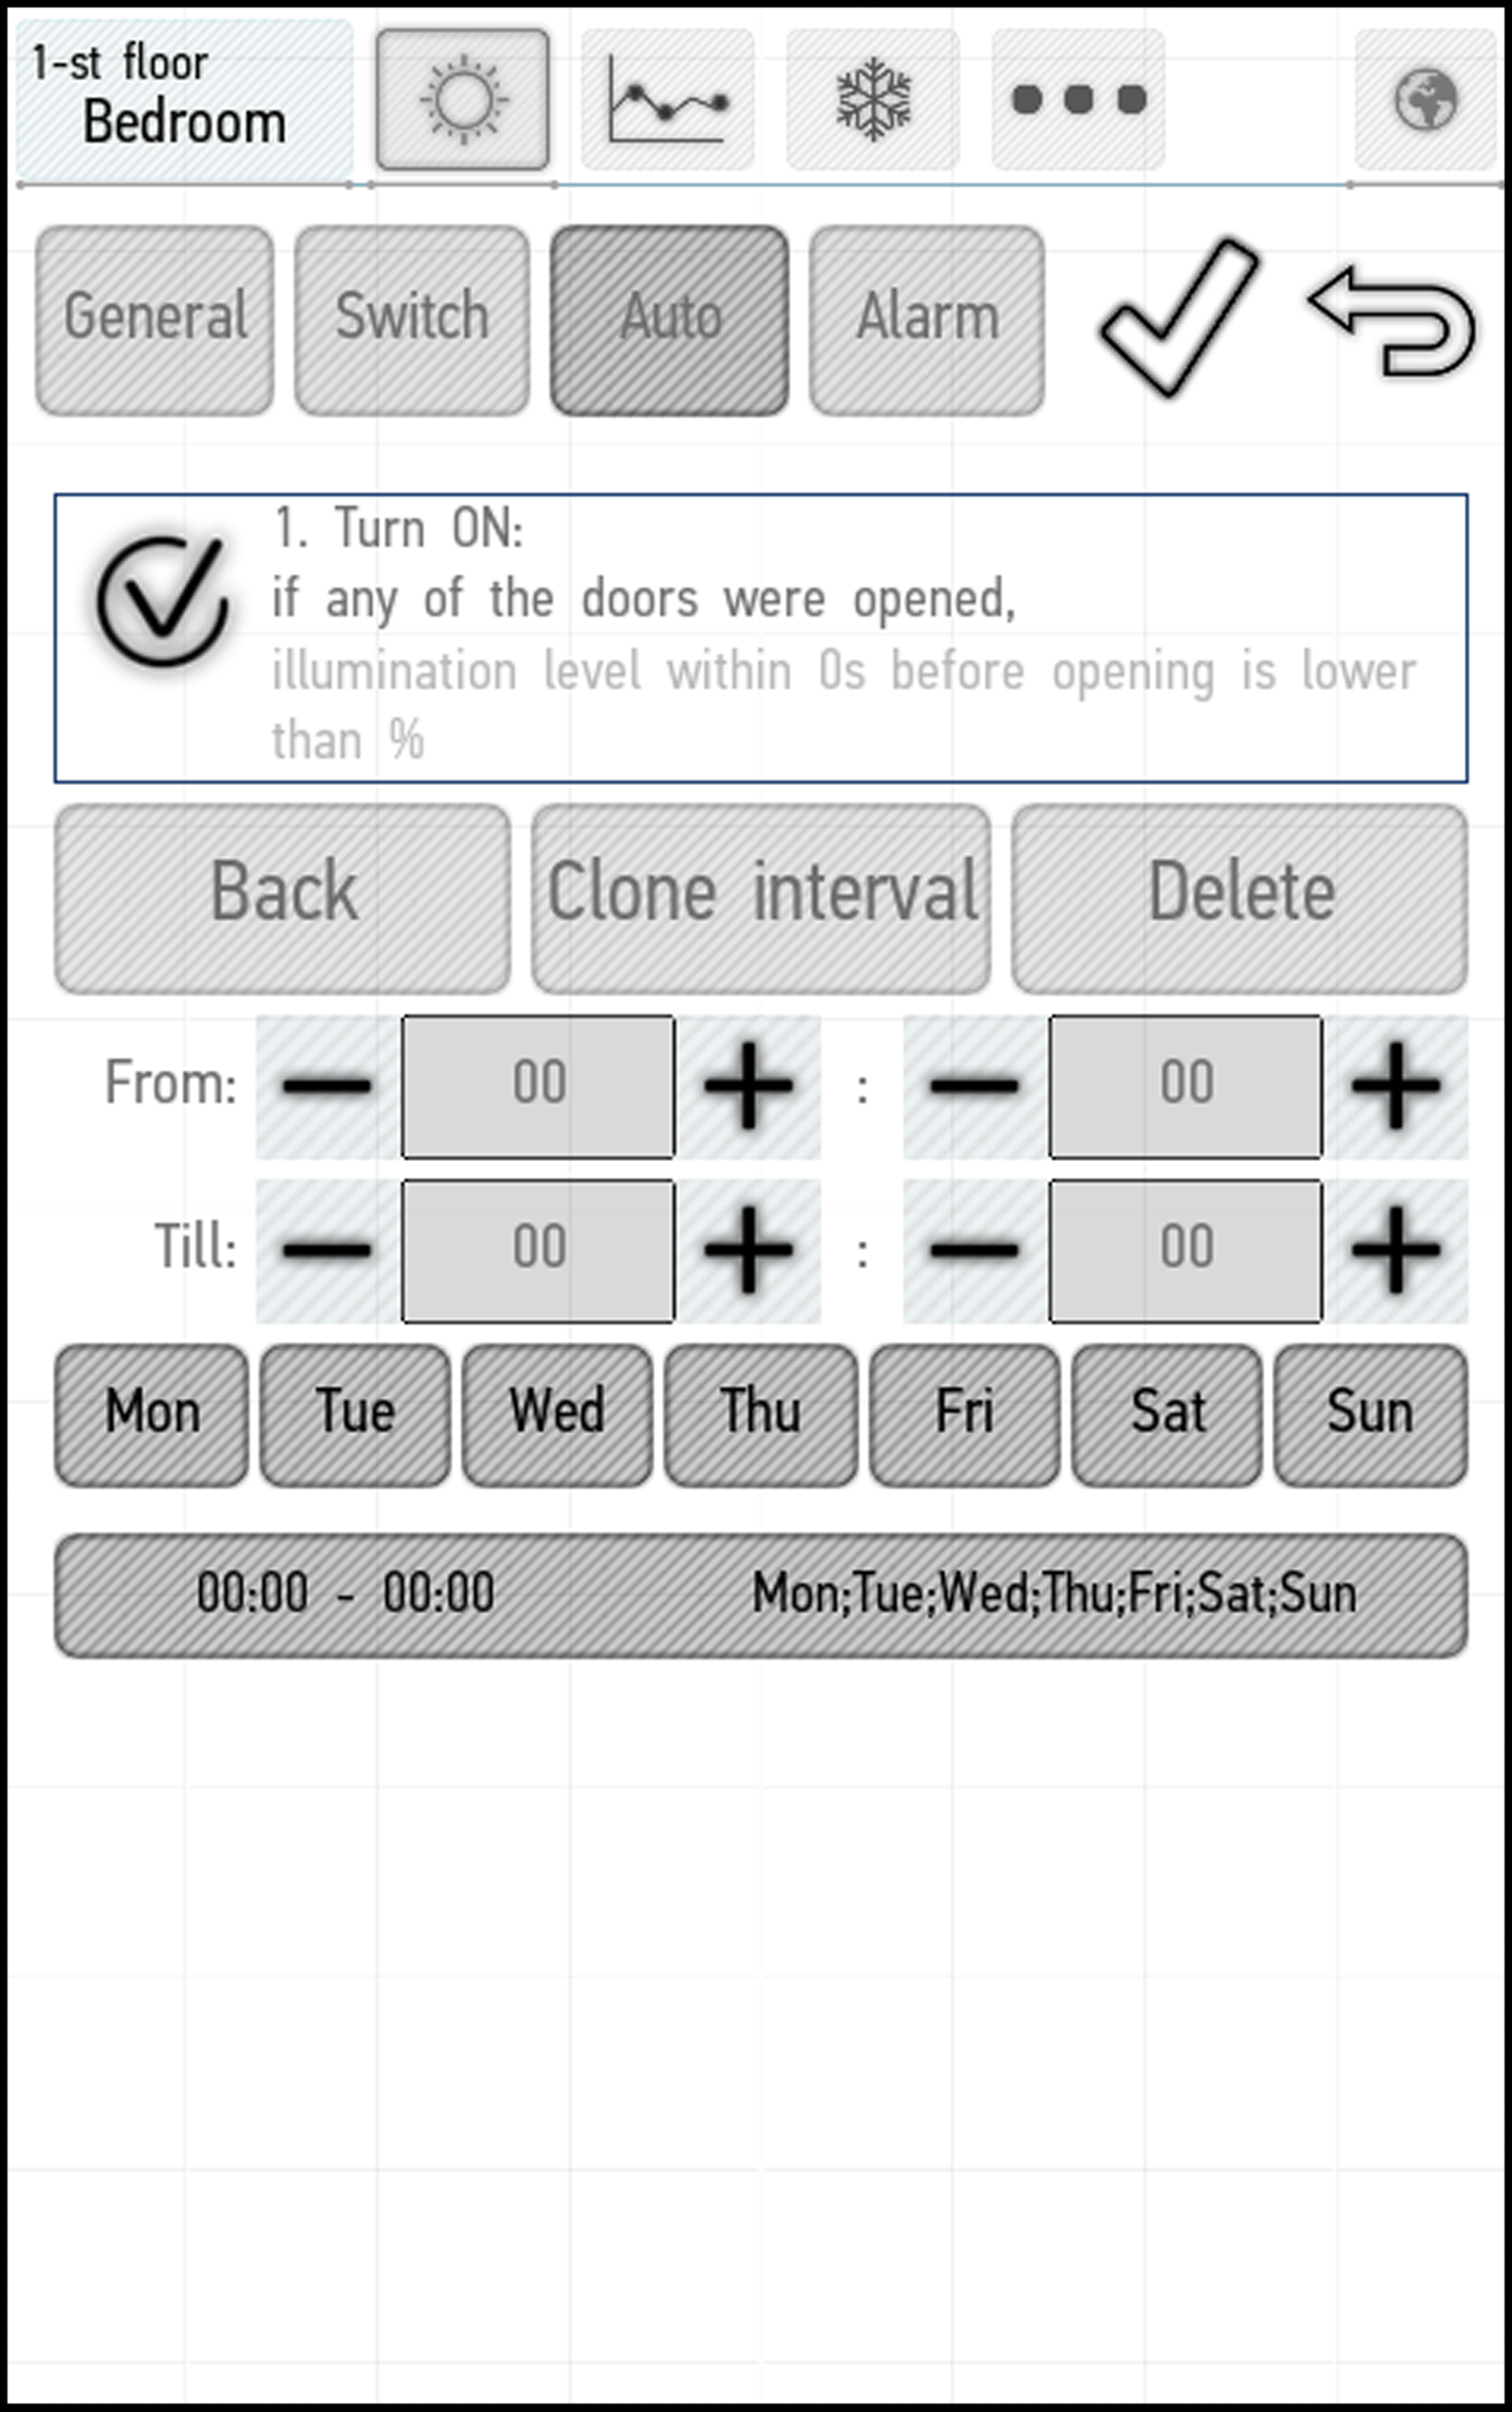
You can use the Customize auto button to set the operation interval for automatic modes. To do this, click Customize auto, and then Create interval. The following window appears.
<br>[[File:auto6.png|500px]]<br>
The From and To fields allow you to set the time of the automation mode activation and deactivation, respectively. Seven buttons below these fields allow you to set the days of the week on which the mode will be activated.
By default, the interval is set from 00:00 to 00:00 on all 7 days of the week. You can limit it or create another interval using the Create interval button.
If you want to copy an existing interval, click the Clone interval button. To delete the selected interval, click the Delete button.
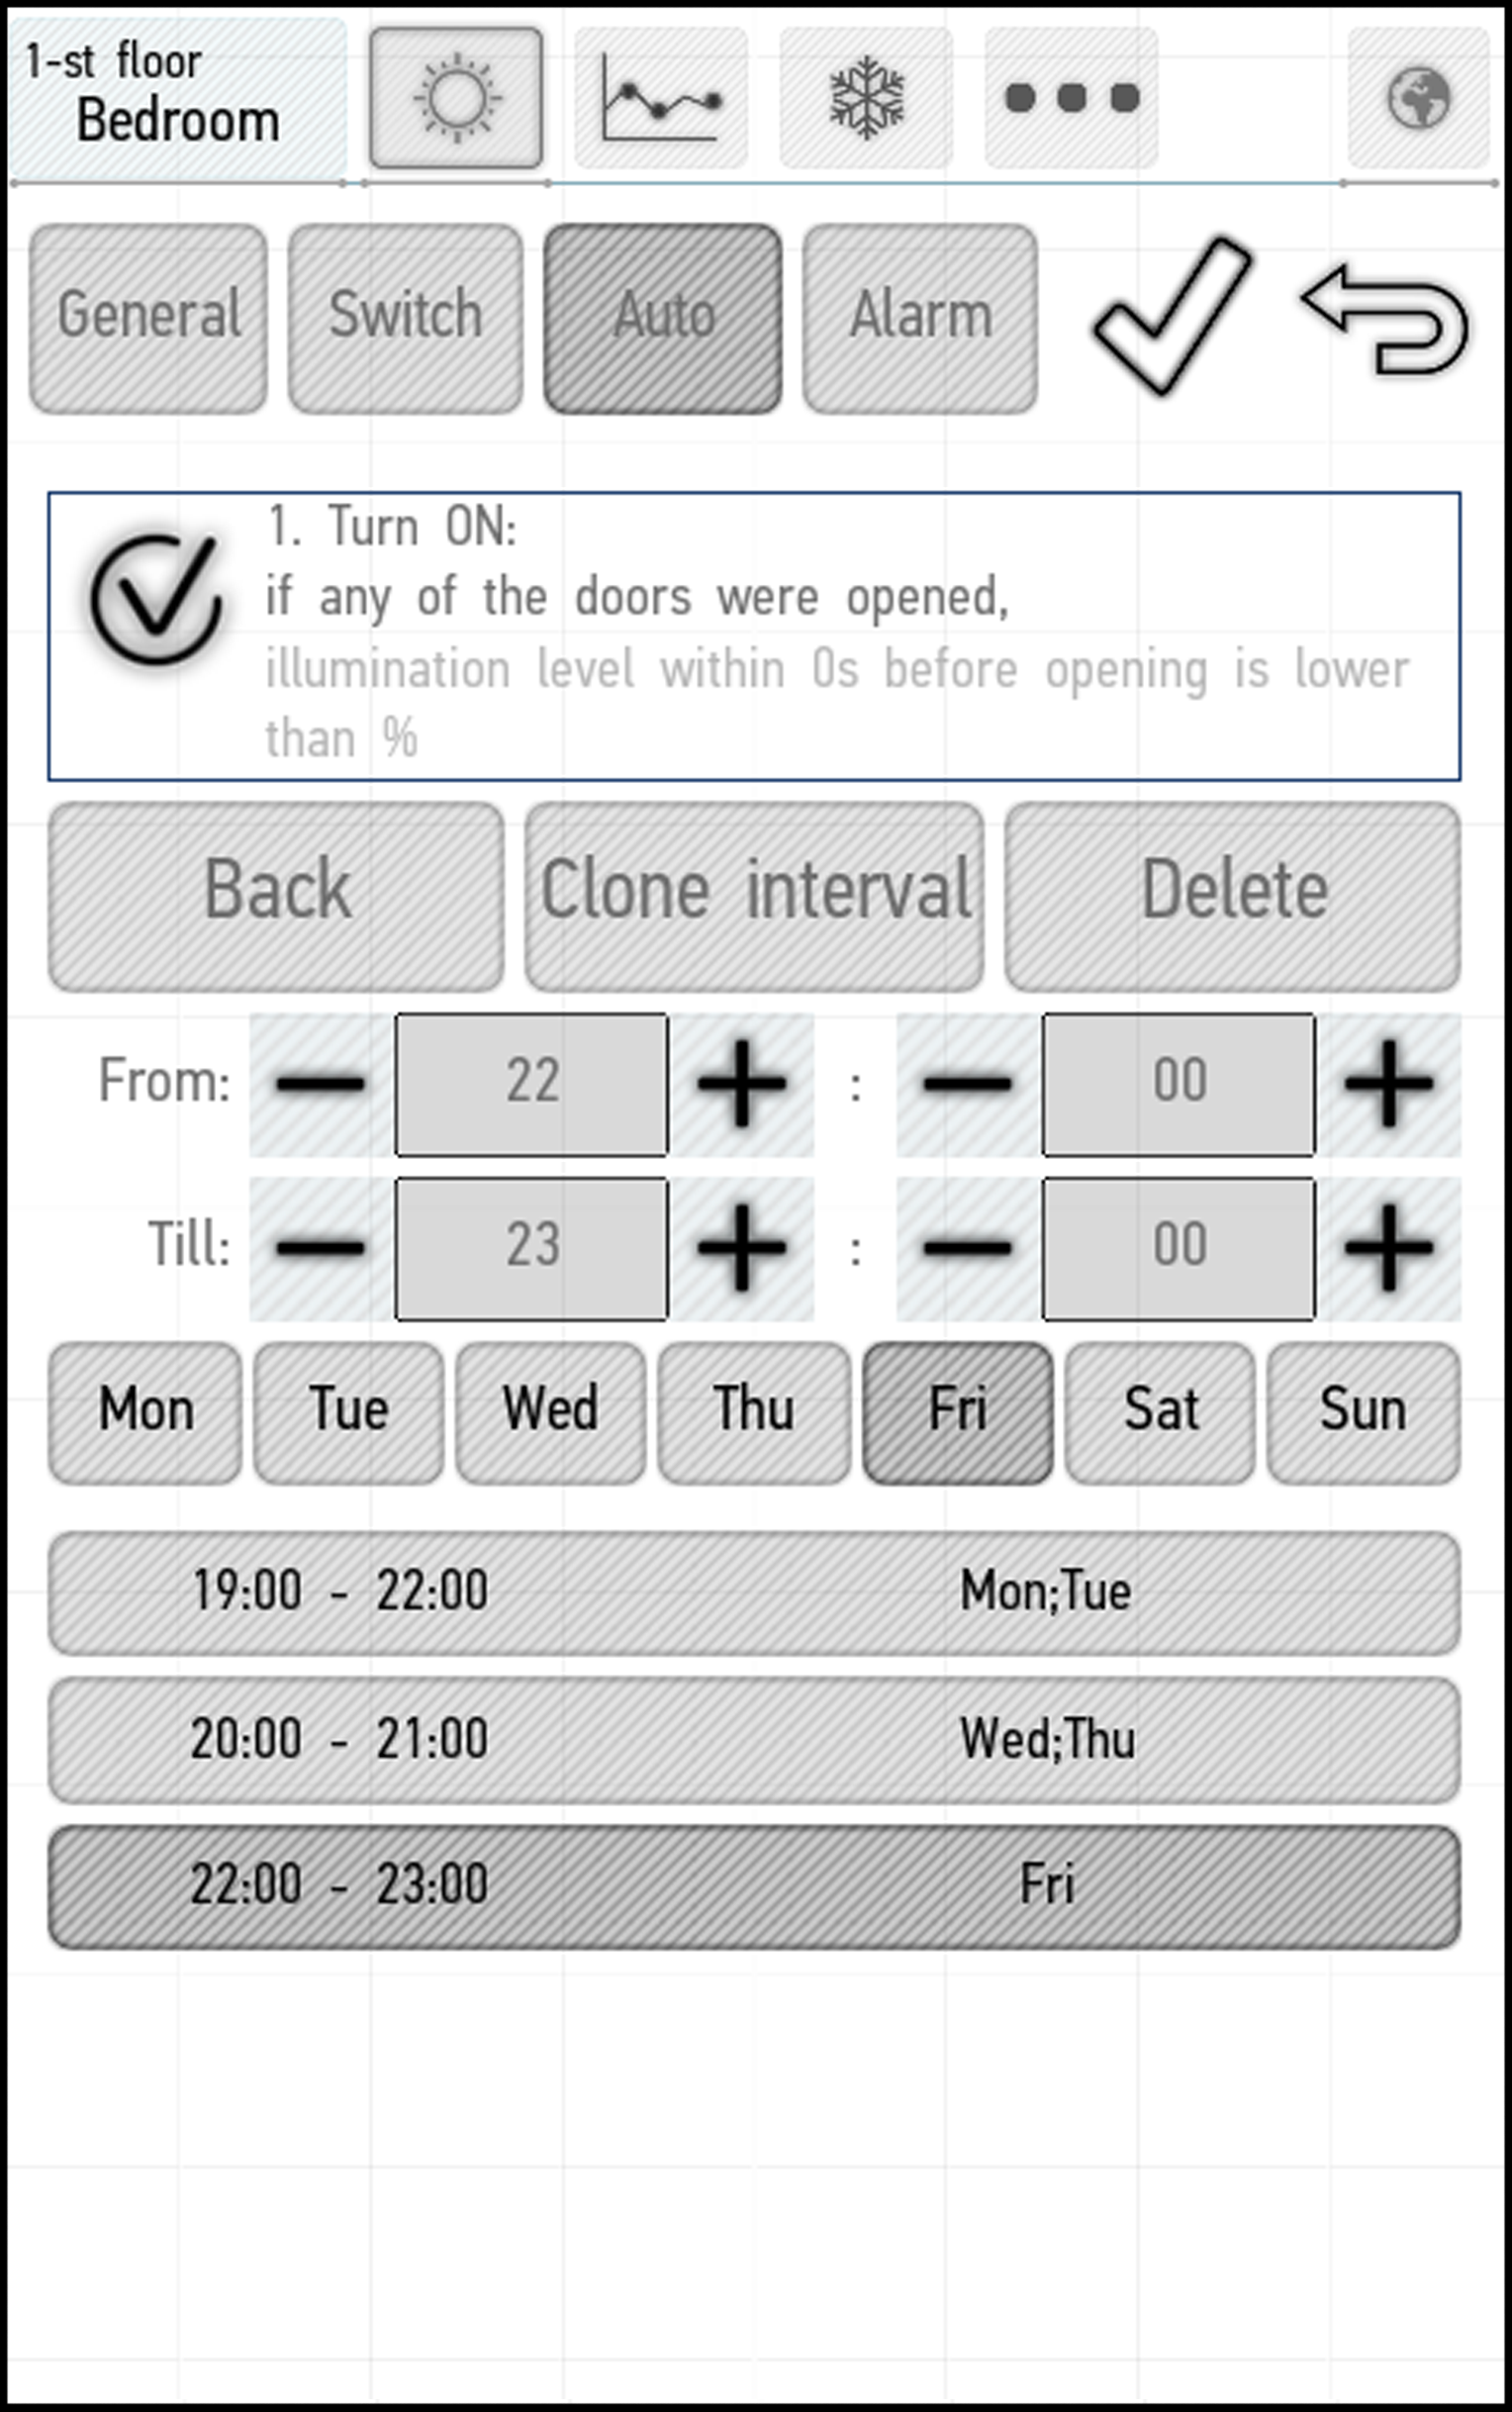
You can create the desired number of intervals. In the example below, we have created the intervals that activate the mode from 7:00 pm to 10:00 pm on Mondays and Tuesdays, from 8:00 pm to 9:00 pm on Wednesdays and Thursdays and from 10:00 pm to 11:00 pm on Fridays. To exit the menu, click Back.
<br>[[File:auto7.png|500px]]<br> Translation ==Creating an Interval== Creating an Interval You can use the Customize auto button to set the operation interval for automatic modes. To do this, click Customize auto, and then Create interval. The following window appears.