Tags : Mobile web edit Mobile edit
(No difference)
Latest revision as of 14:47, 13 January 2022
Information about message (contribute ) This message has no documentation.
If you know where or how this message is used, you can help other translators by adding documentation to this message.
Message definition (Virtual device )
You need open the link with XML description for each button -> [[Xml]]<br>
You need open the link with XML description for each button -> [[Xml]]<br>
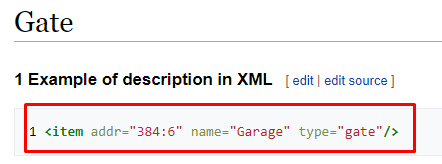
Copy the code of any button you need, for example '''<item addr="384:6" name="Garage" type="gate"/>'''<br>
[[File:Screenshot 001.png|400px]]<br>
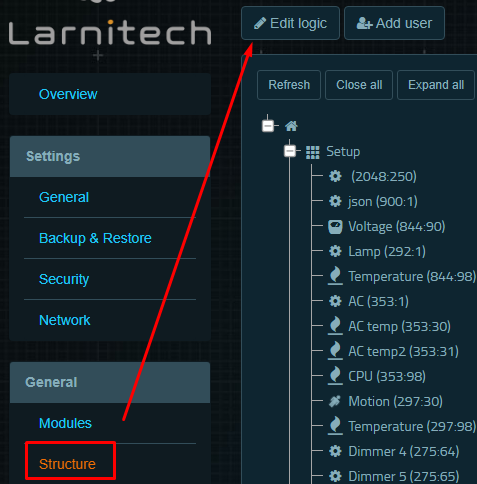
Then open the Structure tab, and click on Edit logic<br>
[[File:Screenshot 002.png|350px]]<br>
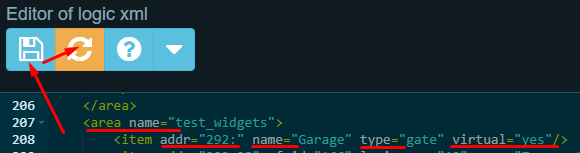
After that will open pop-up window with XML logic<br>
Add your code with a little configuration below!!!<br>
[[File:Screenshot 007.png|700px]]<br>
*area name - the room, where you want an object to add<br>
*addr="292:"<br>
'''where "292"'''- ID of your module (Metaforsa, DE-MG, DW-LC10, BW-SW06 etc.)<br>
'''and ":"''' - inner ID of the object. '''Assigned automatically by the server''' itself after saving and refreshing the XML logic<br>
*name - any you like<br>
*type - the icon (widget) of the object. You can change it to another (Jalousie for example)<br>
*virtual="yes" - the object will be able to perform the actions. Without it, object will be only viewed, without performing actions<br>
After refreshing the XML logic, your line will be like in screenshot below. Inner ID succesfully assigned, in our case it was 240<br>
[[File:Screenshot 008.png|700px]]<br>
After that object ready to work<br> Translation You need open the link with XML description for each button -> [[Xml]]<br> You need open the link with XML description for each button -> Xml <item addr="384:6" name="Garage" type="gate"/>
area name - the room, where you want an object to add
addr="292:" where "292" - ID of your module (Metaforsa, DE-MG, DW-LC10, BW-SW06 etc.)and ":" - inner ID of the object. Assigned automatically by the server itself after saving and refreshing the XML logic
name - any you like
type - the icon (widget) of the object. You can change it to another (Jalousie for example)
virtual="yes" - the object will be able to perform the actions. Without it, object will be only viewed, without performing actions After refreshing the XML logic, your line will be like in screenshot below. Inner ID succesfully assigned, in our case it was 240