Difference between revisions of "Translations:Google Home/1/en"
From Larnitech wiki page
Jump to navigation
Jump to search
Revision as of 17:58, 15 January 2022
Information about message (contribute ) This message has no documentation.
If you know where or how this message is used, you can help other translators by adding documentation to this message.
Message definition (Google Home )
<ol>
<ol>
<li>
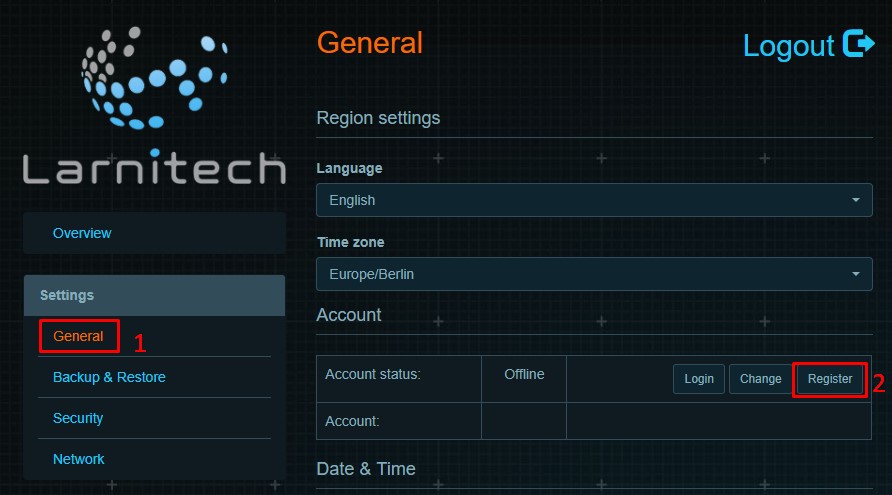
Sign Up or Login to your server in Larnitech Cloud using LT Setup, in the ‘General’ tab;<br />
<br>[[File:google_1.png|800px]]<br>
</li>
<li>
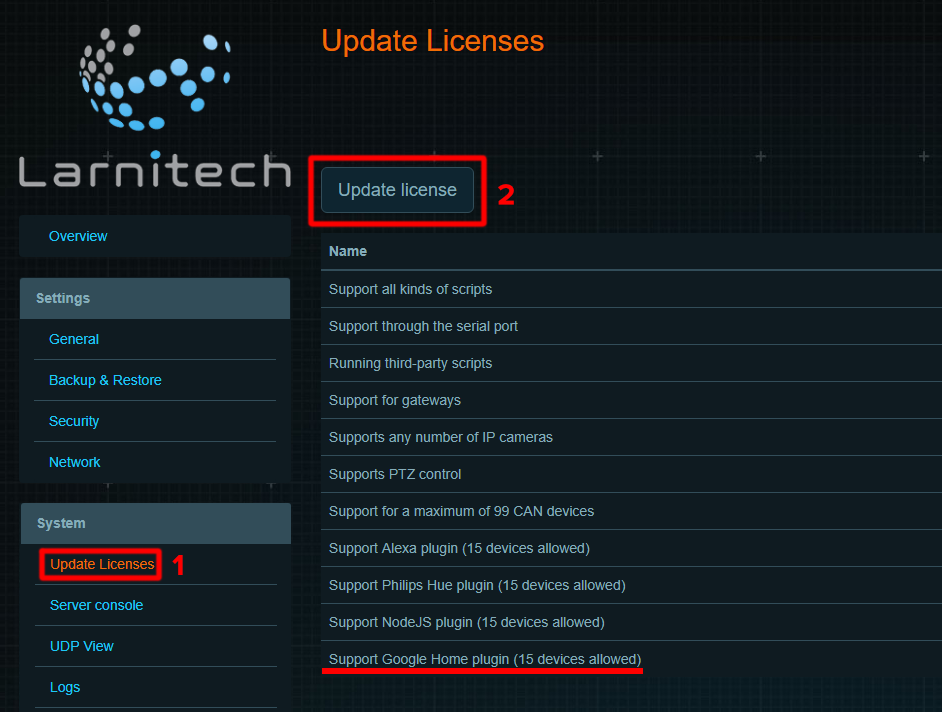
Request support for adding licenses for Google Home devices (by default one device);<br />
{|class="wikitable"
|-
|[[File:google2-1.png|350px]]||[[File:google2_2.png|400px]]
|}
</li>
<li>
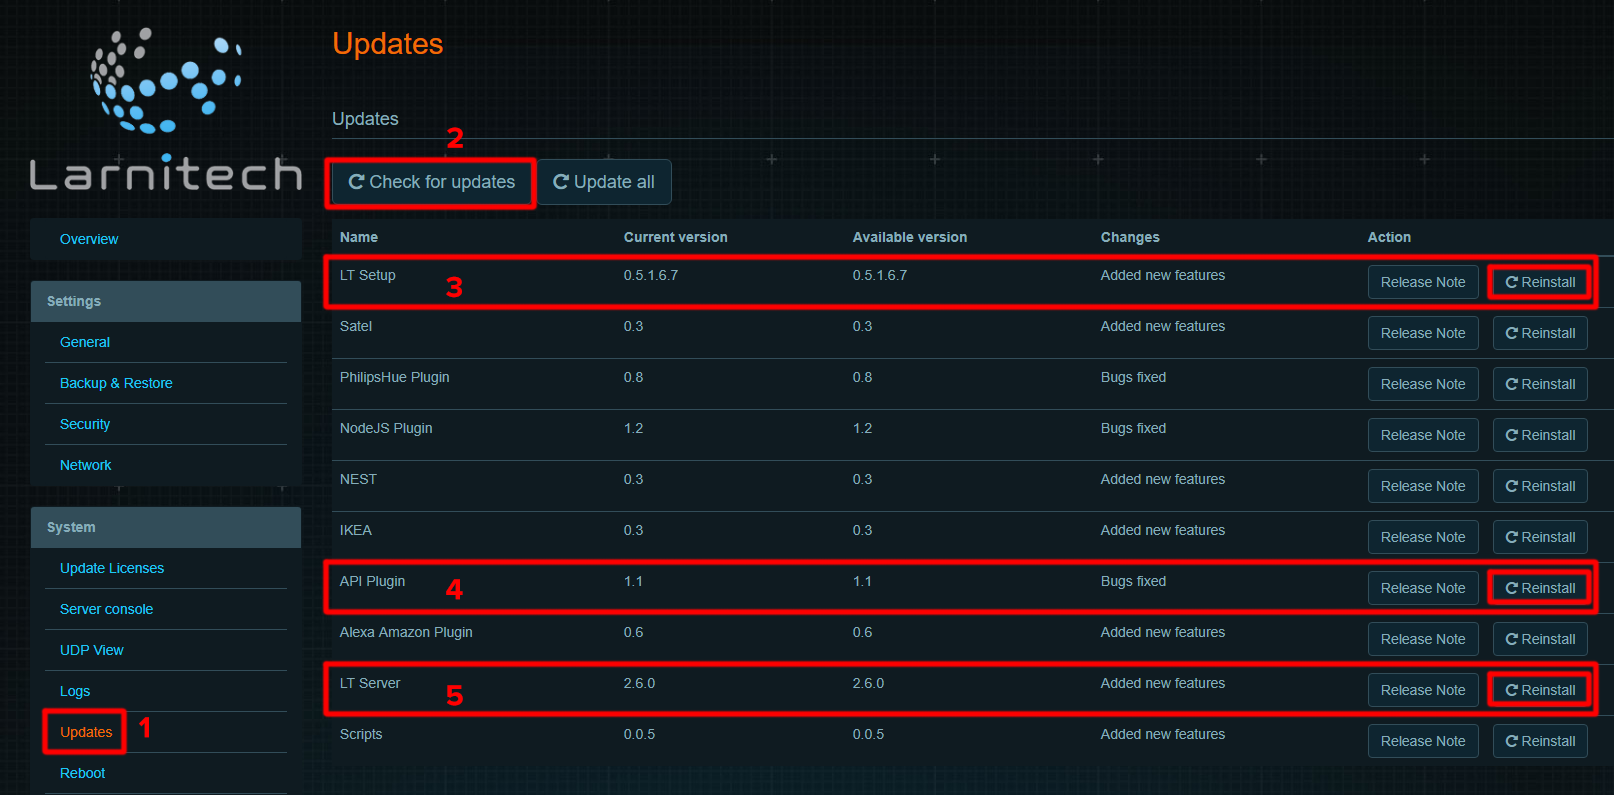
Update LT Setup, LT server, Google API plugin, in the ‘Updates’ tab;<br />
{|class="wikitable"
|-
|[[File:google3_1.png|300px]]||[[File:google3_2.png|900px]]
|}
</li>
<li>
In the 'Voice Assistants' tab, turn on Google Assistant;<br />
{|class="wikitable"
|-
|[[File:google4-1.png|300px]]||[[File:google4_2.png|600px]]
|}
</li>
<li>
In LT Setup go to ‘Structure’ tab, choose an item which you want to manage with Google Home, enable ‘Voice control’ and enter ‘Voice control name’ (the device will be added to Google Home under this name). Repeat this action for all the items you want to control;<br />
{|class="wikitable"
|-
|[[File:google5-1.png|800px]]||[[File:google5_2.png|400px]]
|}
</li>
<li>
Install Google Home app on your device;
</li>
<li>
Create new home;
<table style="width:600px;" border="1px">
<tr>
<td>
<br>[[File:google6_1.png|350px]]<br>
</td>
<td>
<br>[[File:google6_2.png|350px]]<br>
</td>
<td>
<br>[[File:google6_3.png|350px]]<br>
</td>
</tr>
</table>
</li>
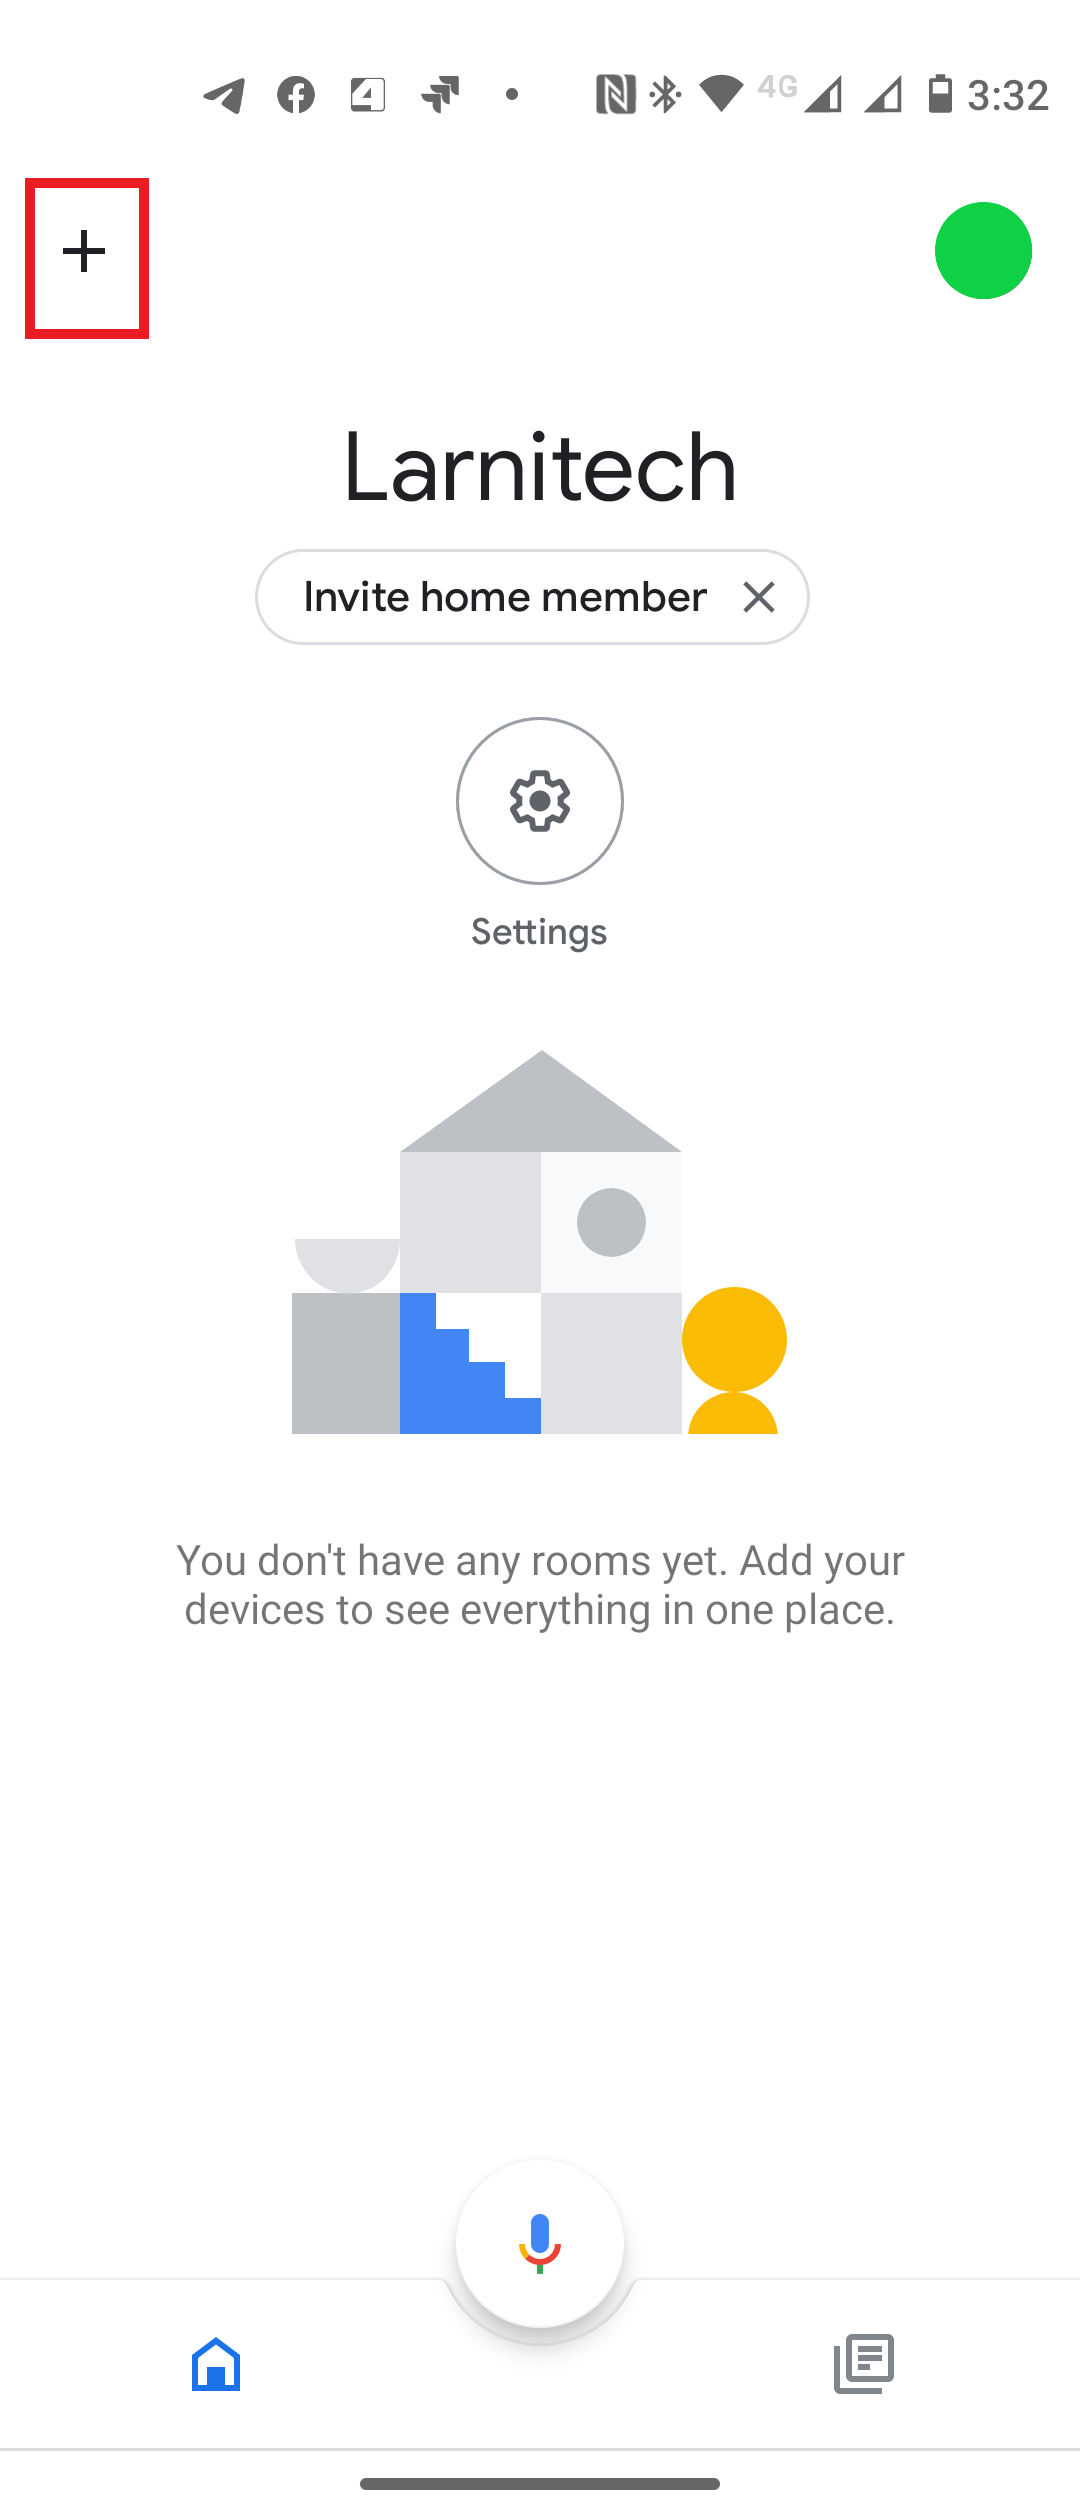
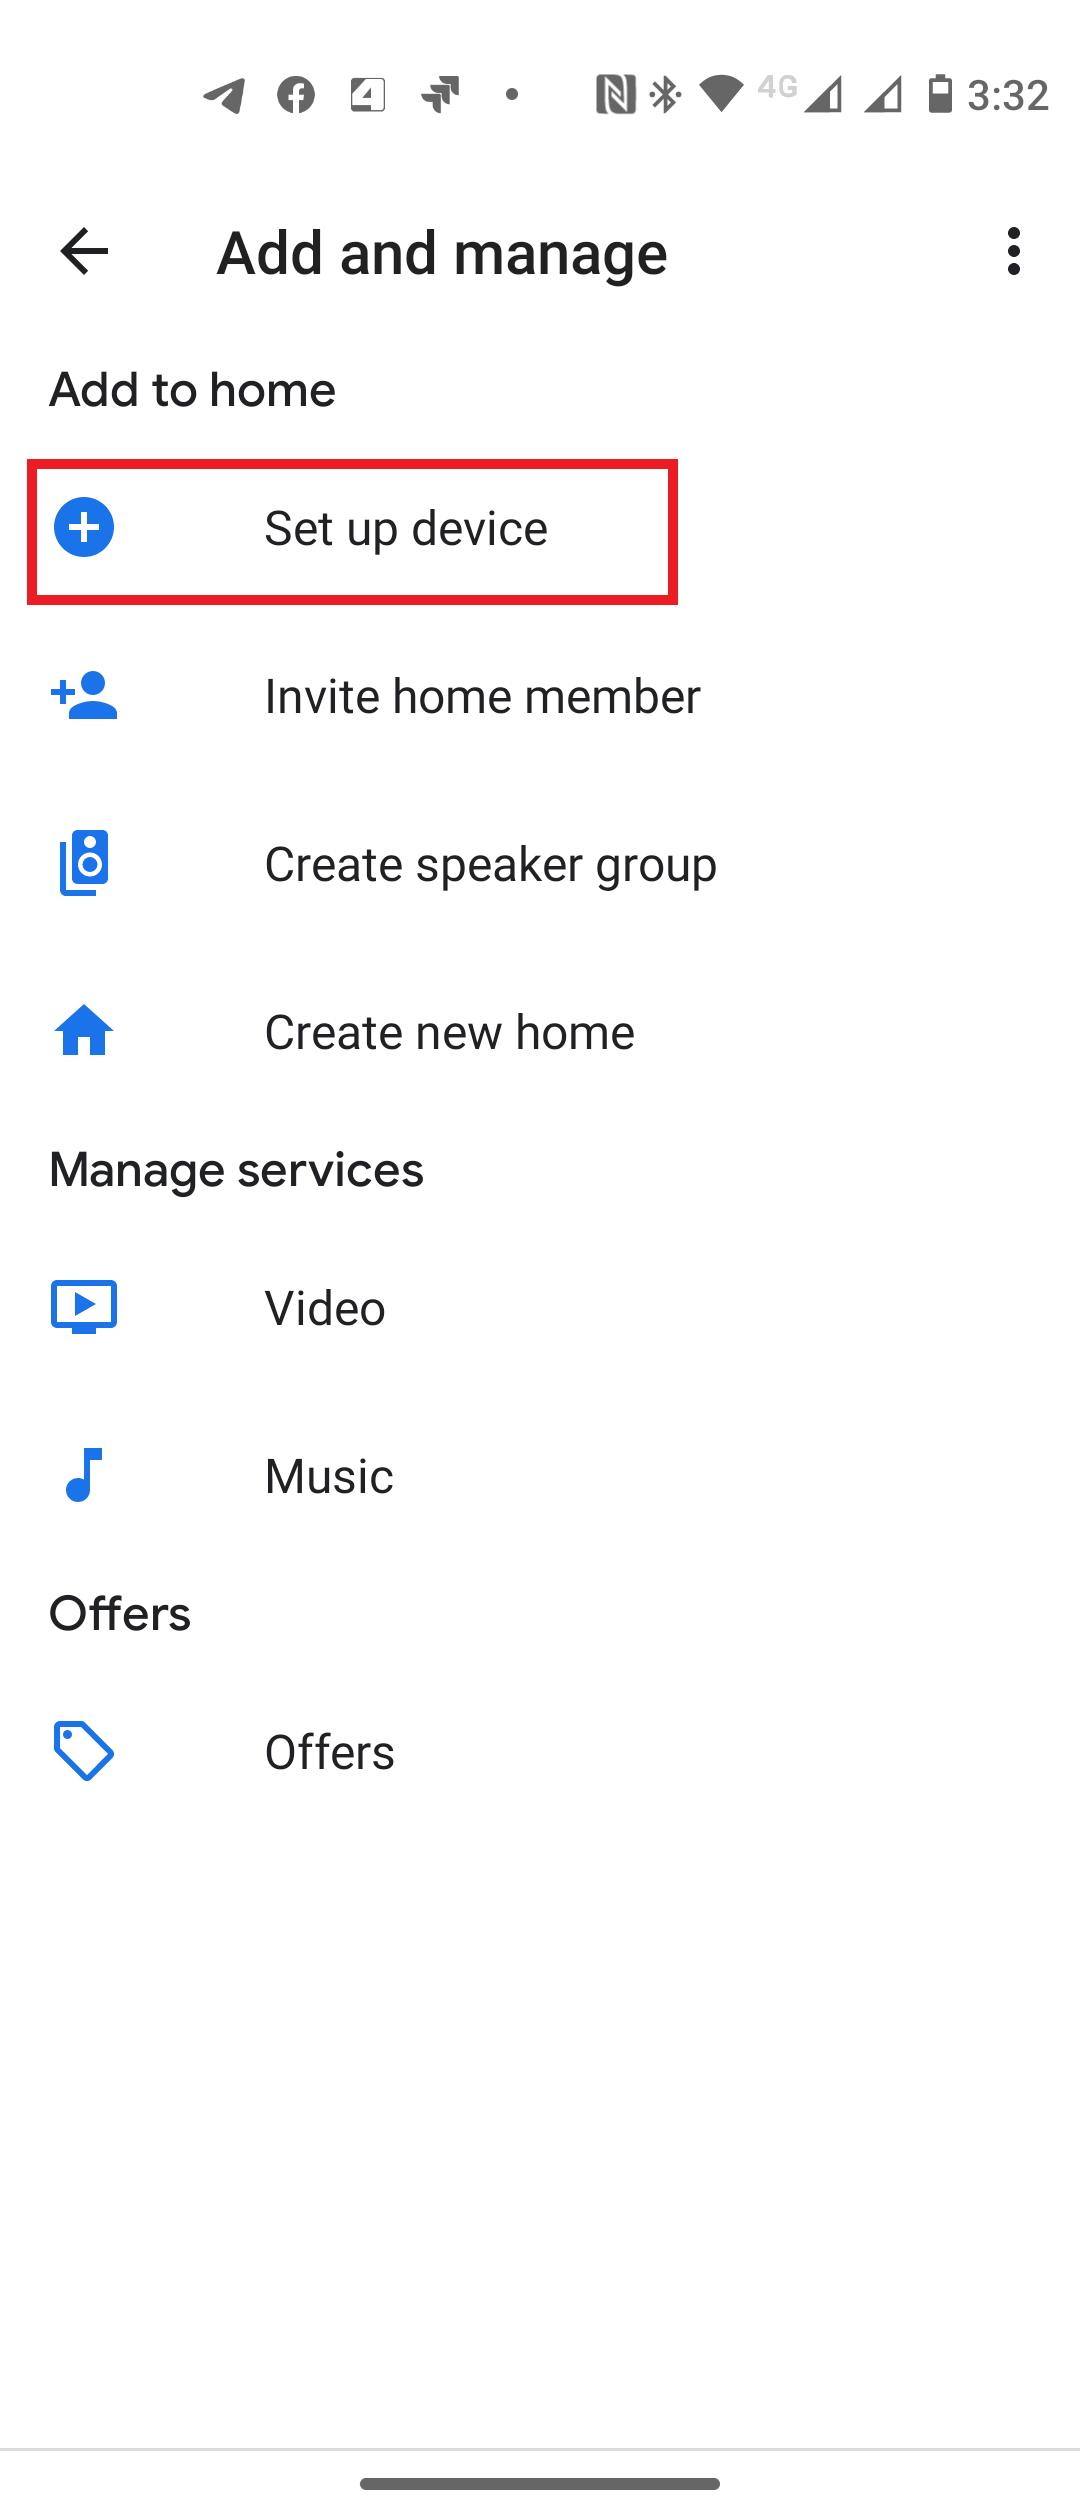
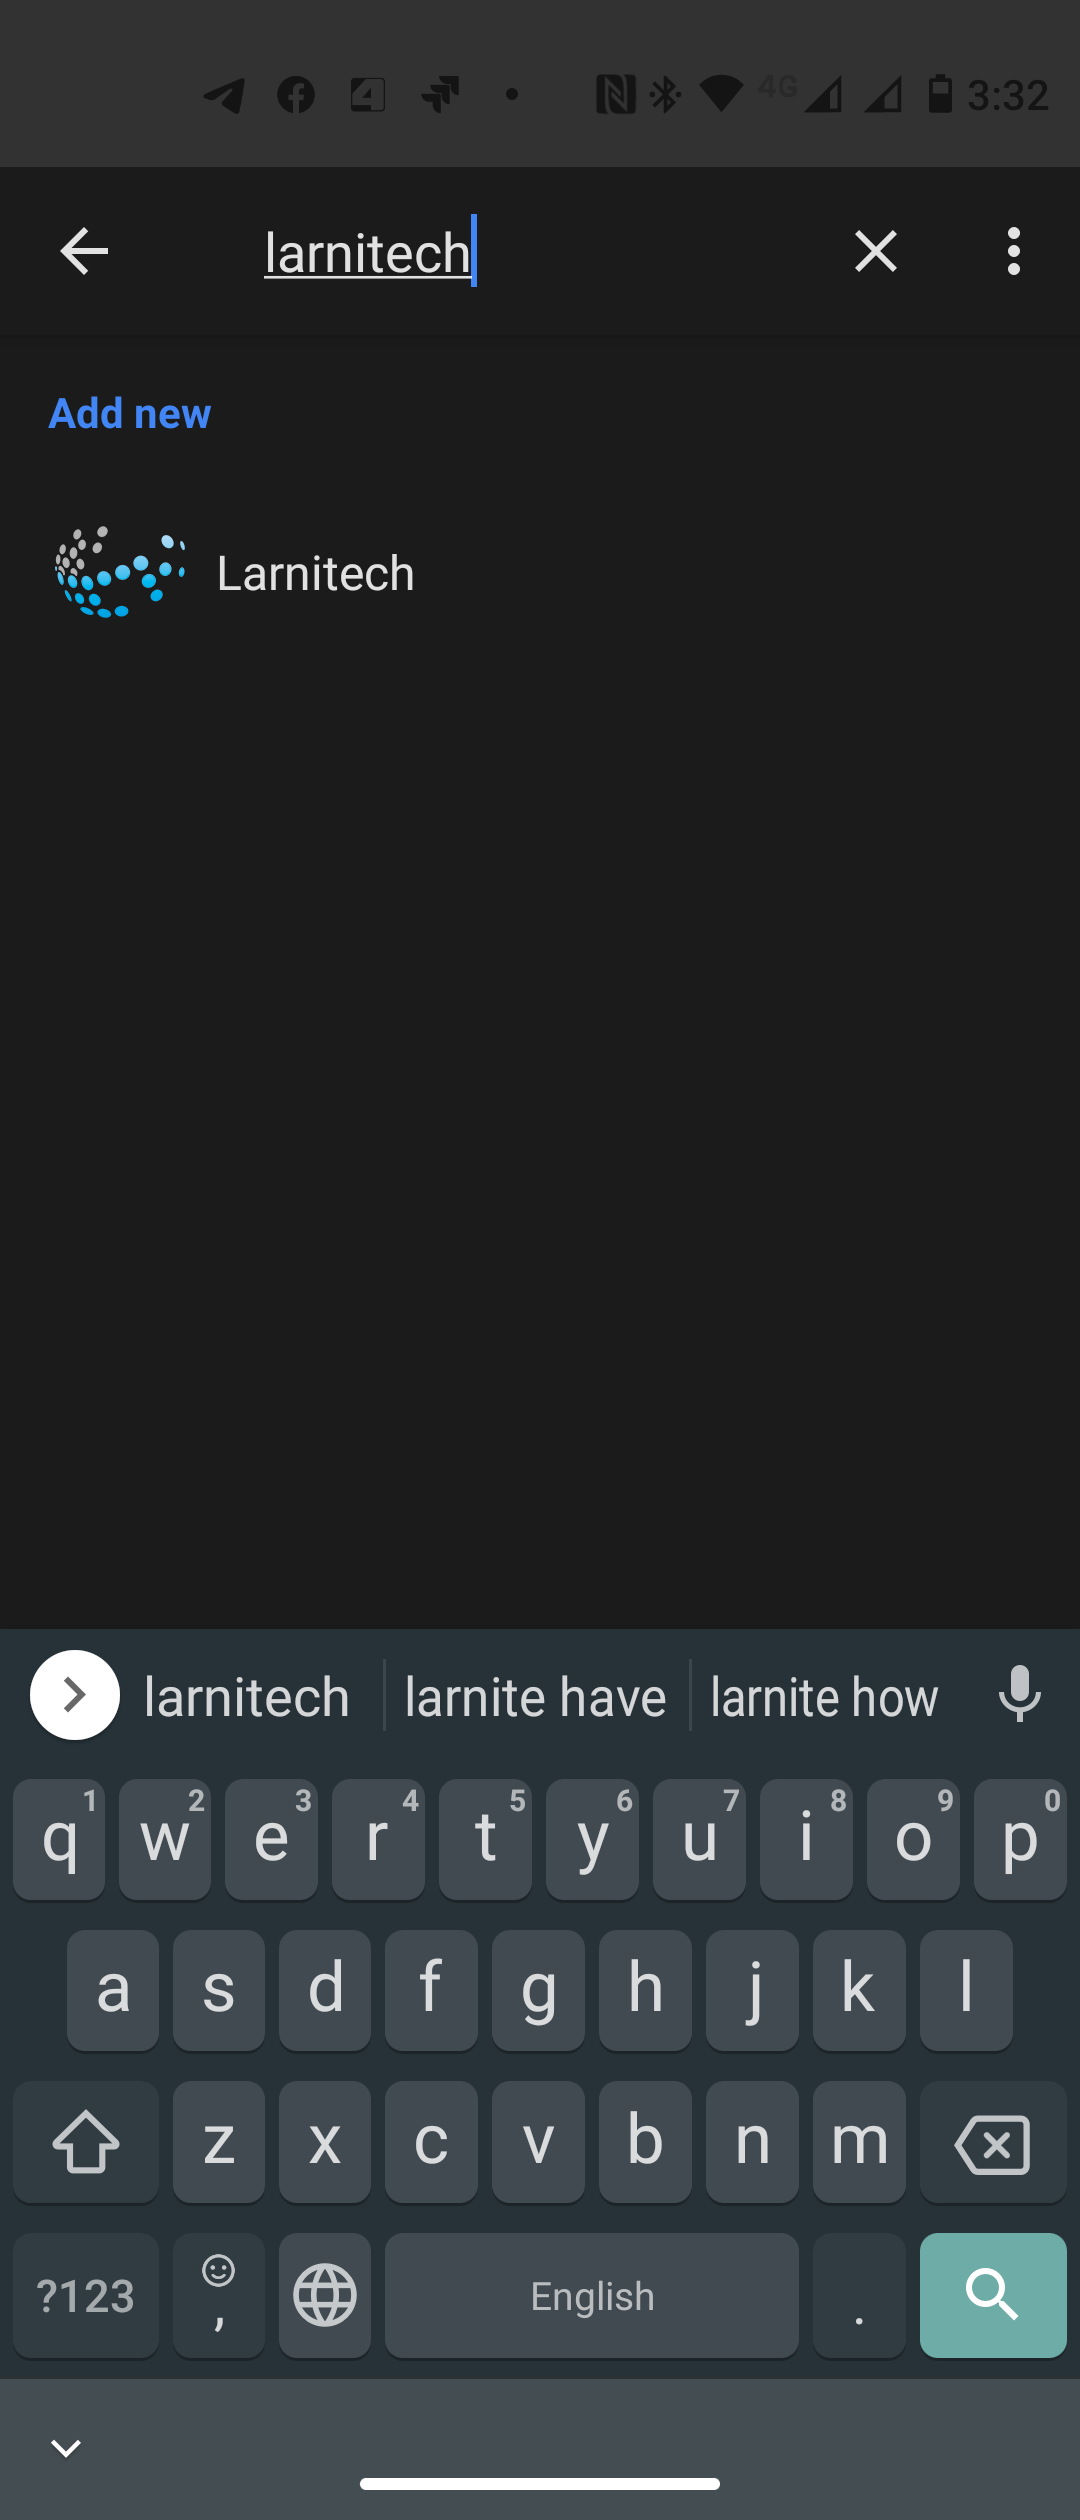
<li>
Add Larnitech service in Google Home app;
<table style="width:600px;" border="1px">
<tr>
<td>
<br>[[File:google7-1.png|350px]]<br>
</td>
<td>
<br>[[File:google7_2.png|350px]]<br>
</td>
<td>
<br>[[File:google7-3.png|350px]]<br>
</td>
</tr>
</table>
</li>
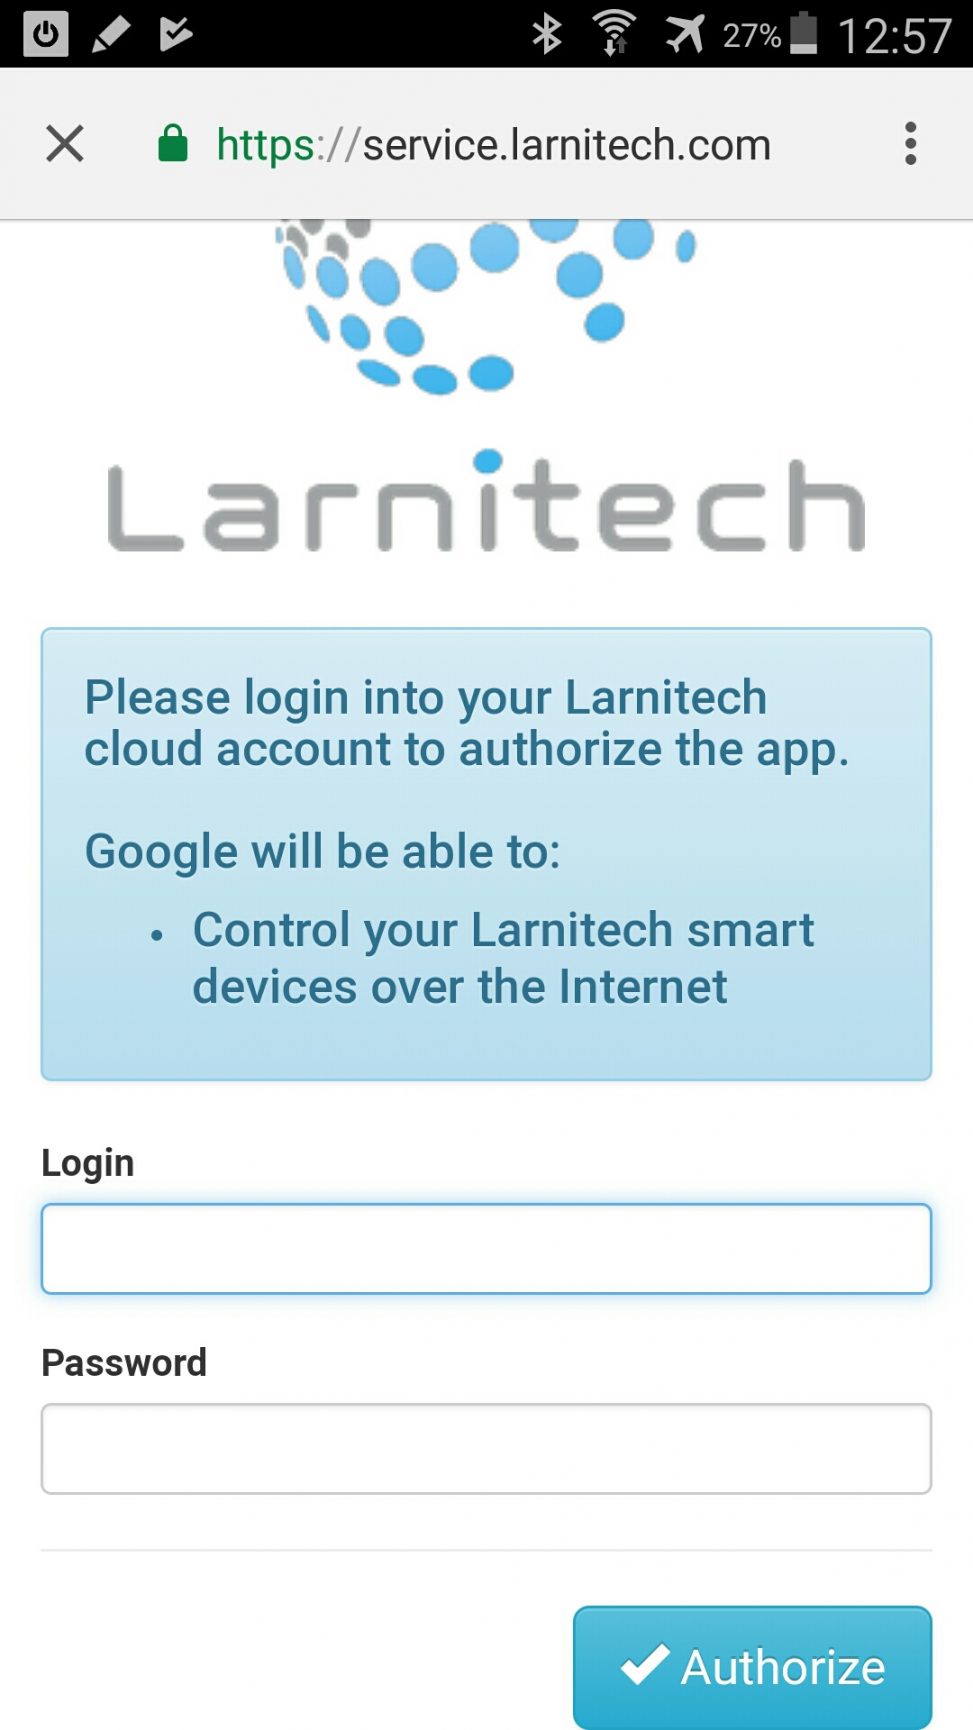
<li>
Enable Larnitech service using your Larnitech Cloud login;
<table style="width:400px;" border="1px">
<tr>
<td>
<br>[[File:google8_1.png|400px]]<br>
</td>
</tr>
</table>
</li>
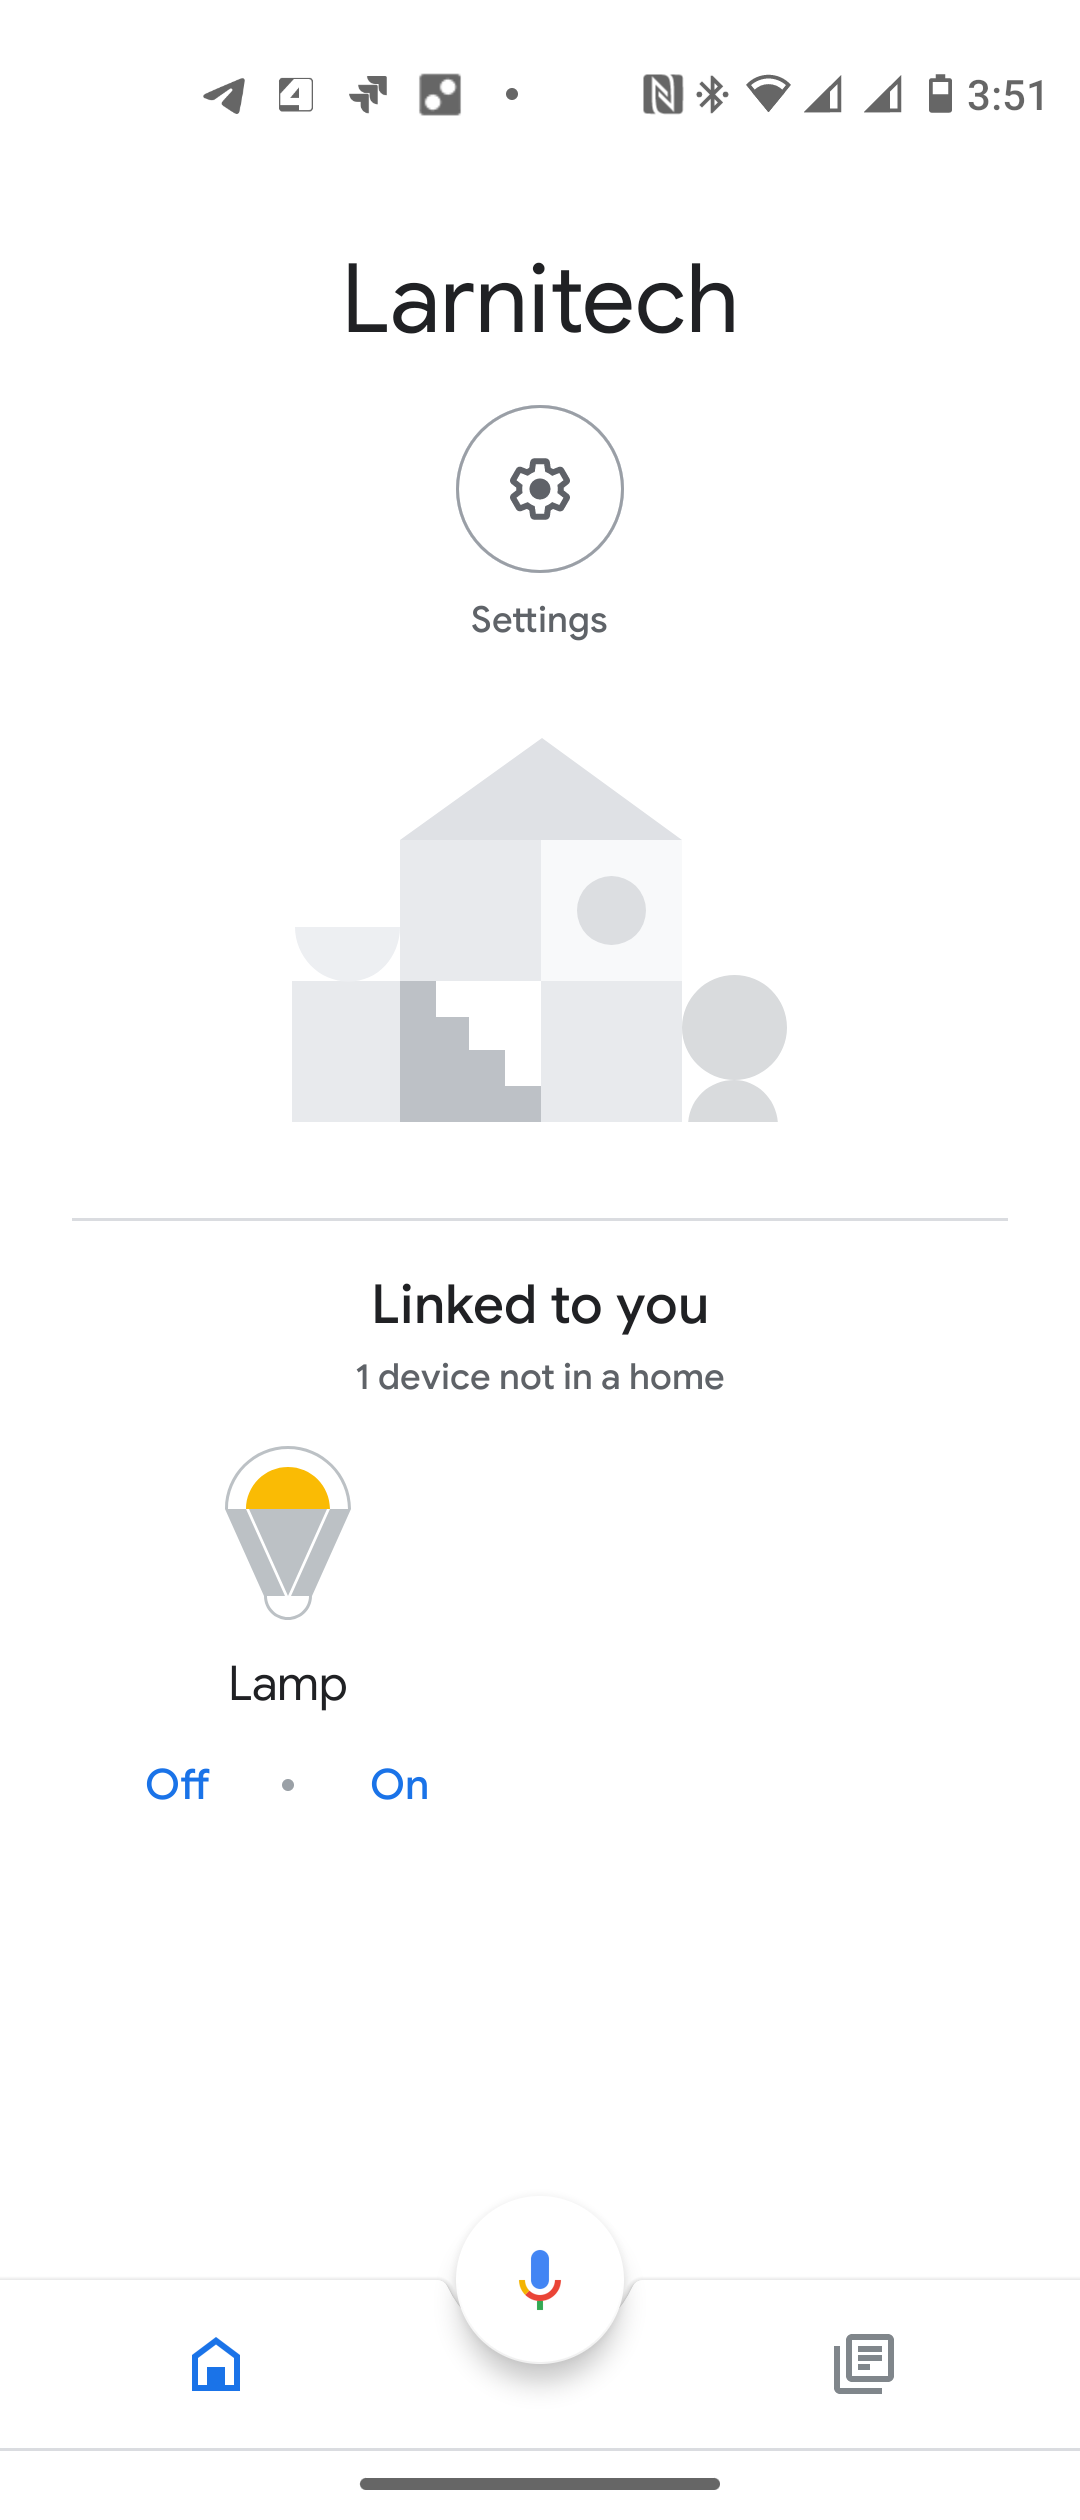
<li>
Enjoy your Google Home with Larnitech!
<table style="width:400px;" border="1px">
<tr>
<td>
<br>[[File:google9_1.png|400px]]<br>
</td>
</tr>
</table>
</li>
</ol> Translation <ol>
Register your server in Larnitech Cloud using LT Setup, in the ‘General’ tab;
Request support for adding licenses for Google Home devices (by default one device);
Update LT Setup, LT server, API plugin, in the ‘Updates’ tab;
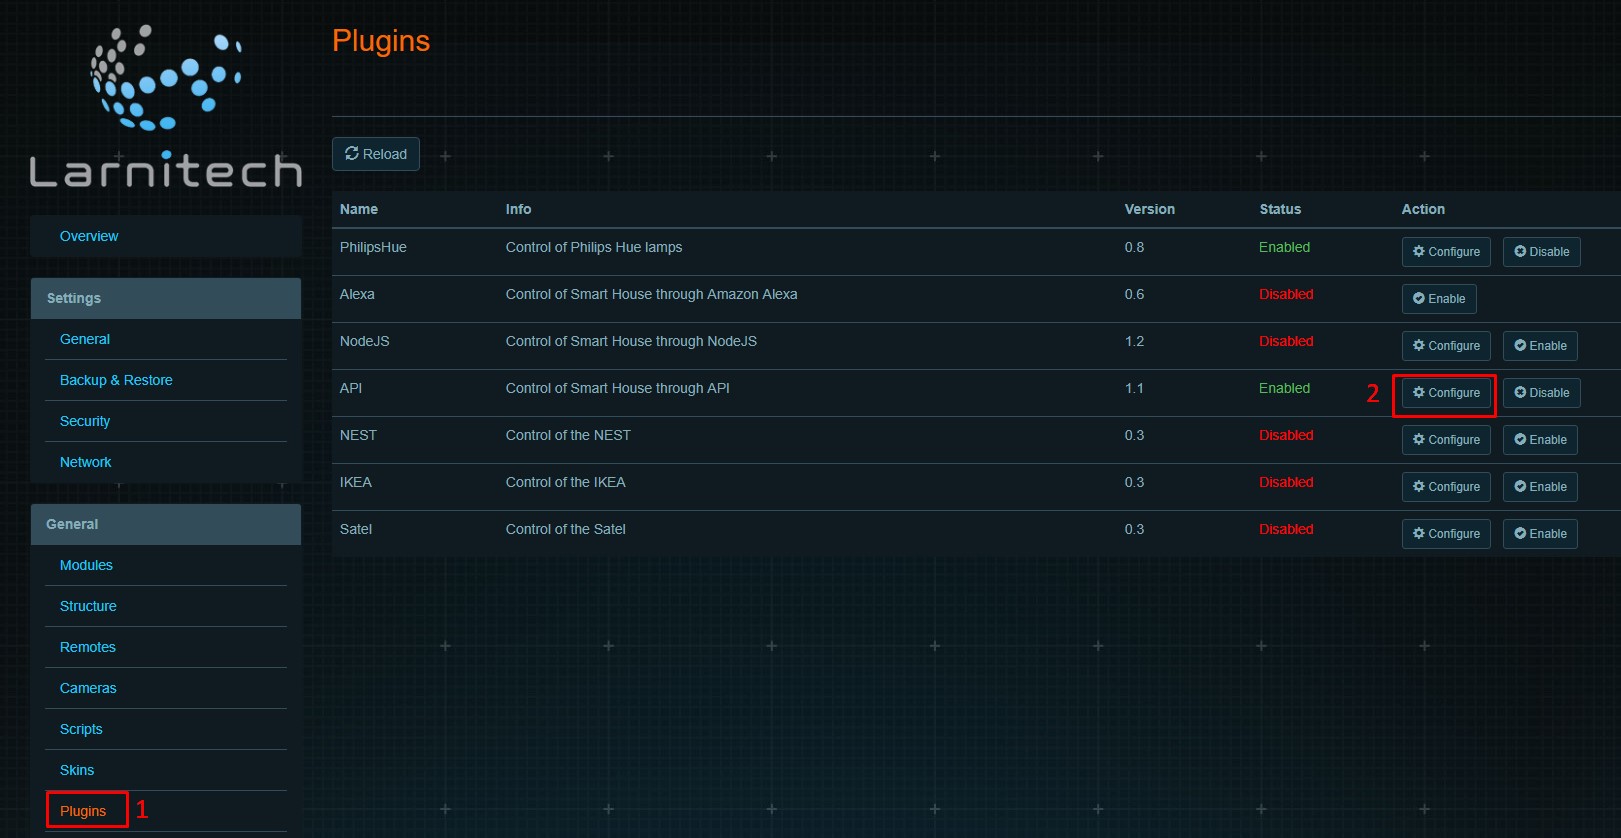
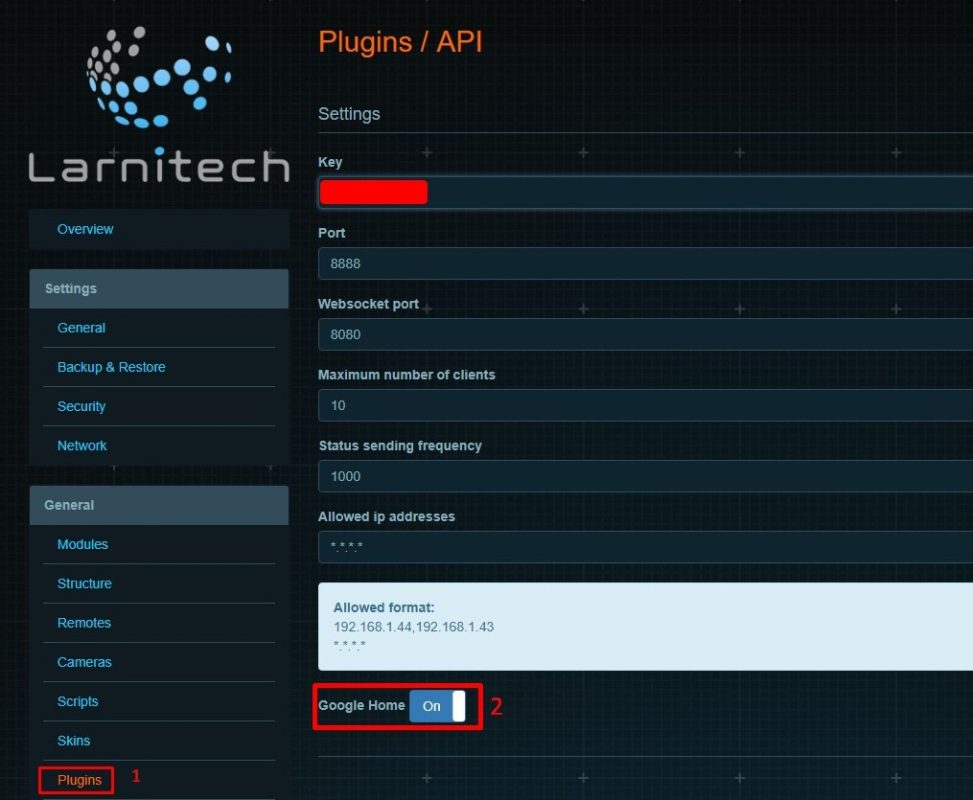
In the ‘Plugins’ tab choose Configure for API plugin;
Activate Google Home;
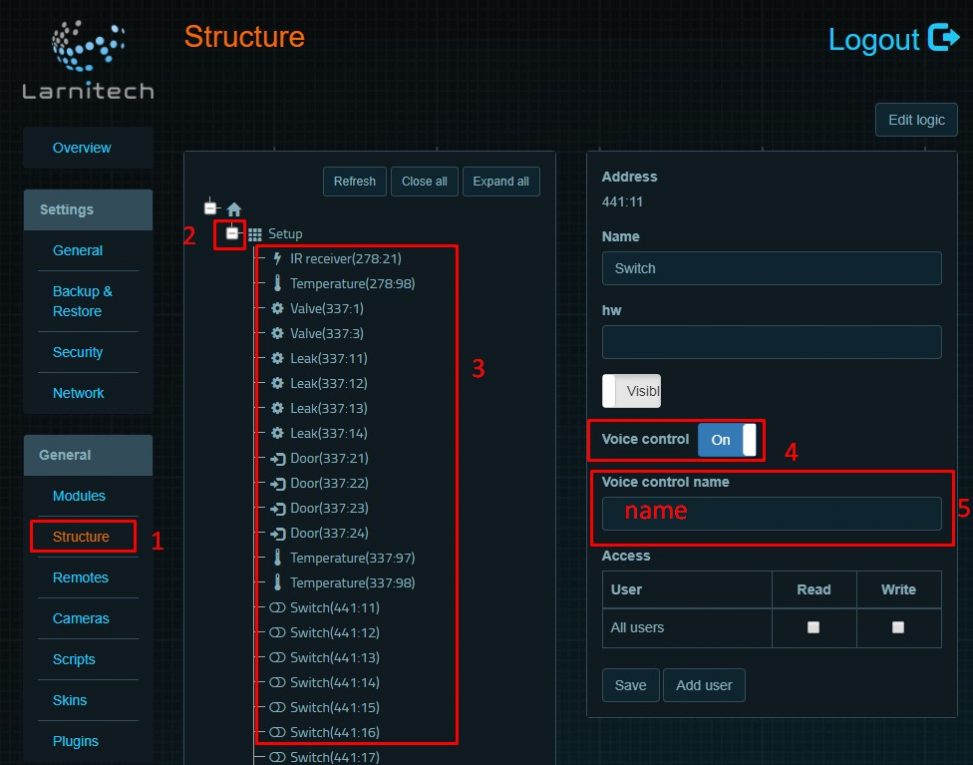
In LT Setup go to ‘Structure’ tab, choose an item which you want to manage with Google Home, enable ‘Voice control’ and enter ‘Voice control name’ (the device will be added to Google Home under this name). Repeat this action for all the items you want to control;
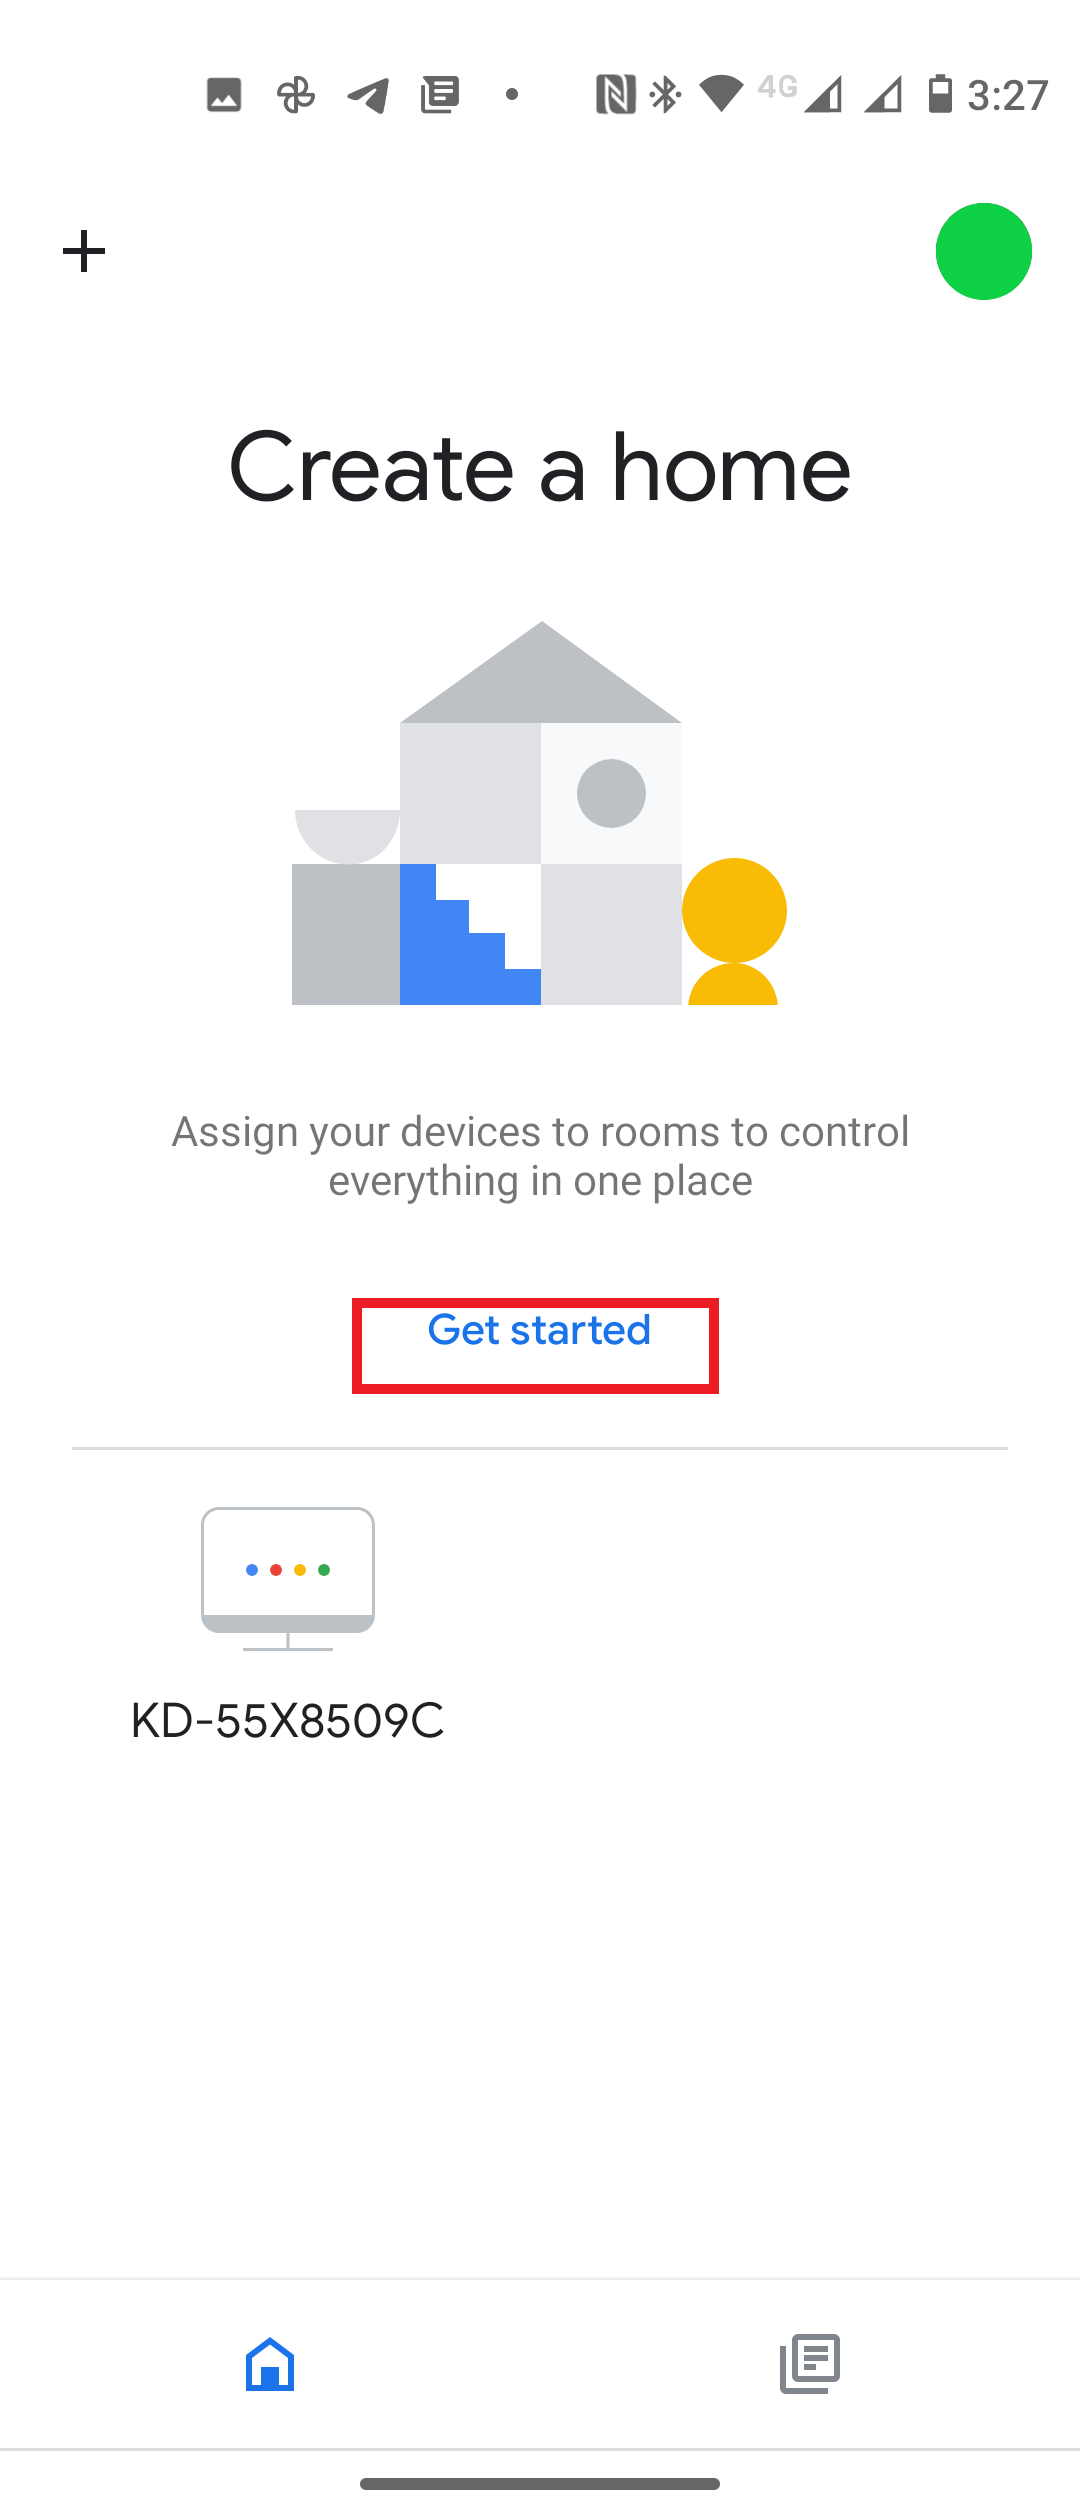
Install Google Home app on your device;
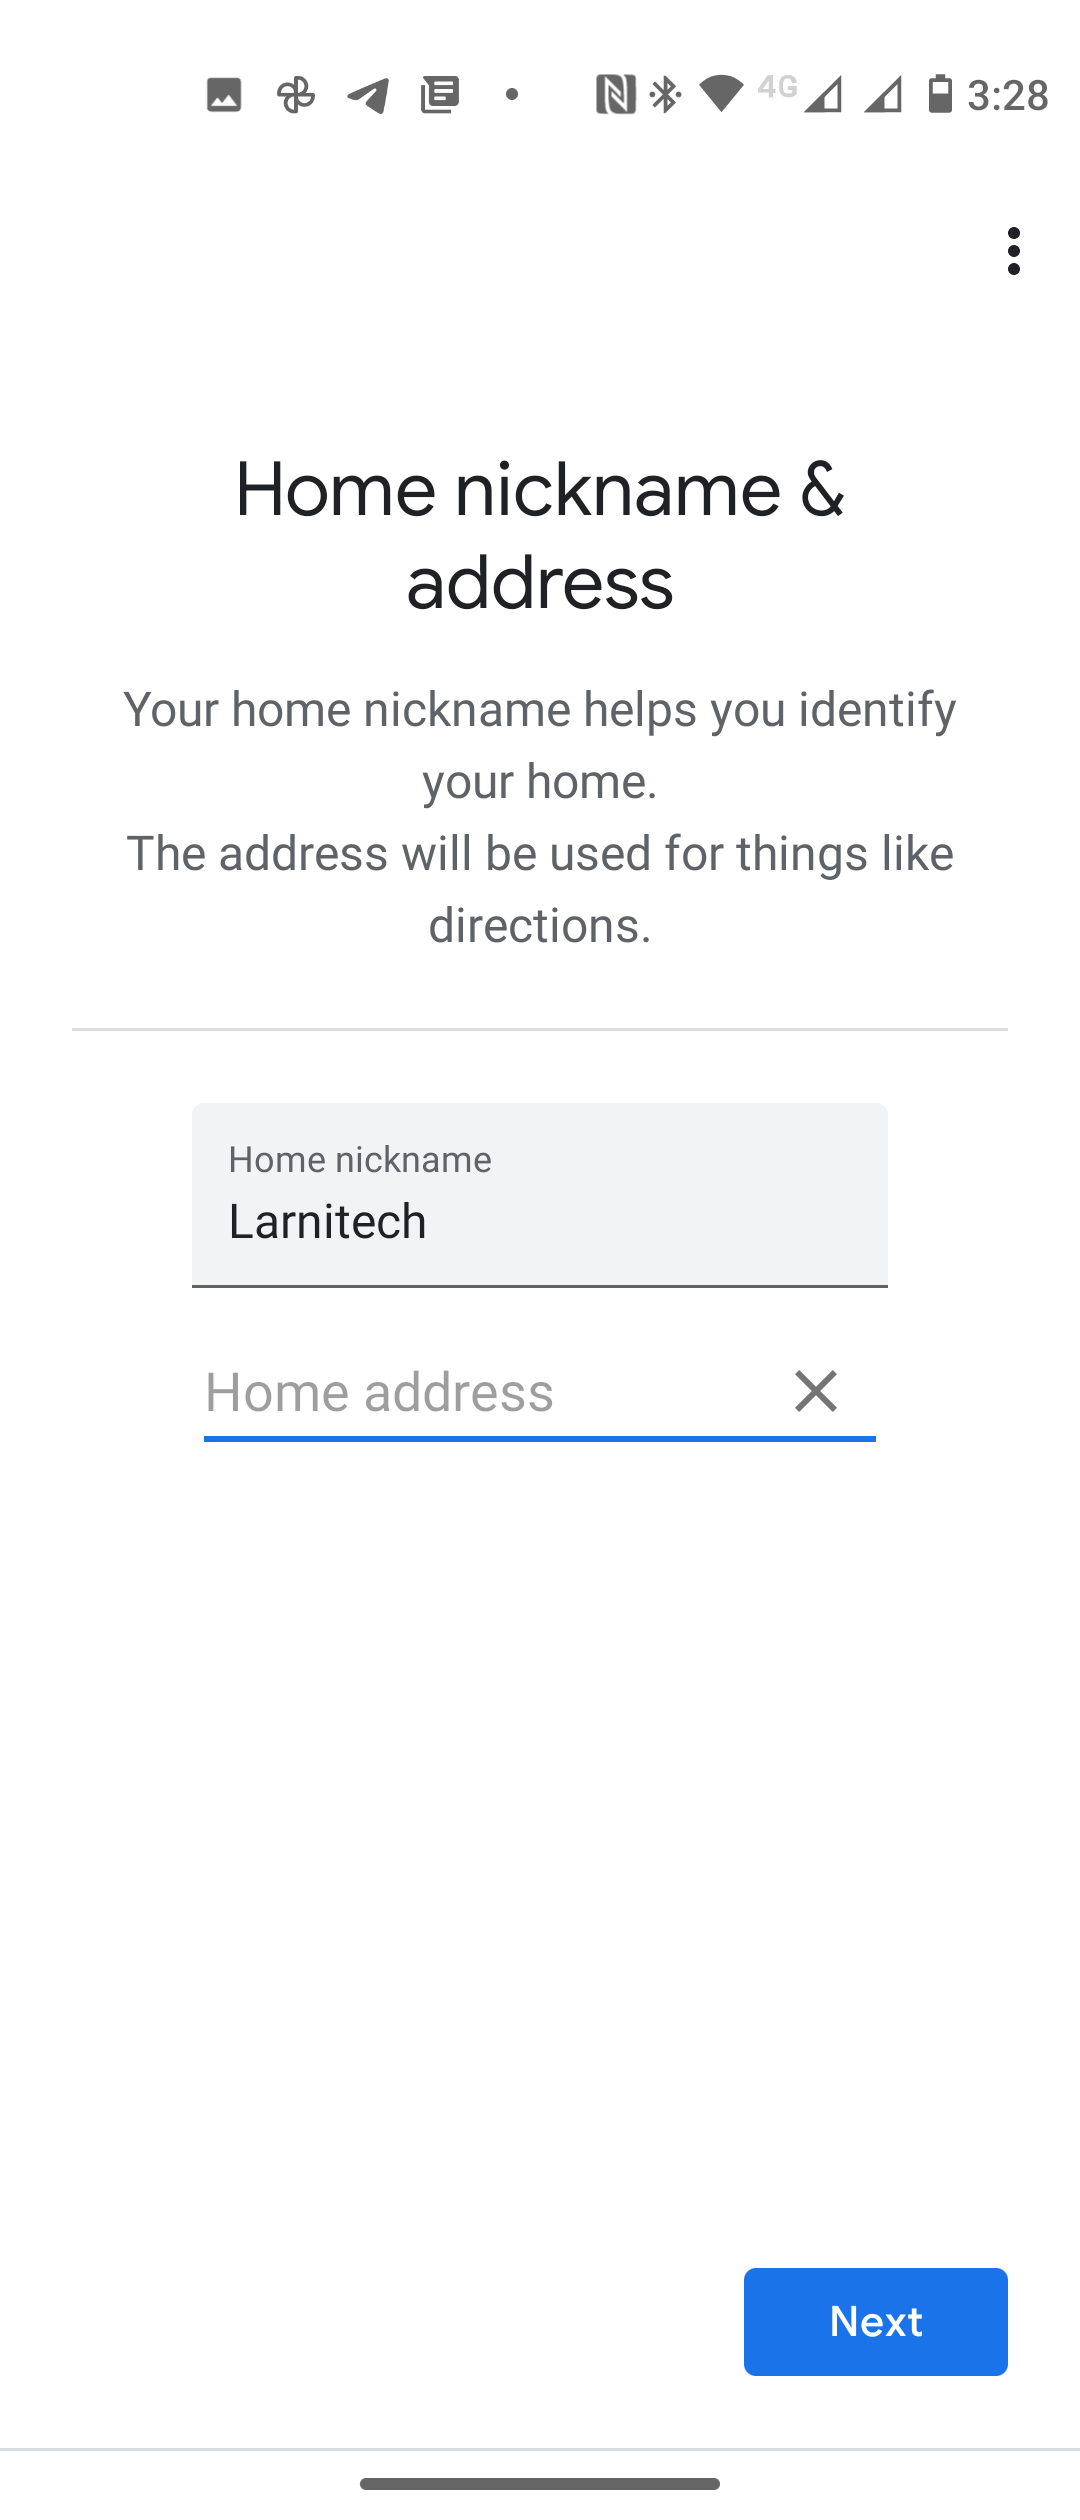
Create new home;
Add Larnitech service in Google Home app;
Enable Larnitech service using your Larnitech Cloud login;
Enjoy your Google Home with Larnitech!