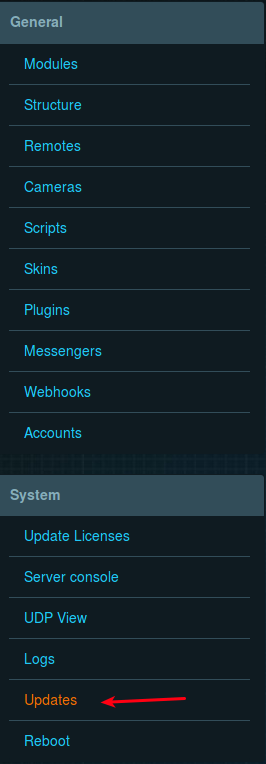
Авторизируйтесь в веб-панели инструментов администрирования системы «Умный дом» (LT Setup) и перейдите на страницу Обновления.Authorize yourself in the Web Toolbar of the Smart Home system administration (LT Setup) and go to the Updates page.
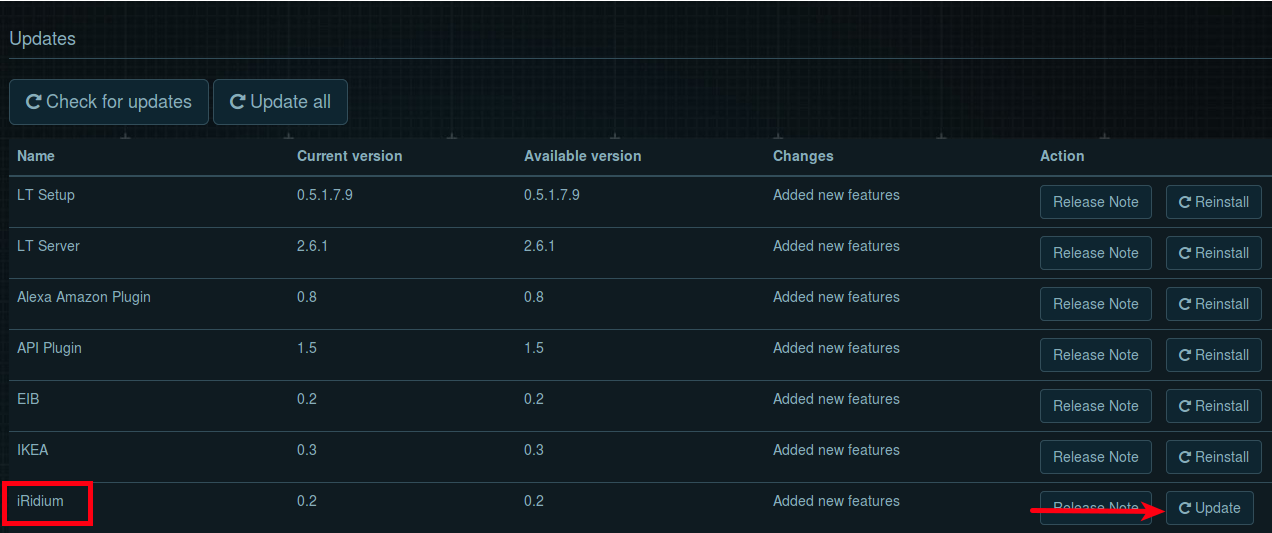
В списке обновлений найдите iRidium и нажмите кнопку Обновить (если плагин не установлен, будет кнопка Установить – нажмите на нее).In the list of updates, find iRidium and click the Update button (if the plug-in is not installed, there will be the Install button – click it).
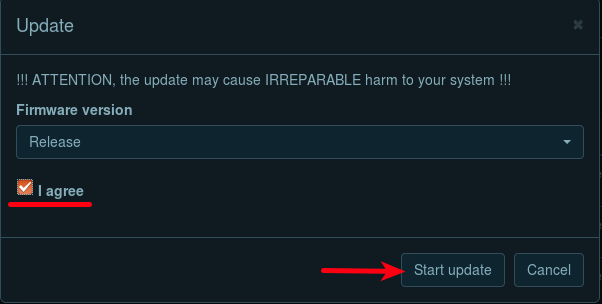
Прочитайте предупреждение, поставьте галочку рядом с надписью «Я согласен и нажмите кнопку Начать обновление.Read the warning, tick the box next to “I agree” inscription and click the Start update button.
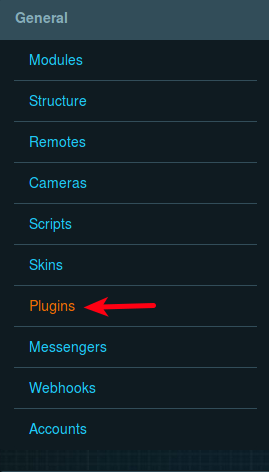
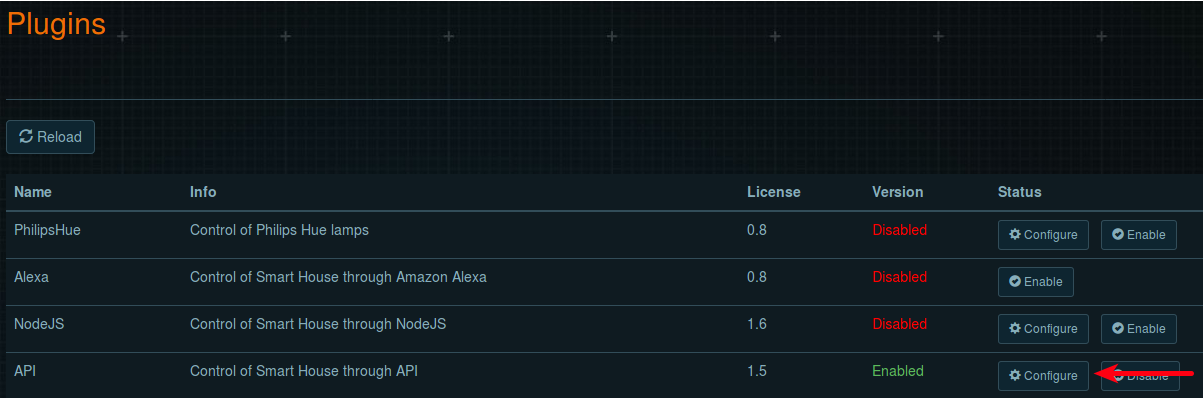
После завершения обновления выберите страницу Плагины в разделе Общие' в левом меню.When the update is complete, select the Plugins page of the General section in the left menu.
Найдите «API» в списке и нажмите «Настроить».Find API in the list and click Configure.
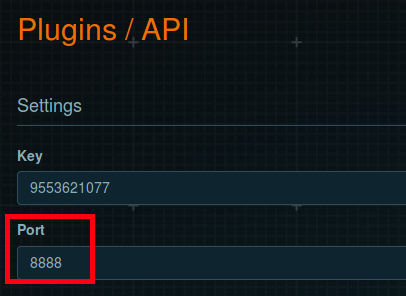
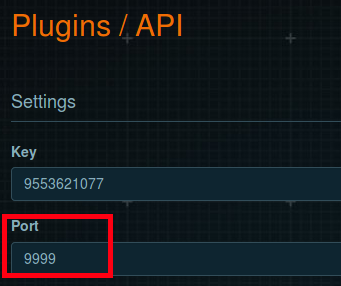
Обратите внимание на значение в поле «Порт». Если он равен 8888, его нужно изменить, так как его использует сервер iRidium. Введите желаемое значение; нажмите «Сохранить» внизу экрана и «ОК» в следующем окне.Note the value in the Port field. If it is equal to 8888, you need to change it, since the iRidium server uses it. Enter the desired value; click Save at the bottom of the screen and OK in the next window.
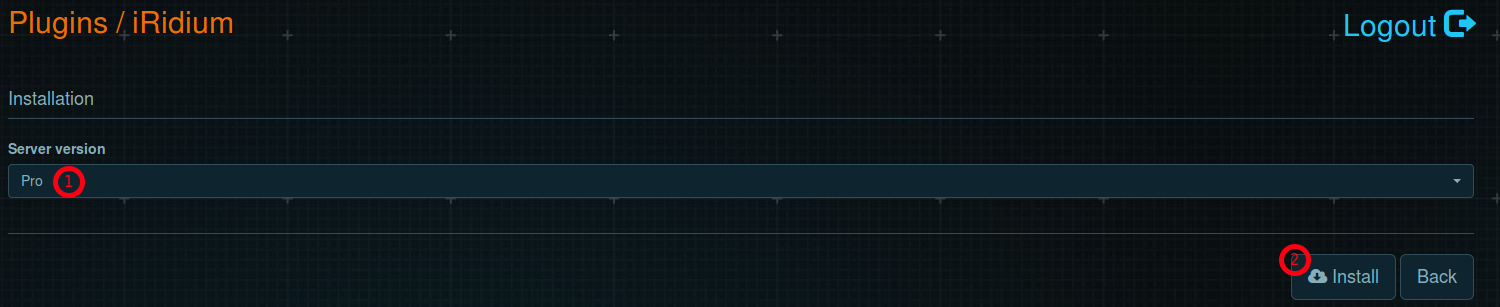
Вернитесь на страницу Плагины, найдите iRidium' в списке и нажмите Настроить.Go back to the Plugins page, find iRidium in the list and click Configure.
В появившемся окне вы можете установить iRidium. Для этого выберите нужную версию (Pro или Lite) в поле Версия сервера и нажмите Установить.In the window that appears, you can install iRidium. To do this, select the required version (Pro or Lite) in the Server version field, and then click Install.
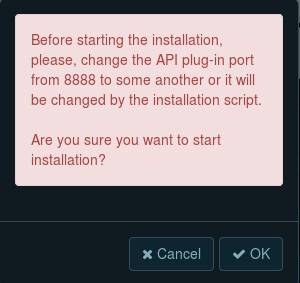
Появится окно с просьбой изменить адрес порта API, если его значение равно 8888 — эти действия описаны в шагах 4, 5 и 6. Если вы изменили адрес, нажмите «ОК».A window will appear asking you to change the API port address if its value is 8888 – these actions are described in steps 4, 5 and 6. If you have changed the address, click OK.
На экране появится окно с надписью Installing, а затем окно с сообщением об успешной установке.A window with the “Installing” inscription will appear on the screen, and then a window with a message about the successful installation.
<liТеперь панель управления сервером iRidium появится в меню Настроить.>Now, the iRidium server control panel will appear in the Configure menu.
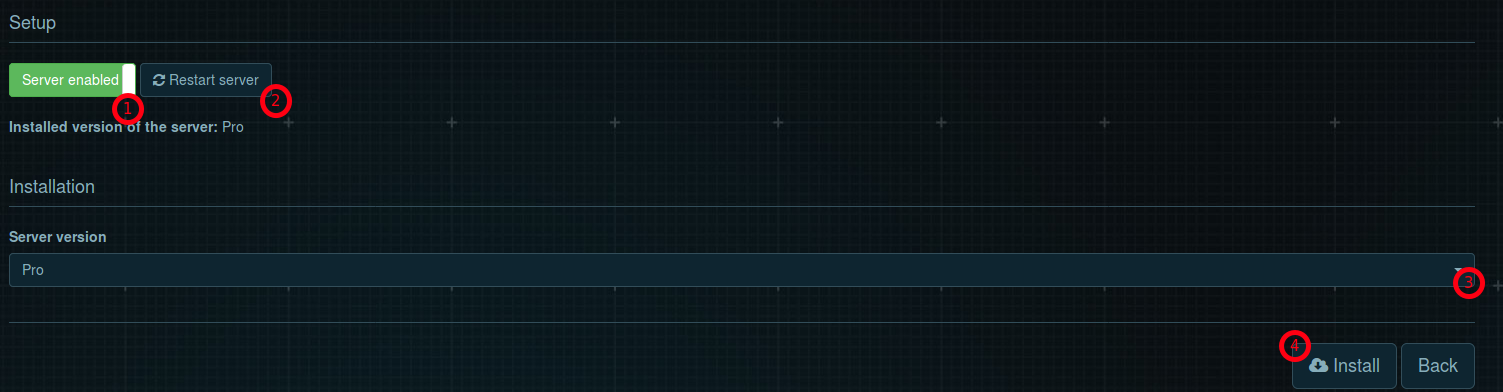
Кнопка «Сервер включен/Отключен» отмечена цифрой 1. Кнопка «Перезапустить сервер» отмечена цифрой 2.
Сообщение с установленной версией сервера находится под кнопками управления. Если вы хотите установить другую версию, выберите ее в поле с пометкой 3 и нажмите «Установить» (с пометкой 4)The Server enabled/Server disabled button is marked 1. The Restart server button is marked 2.
A message with the installed version of the server is located under the control buttons. If you want to install another version, select it in the field marked 3 and click Install (marked 4).