(Created page with "<br>500px<br></li> <li>Нажмите кнопку Разрешить (Allow) в следующем окне. <br>500px<br></li>...")
(No difference)
Latest revision as of 14:38, 17 January 2022
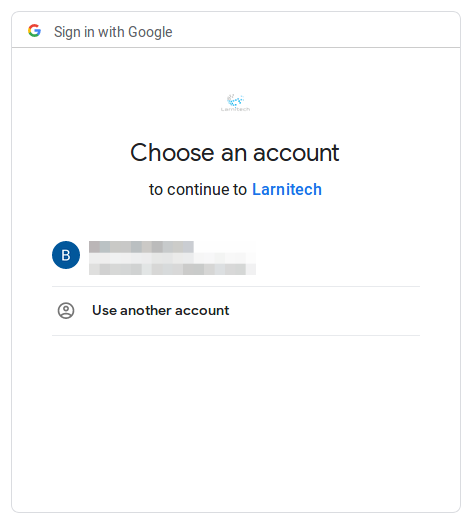
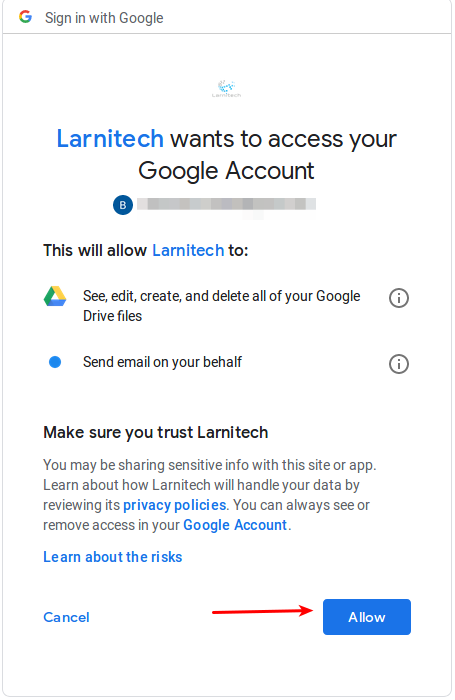
Нажмите кнопку Разрешить (Allow) в следующем окне.
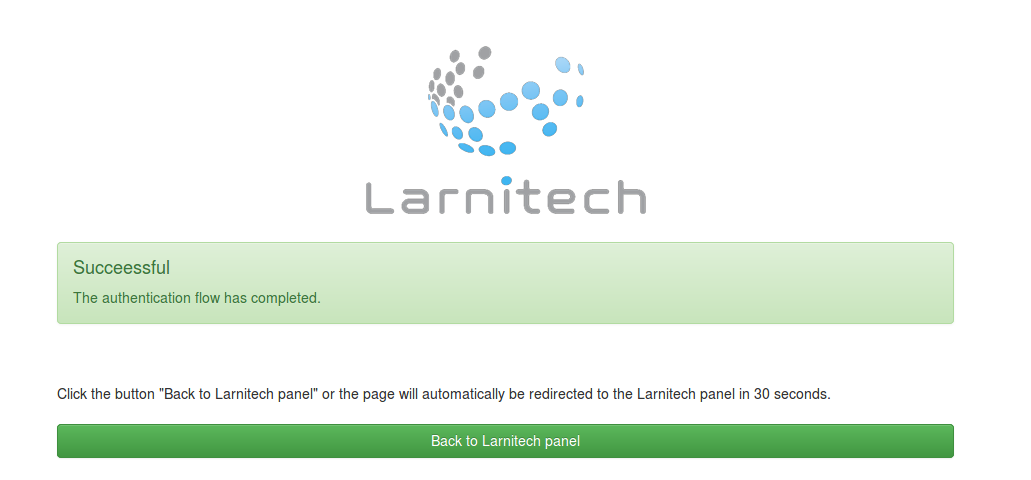
Если после этого открывается следующая страница, привязка учетной записи завершена успешно.
Привязка к учетной записи Google позволит получать уведомления, фото и видео по электронной почте, а также заполнять таблицы на Google Drive с помощью скриптов Larnitech. Вы можете настроить эти функции с помощью Blockly.
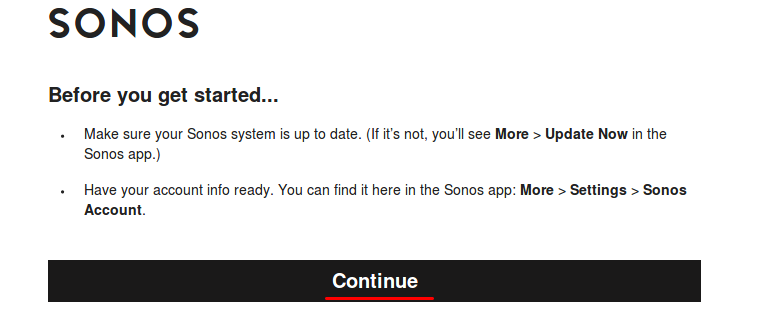
Привязка к Sonos
Перейдите на вкладку Учетные записи (Accounts) (см. первый скриншот). В появившейся таблице нажмите кнопку Связать (Link) рядом с надписью Sonos (вторая строка таблицы).
В появившемся окне нажмите кнопку Продолжить (Continue).
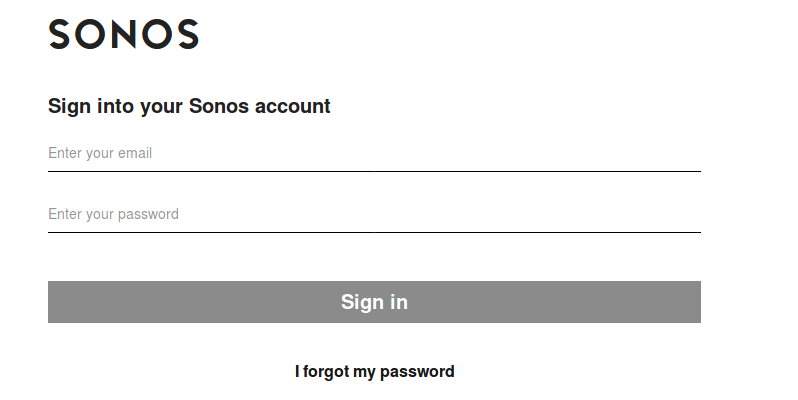
На появившейся странице введите данные своей учетной записи Sonos и нажмите кнопку Войти (Sign In).
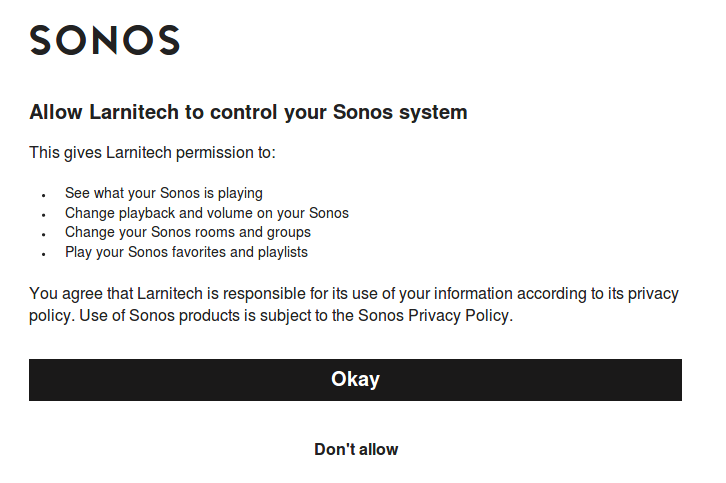
В следующем окне нажмите кнопку ОК.
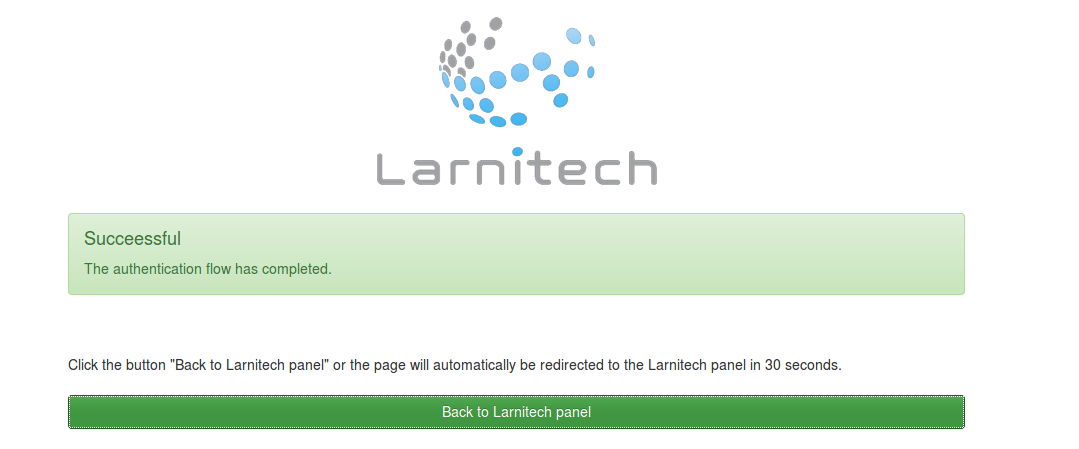
Если вы видите следующее окно, значит, привязка выполнена успешно:
После привязки учетной записи Sonos вы можете управлять аудиосистемой Sonos в своем доме с помощью приложения Larnitech. Если к вашей учетной записи Sonos подключено более одного дома, вы можете выбрать нужный, нажав кнопку Выбрать дом (Set household).
В появившемся окне выберите нужный дом, нажмите Выбрать дом (Set household) и подтвердите выбор, нажав кнопку ОК в следующем окне.