Difference between revisions of "Alexa"
Jump to navigation
Jump to search
(Created page with "<ol> <li> Register your server in Larnitech Cloud using LT Setup, in the ‘General’ tab;<br /> <br>800px<br> </li> <li> Request support...") |
m (Update Alexa) |
||
| (2 intermediate revisions by one other user not shown) | |||
| Line 1: | Line 1: | ||
| + | <languages/> | ||
| + | <translate> | ||
| + | <!--T:1--> | ||
<ol> | <ol> | ||
<li> | <li> | ||
Register your server in Larnitech Cloud using LT Setup, in the ‘General’ tab;<br /> | Register your server in Larnitech Cloud using LT Setup, in the ‘General’ tab;<br /> | ||
| − | <br>[[File: | + | <br>[[File:alexa1_1.png|800px]]<br> |
</li> | </li> | ||
<li> | <li> | ||
| − | Request support for adding licenses for Alexa devices (by default one device); | + | Request support for adding licenses for Alexa devices (by default one device); |
| + | {|class="wikitable" | ||
| + | |- | ||
| + | |[[File:alexa2_1.png|400px]]||[[File:alexa2_2.png|600px]] | ||
| + | |} | ||
</li> | </li> | ||
<li> | <li> | ||
| − | Make sure you have the latest versions of LT Setup and LT Server installed;< | + | Make sure you have the latest versions of LT Setup and LT Server installed; |
| + | </li> | ||
| + | <li> | ||
| + | Go to tab ‘Updates’ . Press ‘Check for updates’ and install Alexa Amazon Plugin; | ||
| + | {|class="wikitable" | ||
| + | |- | ||
| + | |[[File:alexa31.png|400px]]||[[File:alexa3_2.png|600px]] | ||
| + | |} | ||
| + | </li> | ||
| + | <li> | ||
| + | Go to the "Voice assistants" tab and enable the "Alexa Amazon voice assistant". | ||
| + | {|class="wikitable" | ||
| + | |- | ||
| + | |[[File:alexa4_1.png|250px]]||[[File:alexa4_2.png|600px]] | ||
| + | |} | ||
</li> | </li> | ||
<li> | <li> | ||
| − | + | In LT Setup go to ‘Structure’ tab, choose an item which you want to manage with Alexa, enable ‘Voice control’ and enter ‘Voice control name’ (the device will be added to Alexa under this name); Repeat this action for all the items you want to control;you want to control; | |
| + | {|class="wikitable" | ||
| + | |- | ||
| + | |[[File:alexa5_1.png|800px]]||[[File:alexa5_2.png|400px]] | ||
| + | |} | ||
</li> | </li> | ||
<li> | <li> | ||
| Line 17: | Line 42: | ||
</li> | </li> | ||
<li> | <li> | ||
| − | Go to | + | Go to the "More" tab and add the "Larnitech Smart Home" skill to the Alexa app in the "Skills & Games" section; |
{|class="wikitable" | {|class="wikitable" | ||
|- | |- | ||
| − | |[[File: | + | |[[File:alexa6_1.png|350px]]||[[File:alexa6-2.png|350px]]||[[File:alexa6_3.png|350px]]||[[File:alexa6_4.png|350px]] |
|} | |} | ||
</li> | </li> | ||
<li> | <li> | ||
| − | + | Enable Larnitech Smart Home skill using your Larnitech Cloud login; | |
{|class="wikitable" | {|class="wikitable" | ||
|- | |- | ||
| − | |[[File: | + | |[[File:alexa6_5.png|350px]]||[[File:alexa6_6.png|350px]]||[[File:alexa6_7.png|350px]] |
|} | |} | ||
</li> | </li> | ||
<li> | <li> | ||
| − | + | Go to the "Add Device" tab, select "Device", select "Other" at the end of the list and select the "Wi-Fi" logo; | |
| − | + | {|class="wikitable" | |
| − | + | |- | |
| − | + | |[[File:alexa7_1.png|350px]]||[[File:alexa7_2.png|350px]]||[[File:alexa7_3.png|350px]]||[[File:alexa7_4.png|350px]] | |
| + | |} | ||
</li> | </li> | ||
<li> | <li> | ||
| − | Press | + | Press "Discover Devices" and after the device is discovered, press "Set Up Device"; |
{|class="wikitable" | {|class="wikitable" | ||
|- | |- | ||
| − | |[[File: | + | |[[File:alexa7_5.png|350px]]||[[File:alexa7-6.png|350px]]||[[File:alexa7_7.png|350px]] |
|} | |} | ||
</li> | </li> | ||
| Line 47: | Line 73: | ||
</li> | </li> | ||
</ol> | </ol> | ||
| + | </translate> | ||
Latest revision as of 09:05, 1 December 2023
-
Register your server in Larnitech Cloud using LT Setup, in the ‘General’ tab;
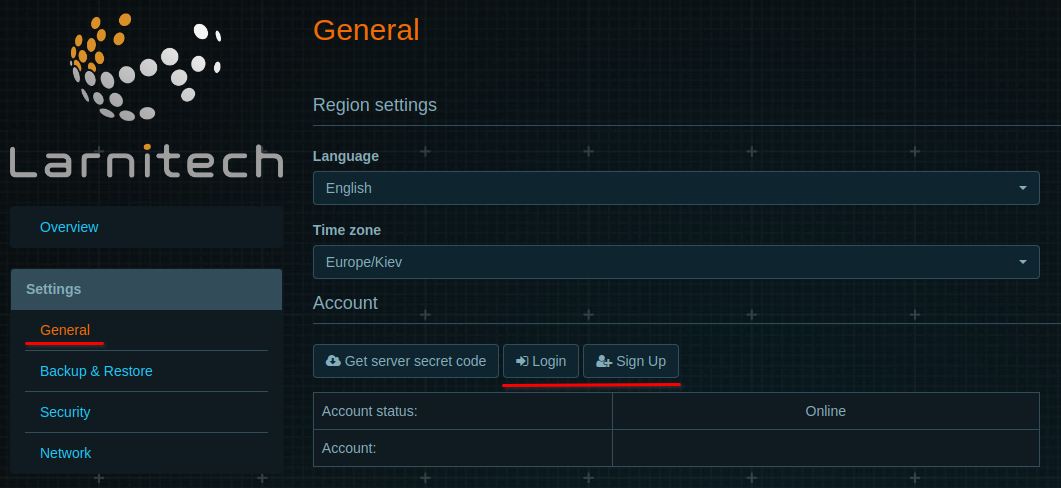
-
Request support for adding licenses for Alexa devices (by default one device);
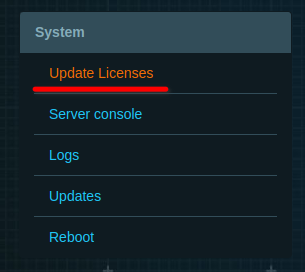
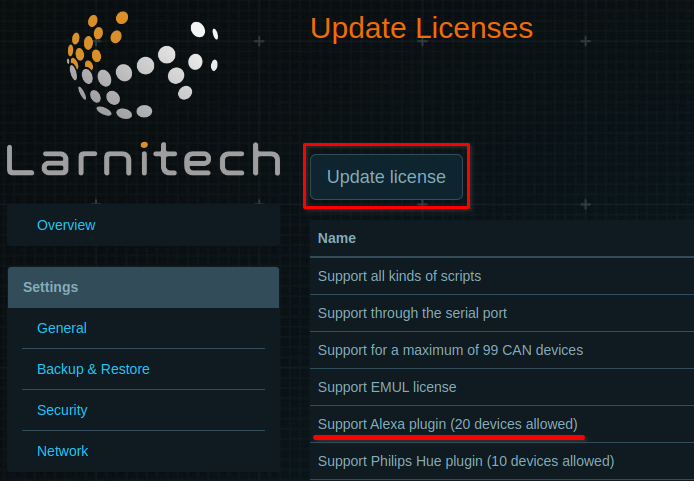
- Make sure you have the latest versions of LT Setup and LT Server installed;
-
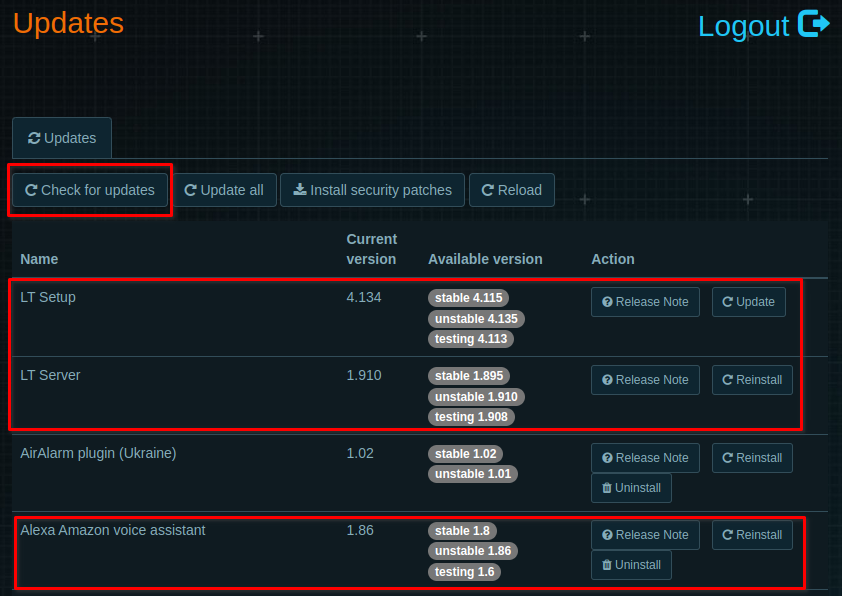
Go to tab ‘Updates’ . Press ‘Check for updates’ and install Alexa Amazon Plugin;
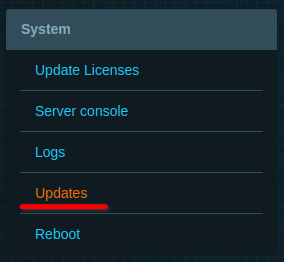
-
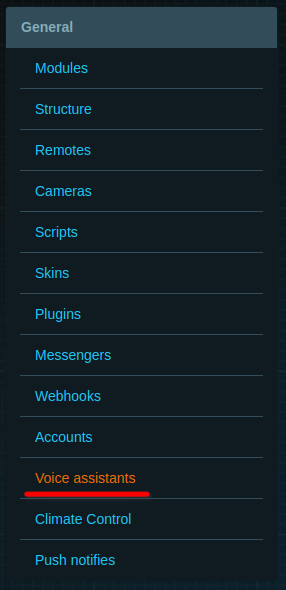
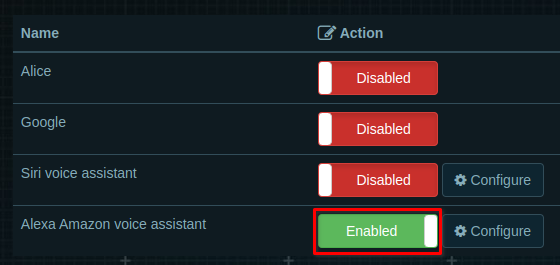
Go to the "Voice assistants" tab and enable the "Alexa Amazon voice assistant".
-
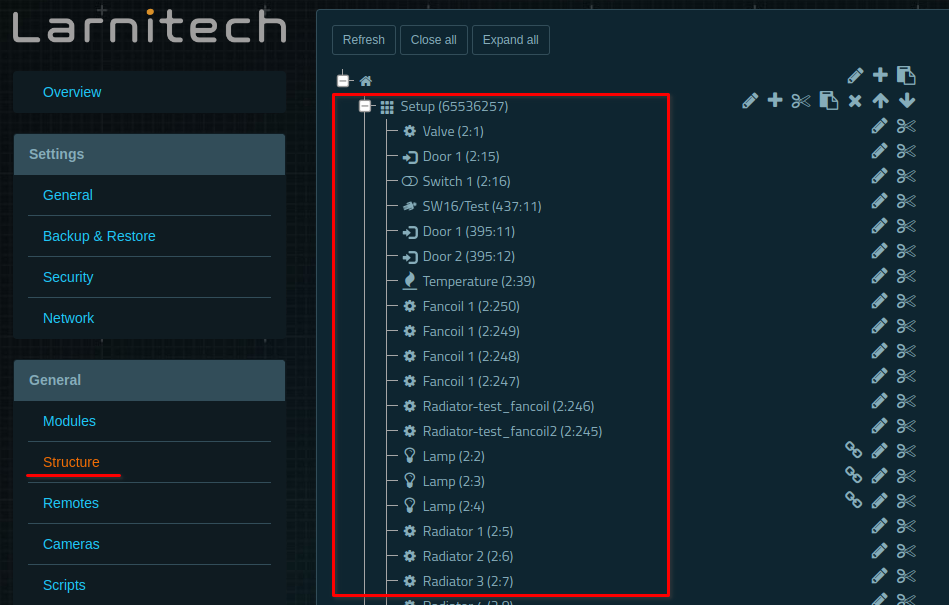
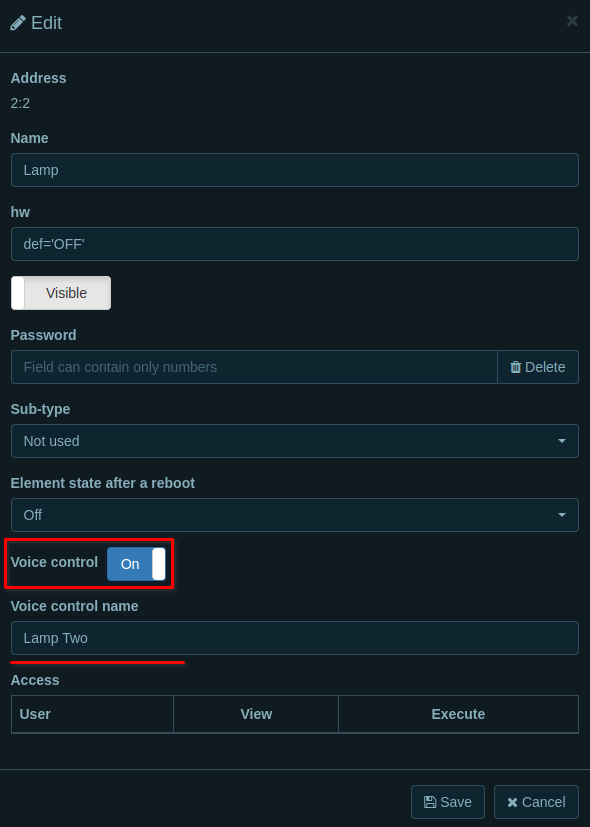
In LT Setup go to ‘Structure’ tab, choose an item which you want to manage with Alexa, enable ‘Voice control’ and enter ‘Voice control name’ (the device will be added to Alexa under this name); Repeat this action for all the items you want to control;you want to control;
- Install Amazon Alexa app on your Android or iOS device. Register or login in Alexa app;
-
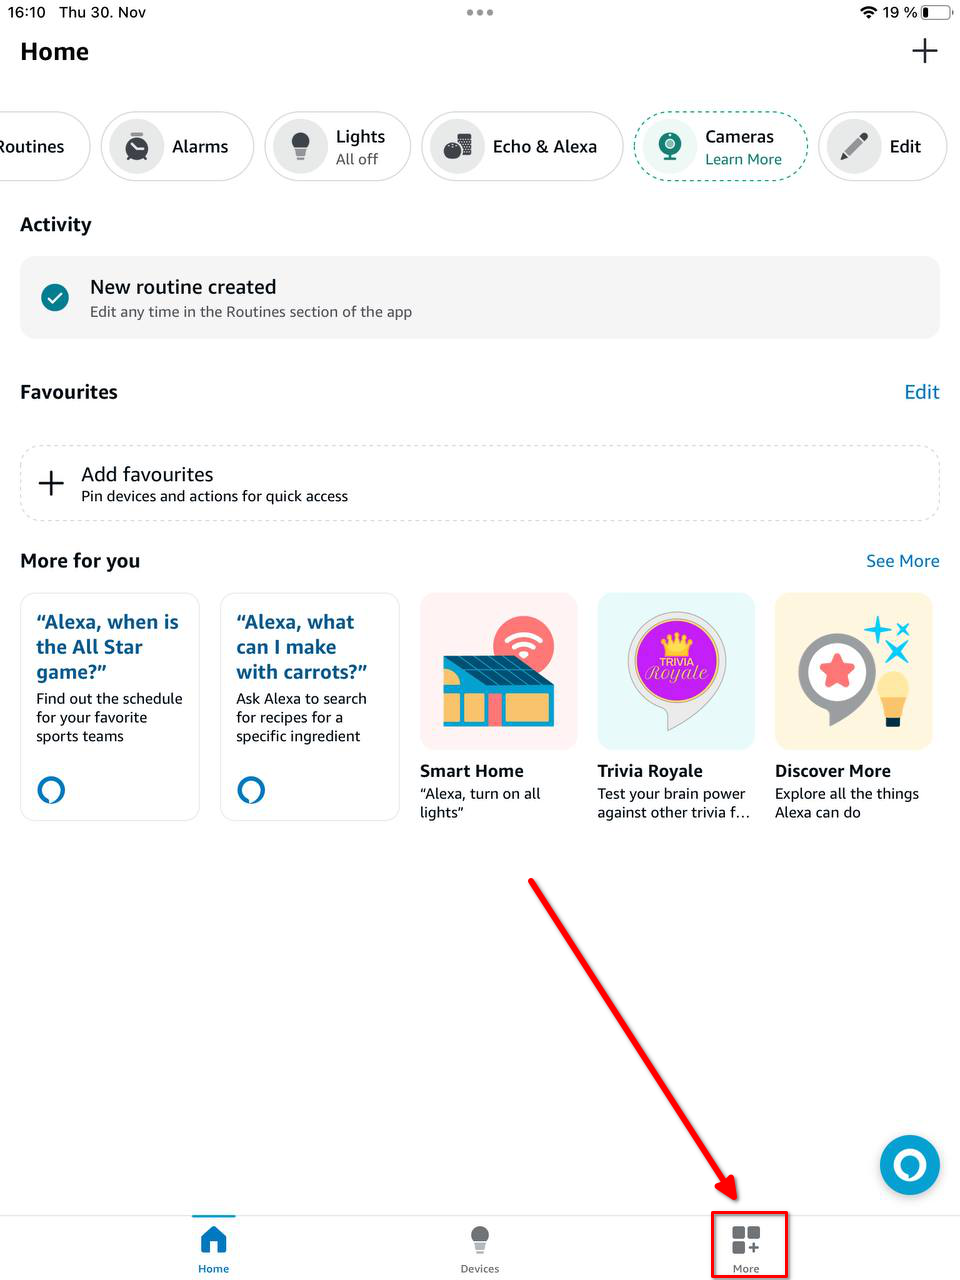
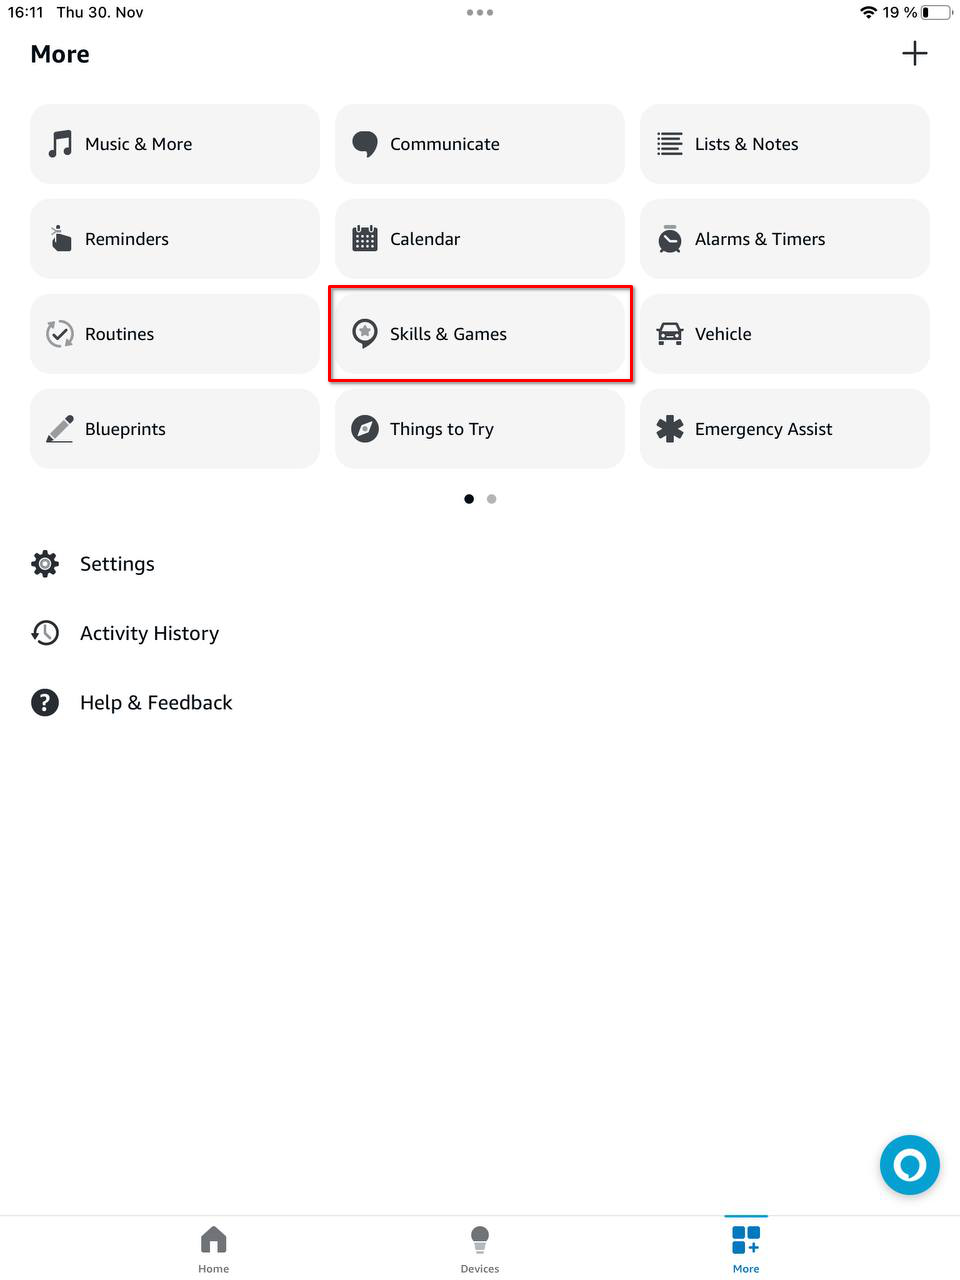
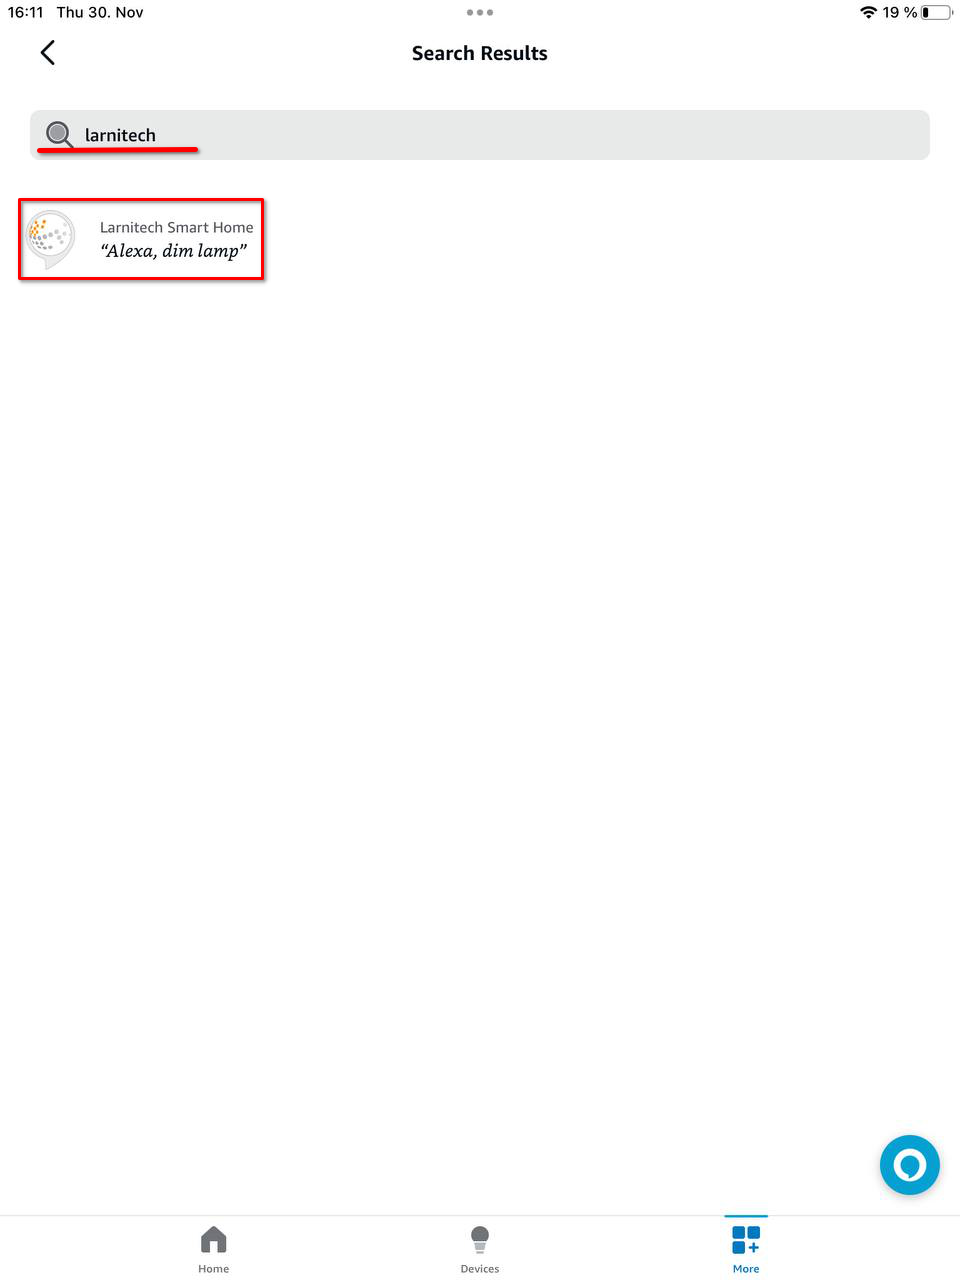
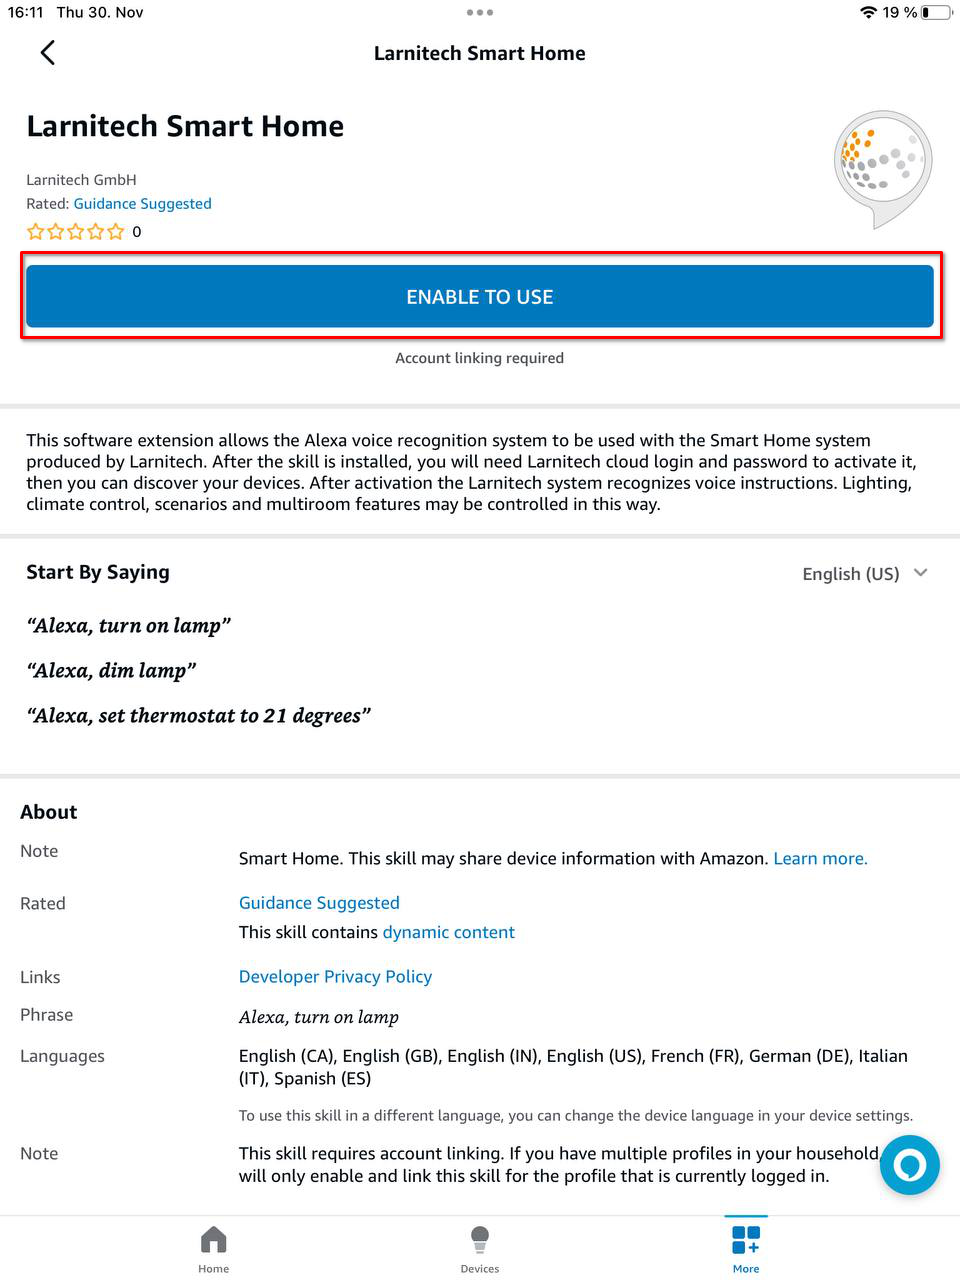
Go to the "More" tab and add the "Larnitech Smart Home" skill to the Alexa app in the "Skills & Games" section;
-
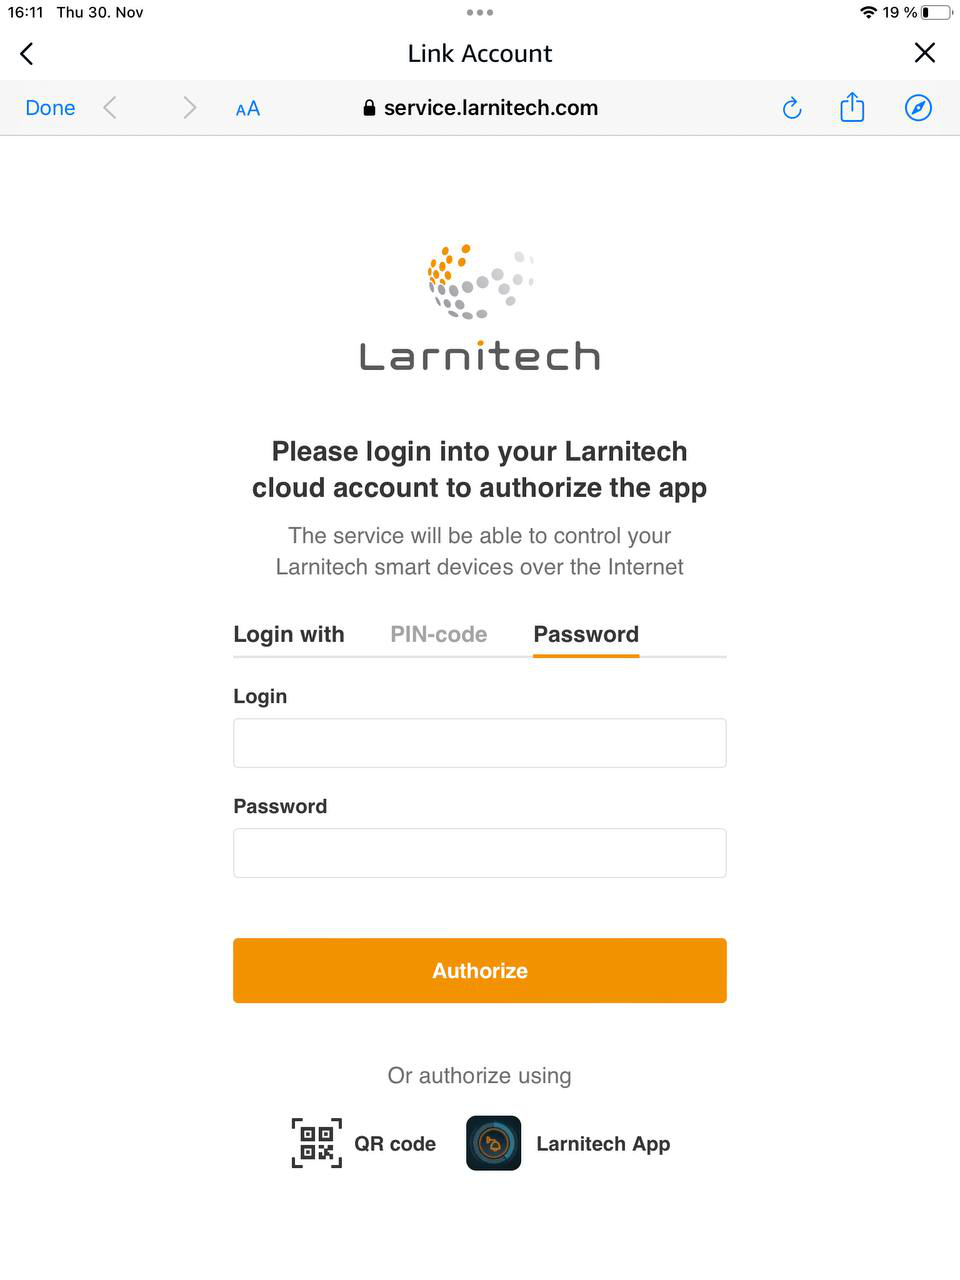
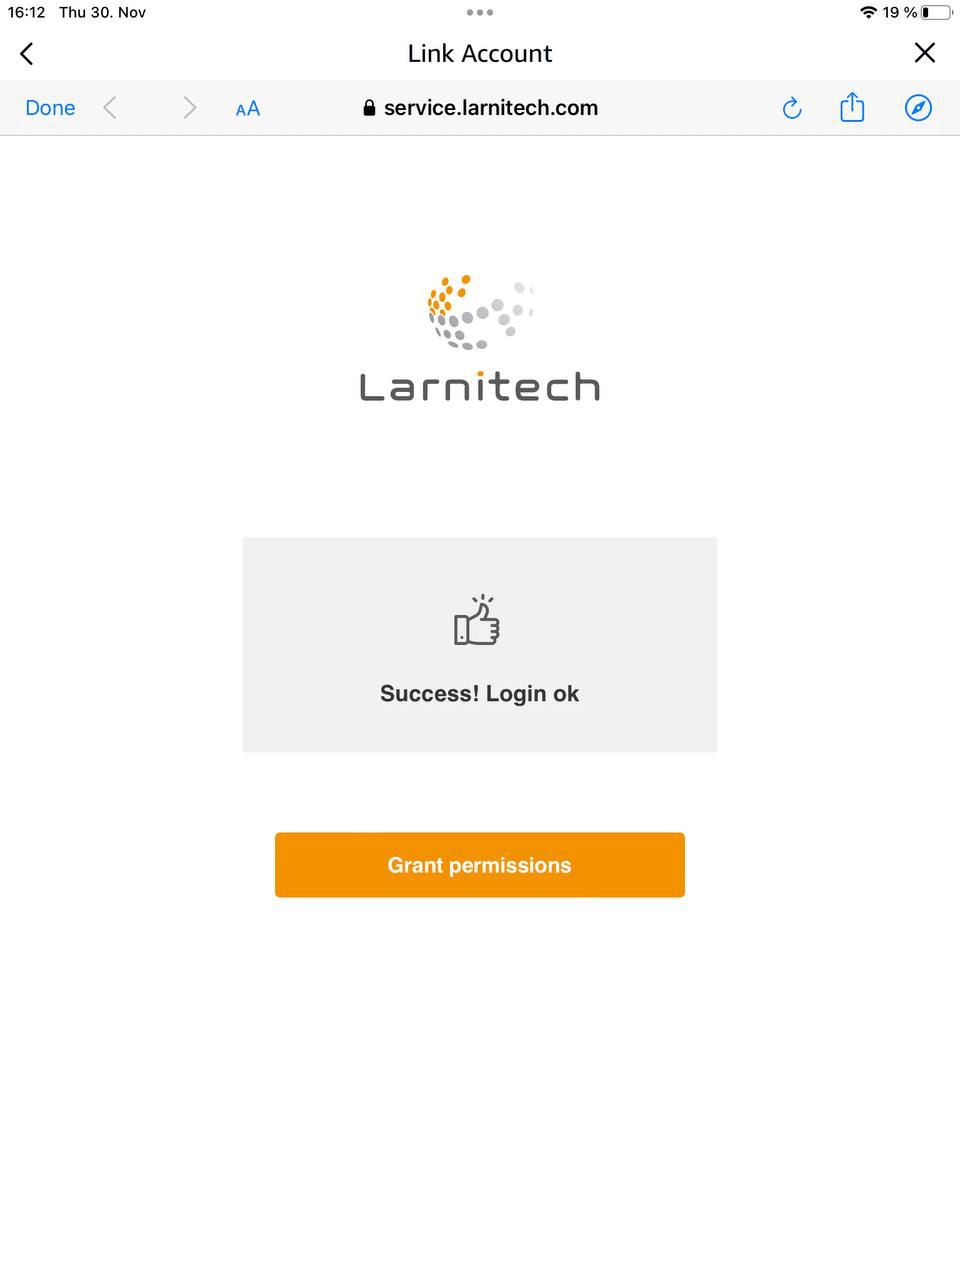
Enable Larnitech Smart Home skill using your Larnitech Cloud login;

-
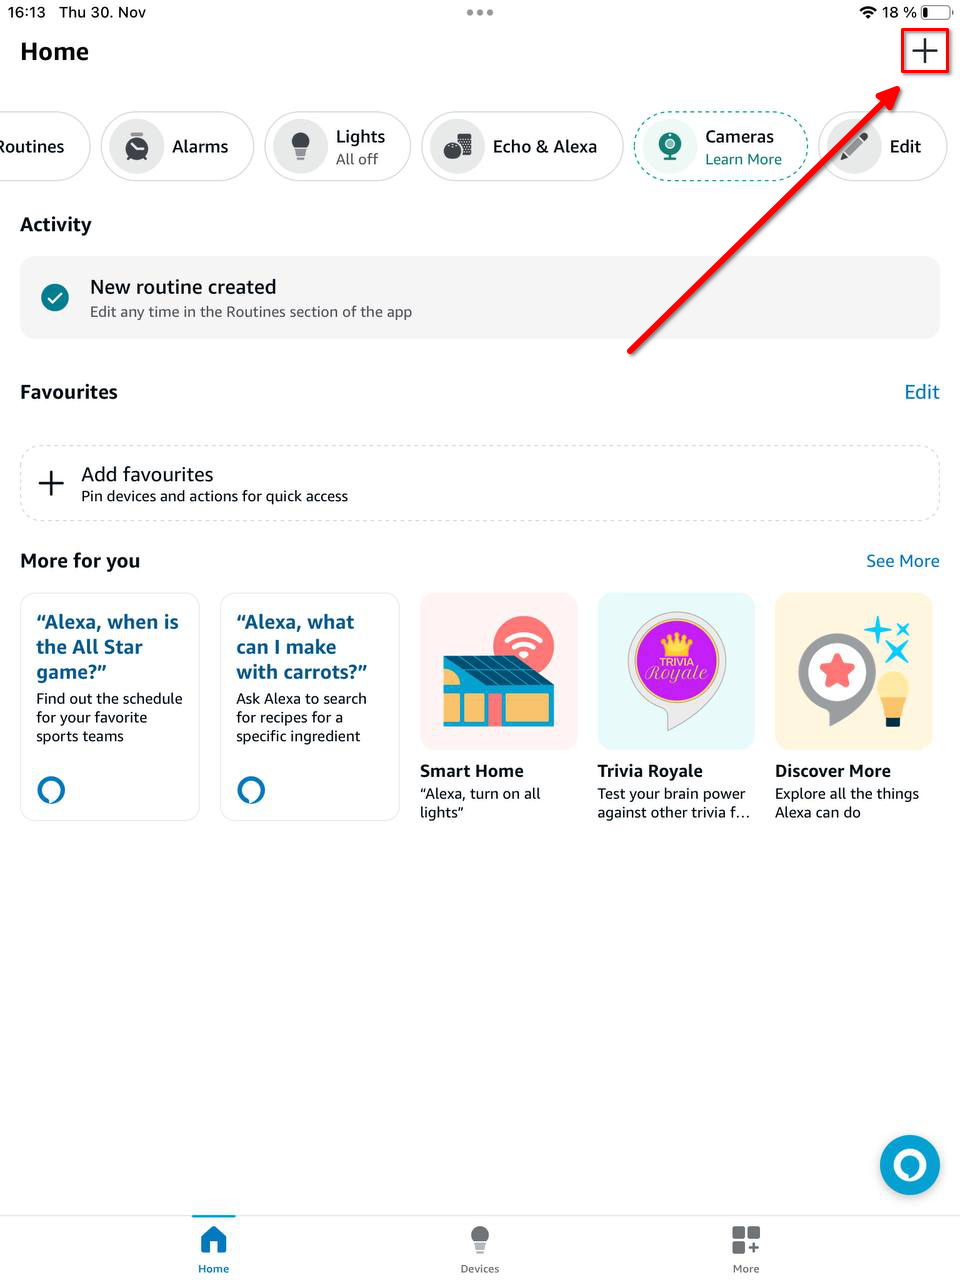
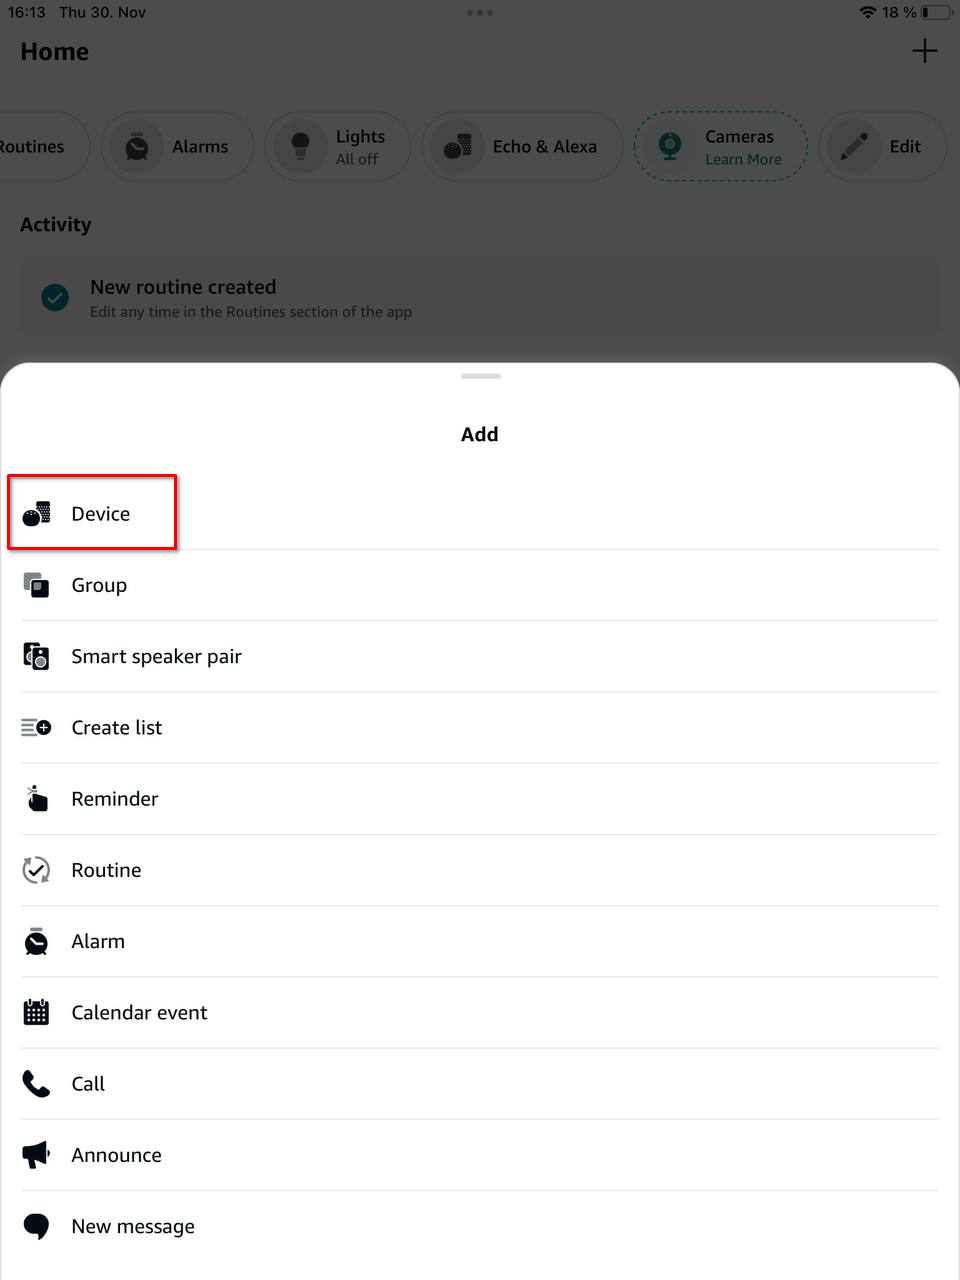
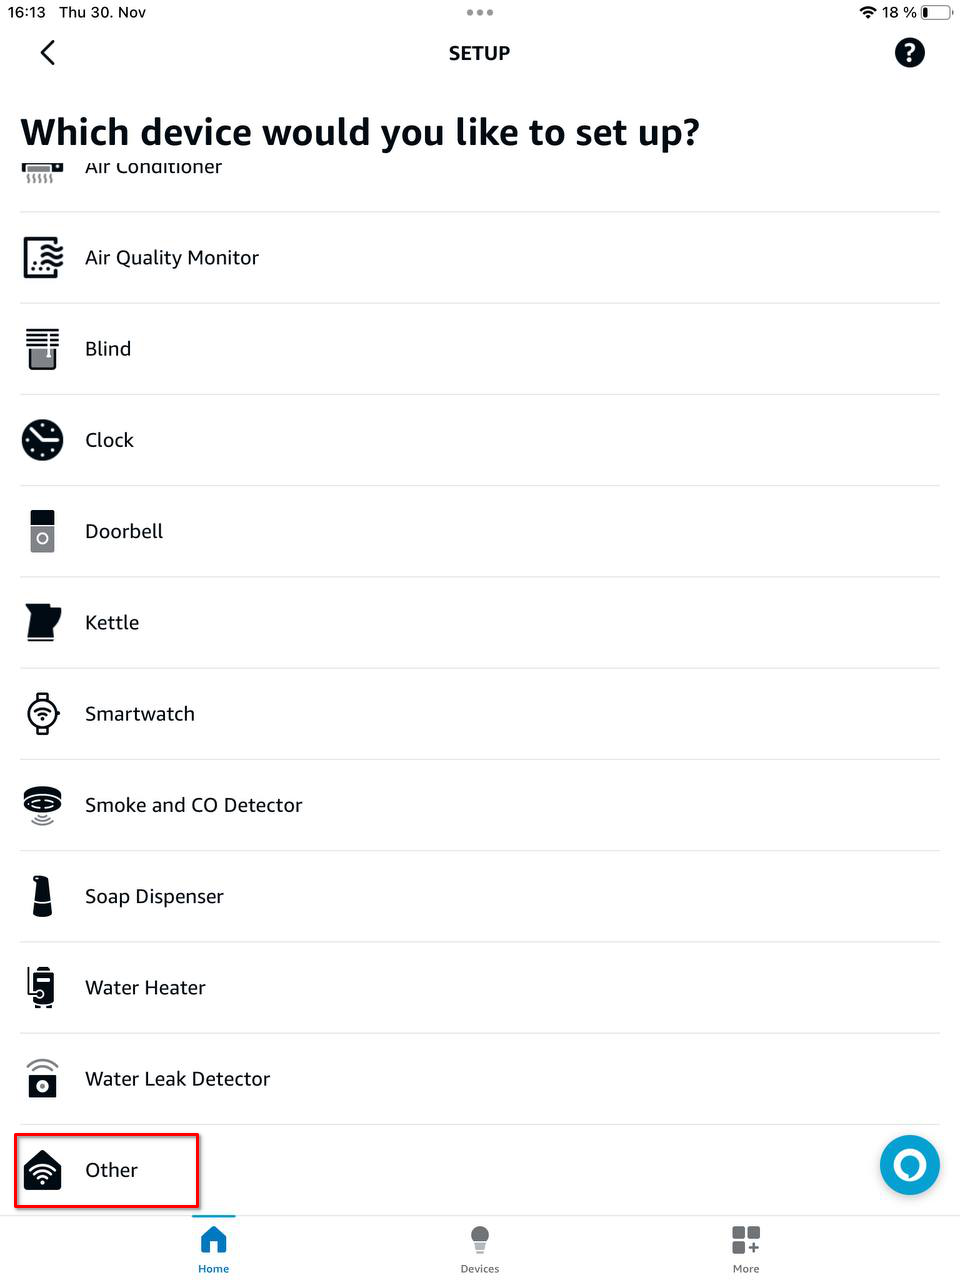
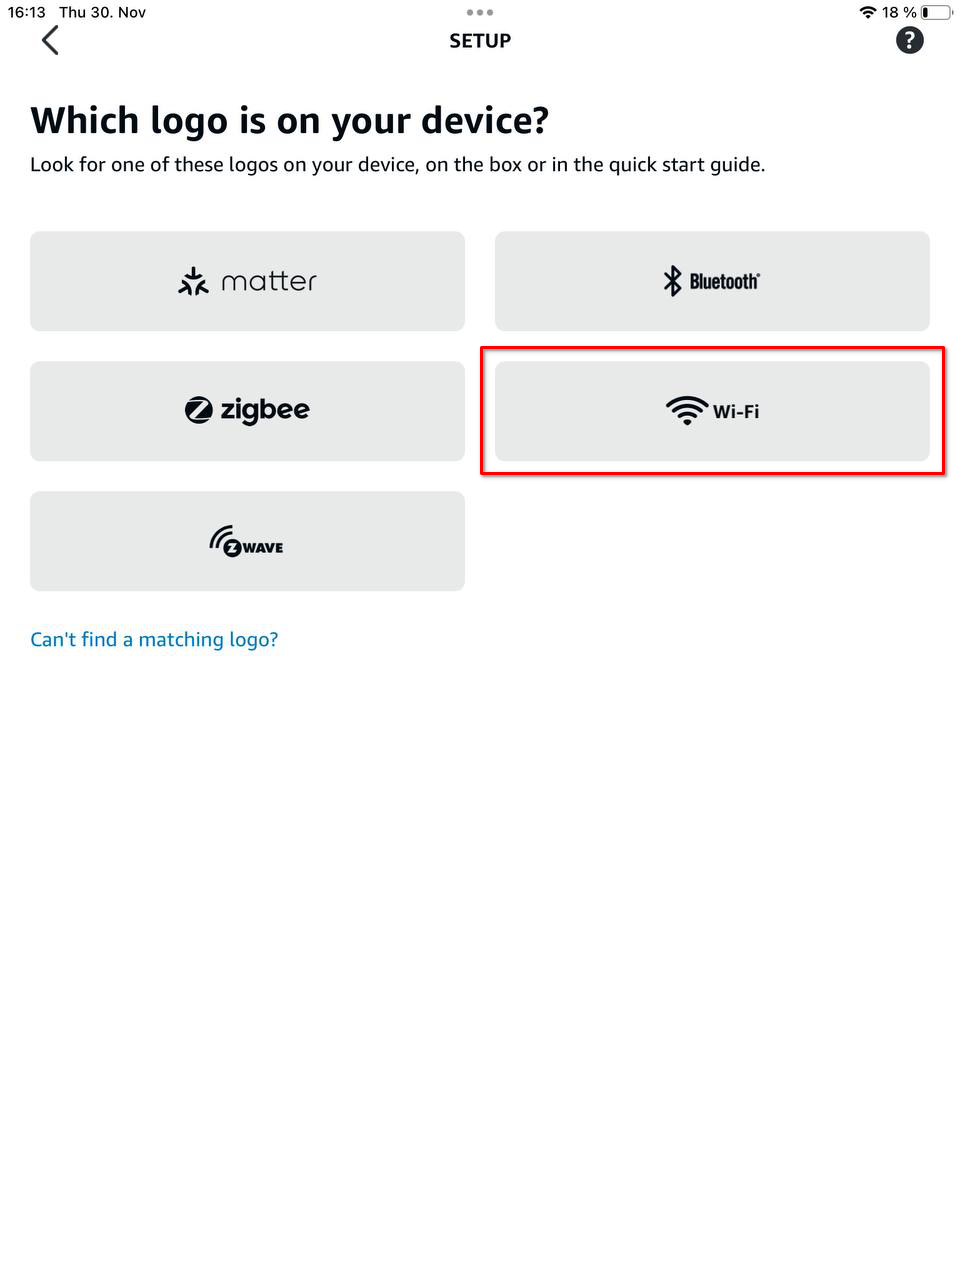
Go to the "Add Device" tab, select "Device", select "Other" at the end of the list and select the "Wi-Fi" logo;
-
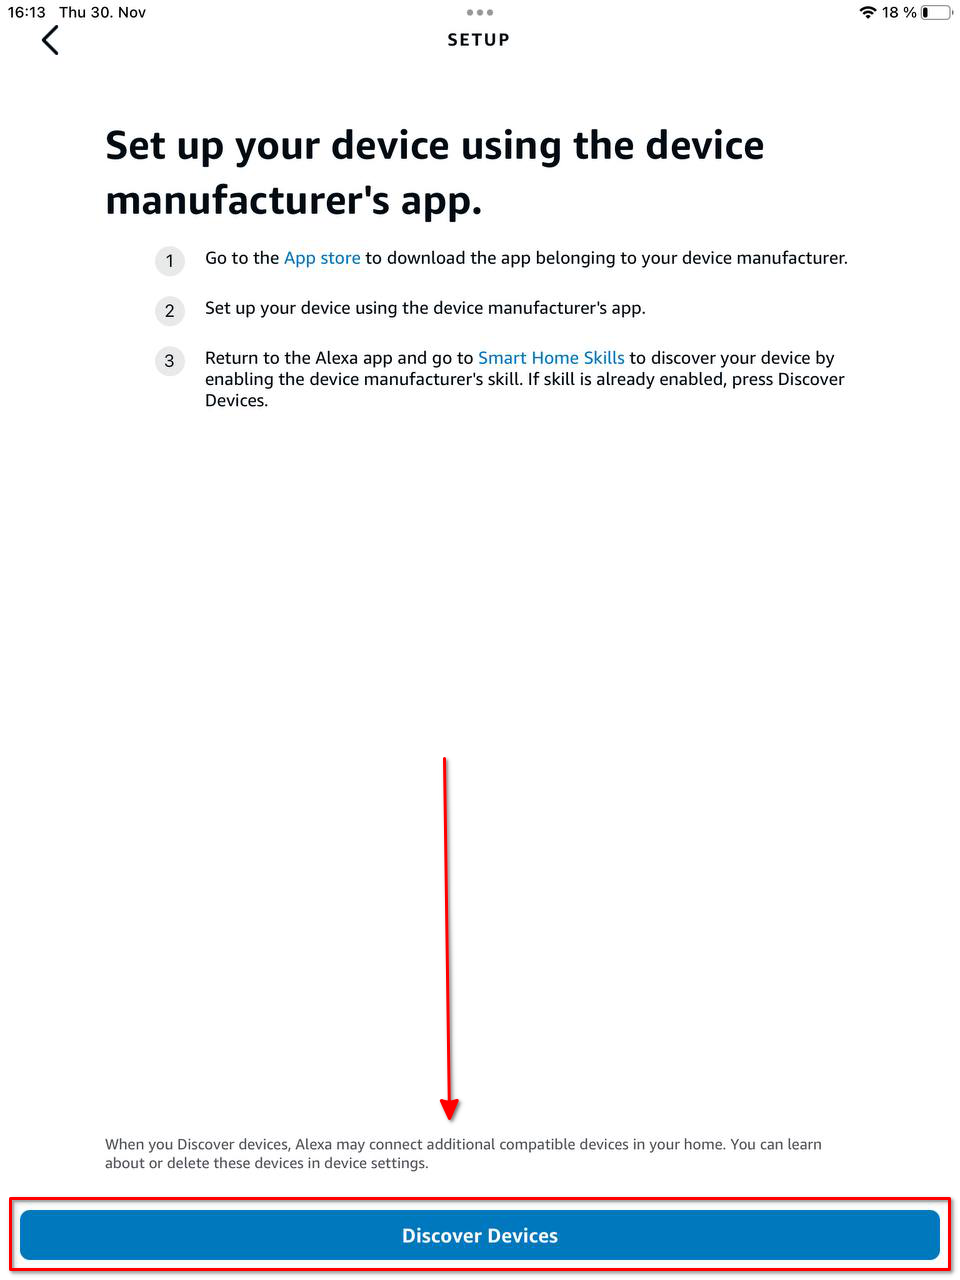
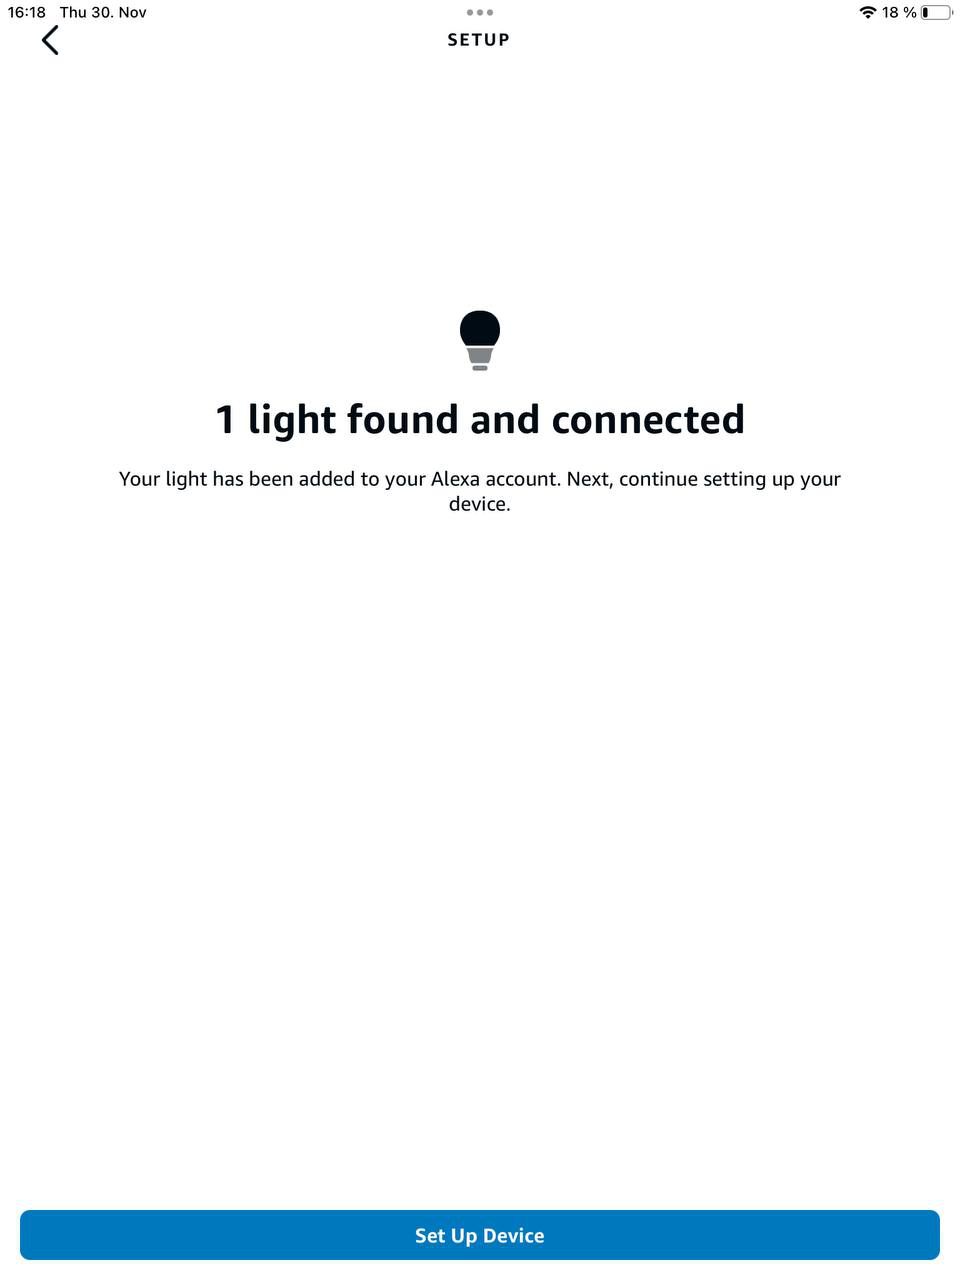
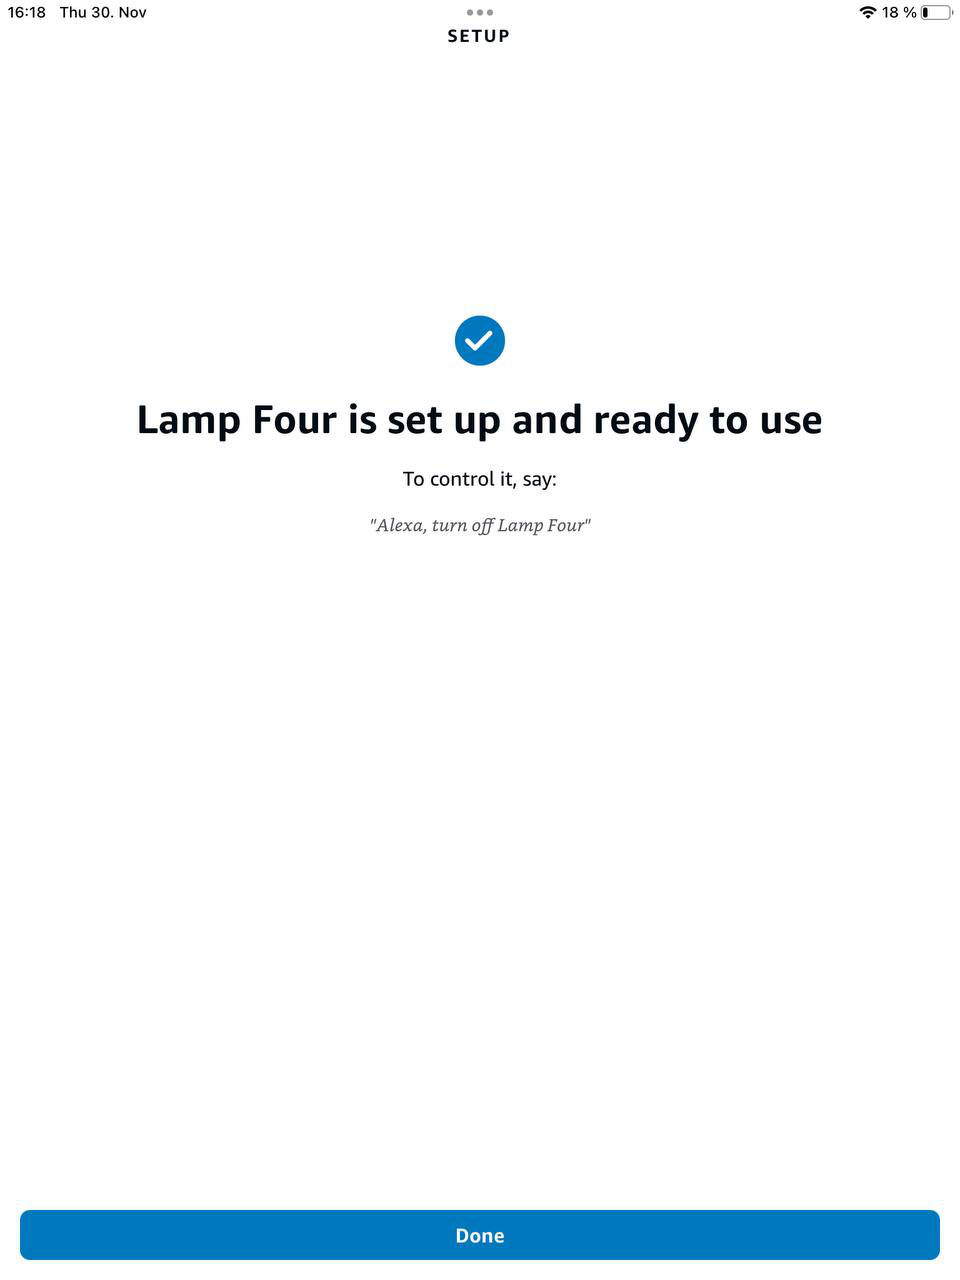
Press "Discover Devices" and after the device is discovered, press "Set Up Device";
- Enjoy your Alexa with Larnitech!