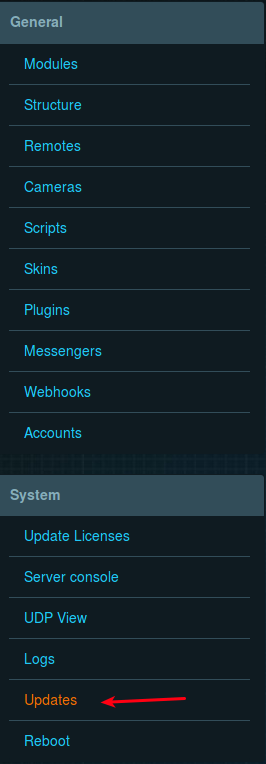
- Authorize yourself in the Web Toolbar of the Smart Home system administration (LT Setup) and go to the Updates page.
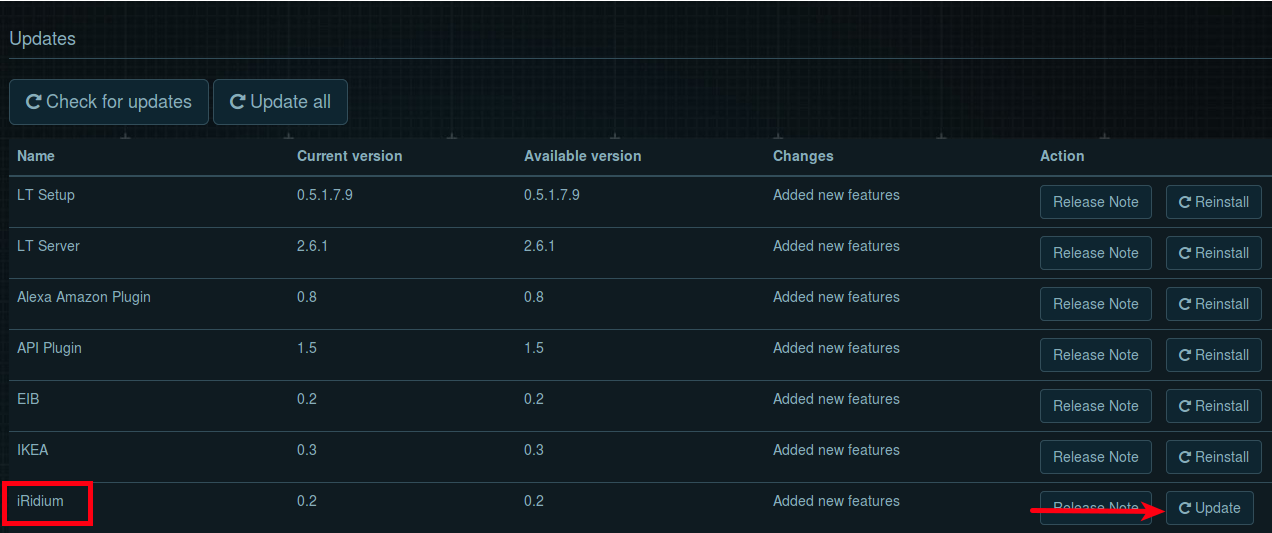
- In the list of updates, find iRidium and click the Update button (if the plug-in is not installed, there will be the Install button – click it).
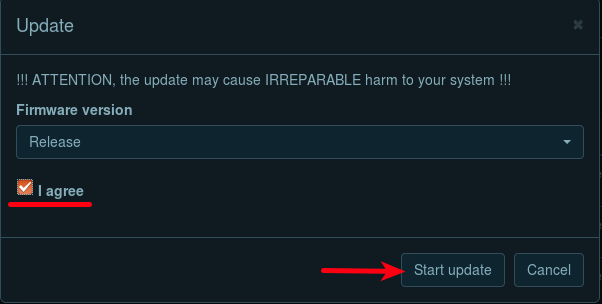
- Read the warning, tick the box next to “I agree” inscription and click the Start update button.
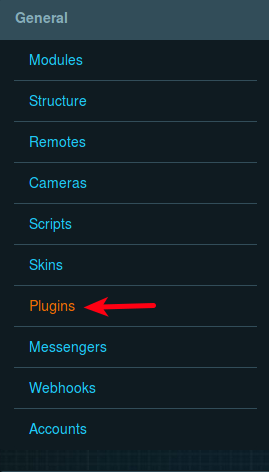
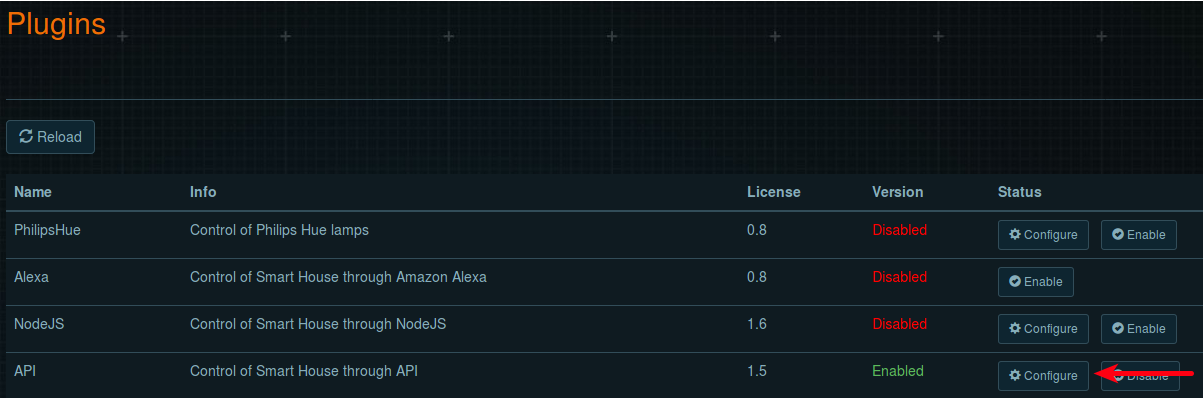
- When the update is complete, select the Plugins page of the General section in the left menu.
- Find API in the list and click Configure.
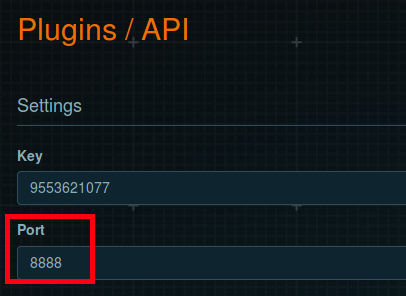
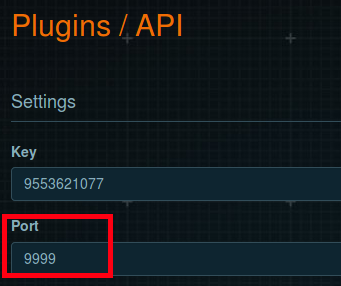
- Note the value in the Port field. If it is equal to 8888, you need to change it, since the iRidium server uses it. Enter the desired value; click Save at the bottom of the screen and OK in the next window.
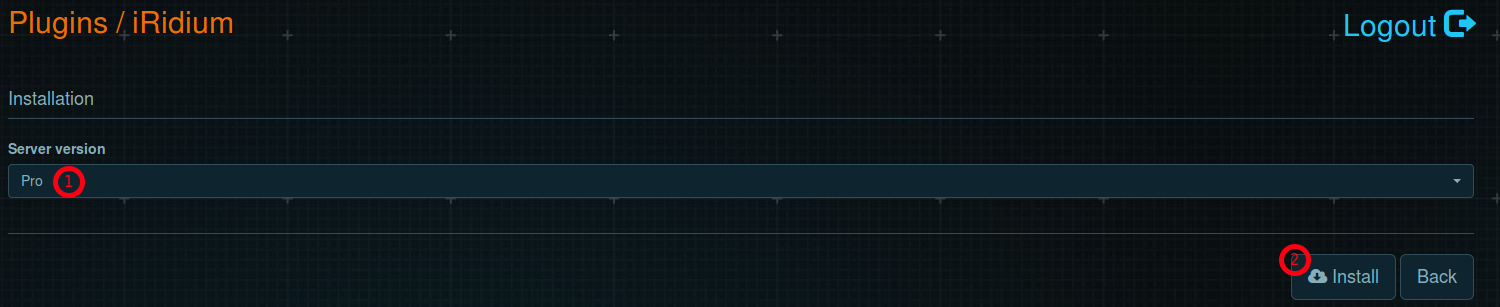
- Go back to the Plugins page, find iRidium in the list and click Configure.


- In the window that appears, you can install iRidium. To do this, select the required version (Pro or Lite) in the Server version field, and then click Install.
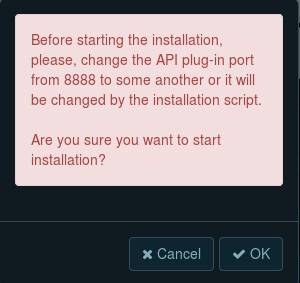
- A window will appear asking you to change the API port address if its value is 8888 – these actions are described in steps 4, 5 and 6. If you have changed the address, click OK.
- A window with the “Installing” inscription will appear on the screen, and then a window with a message about the successful installation.


- Now, the iRidium server control panel will appear in the Configure menu.
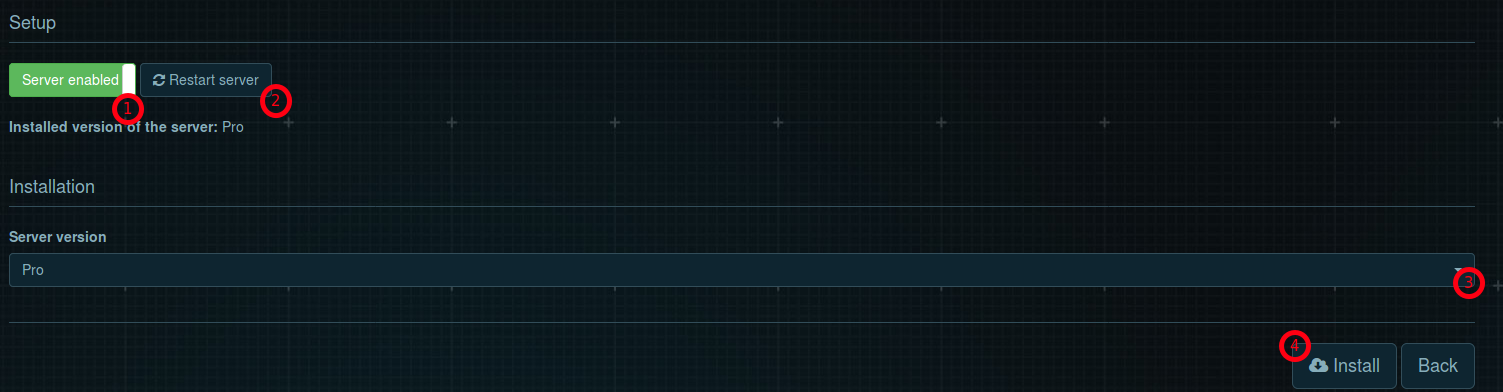
The Server enabled/Server disabled button is marked 1. The Restart server button is marked 2.
A message with the installed version of the server is located under the control buttons. If you want to install another version, select it in the field marked 3 and click Install (marked 4).