Difference between revisions of "Google Home"
Jump to navigation
Jump to search
(Created page with "<ol> <li> Register your server in Larnitech Cloud using LT Setup, in the ‘General’ tab;<br /> <br>600px<br> </li> <li> Request support fo...") |
(Update Google Home integration) |
||
| (6 intermediate revisions by 2 users not shown) | |||
| Line 1: | Line 1: | ||
| + | <languages/> | ||
| + | <translate> | ||
| + | <!--T:1--> | ||
<ol> | <ol> | ||
<li> | <li> | ||
| − | + | Sign Up or Login to your server in Larnitech Cloud using LT Setup, in the ‘General’ tab;<br /> | |
| − | <br>[[File: | + | <br>[[File:google_1.png|800px]]<br> |
</li> | </li> | ||
<li> | <li> | ||
Request support for adding licenses for Google Home devices (by default one device);<br /> | Request support for adding licenses for Google Home devices (by default one device);<br /> | ||
| − | + | {|class="wikitable" | |
| + | |- | ||
| + | |[[File:google2-1.png|350px]]||[[File:google2_2.png|400px]] | ||
| + | |} | ||
</li> | </li> | ||
<li> | <li> | ||
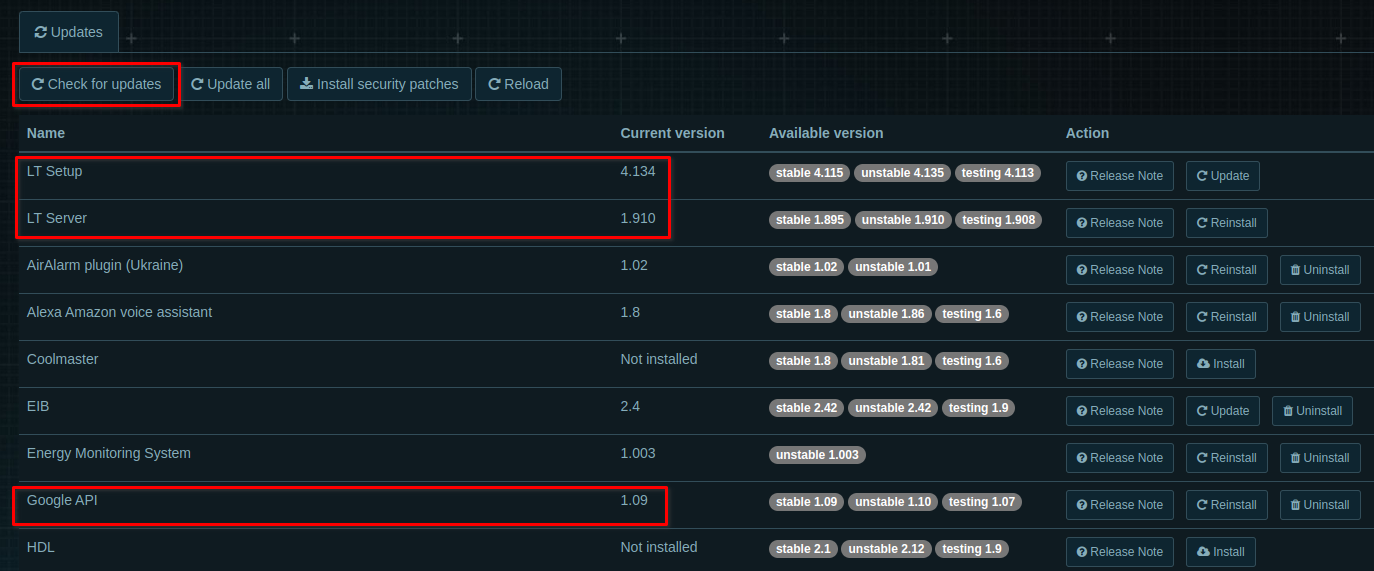
| − | Update LT Setup, LT server, API plugin, in the ‘Updates’ tab;<br /> | + | Update LT Setup, LT server, Google API plugin, in the ‘Updates’ tab;<br /> |
| − | + | {|class="wikitable" | |
| + | |- | ||
| + | |[[File:google3_1.png|300px]]||[[File:google3_2.png|900px]] | ||
| + | |} | ||
</li> | </li> | ||
<li> | <li> | ||
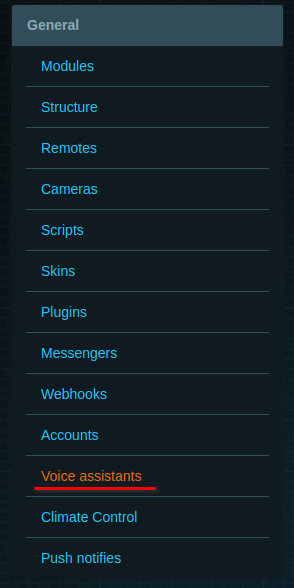
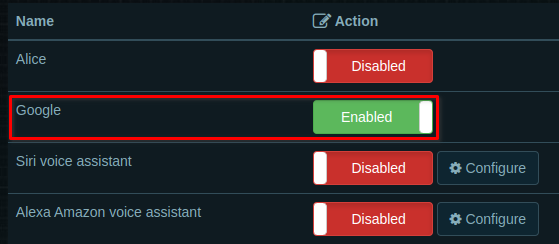
| − | In the | + | In the 'Voice Assistants' tab, turn on Google Assistant;<br /> |
| − | + | {|class="wikitable" | |
| − | + | |- | |
| − | + | |[[File:google4-1.png|300px]]||[[File:google4_2.png|600px]] | |
| − | + | |} | |
| − | |||
</li> | </li> | ||
<li> | <li> | ||
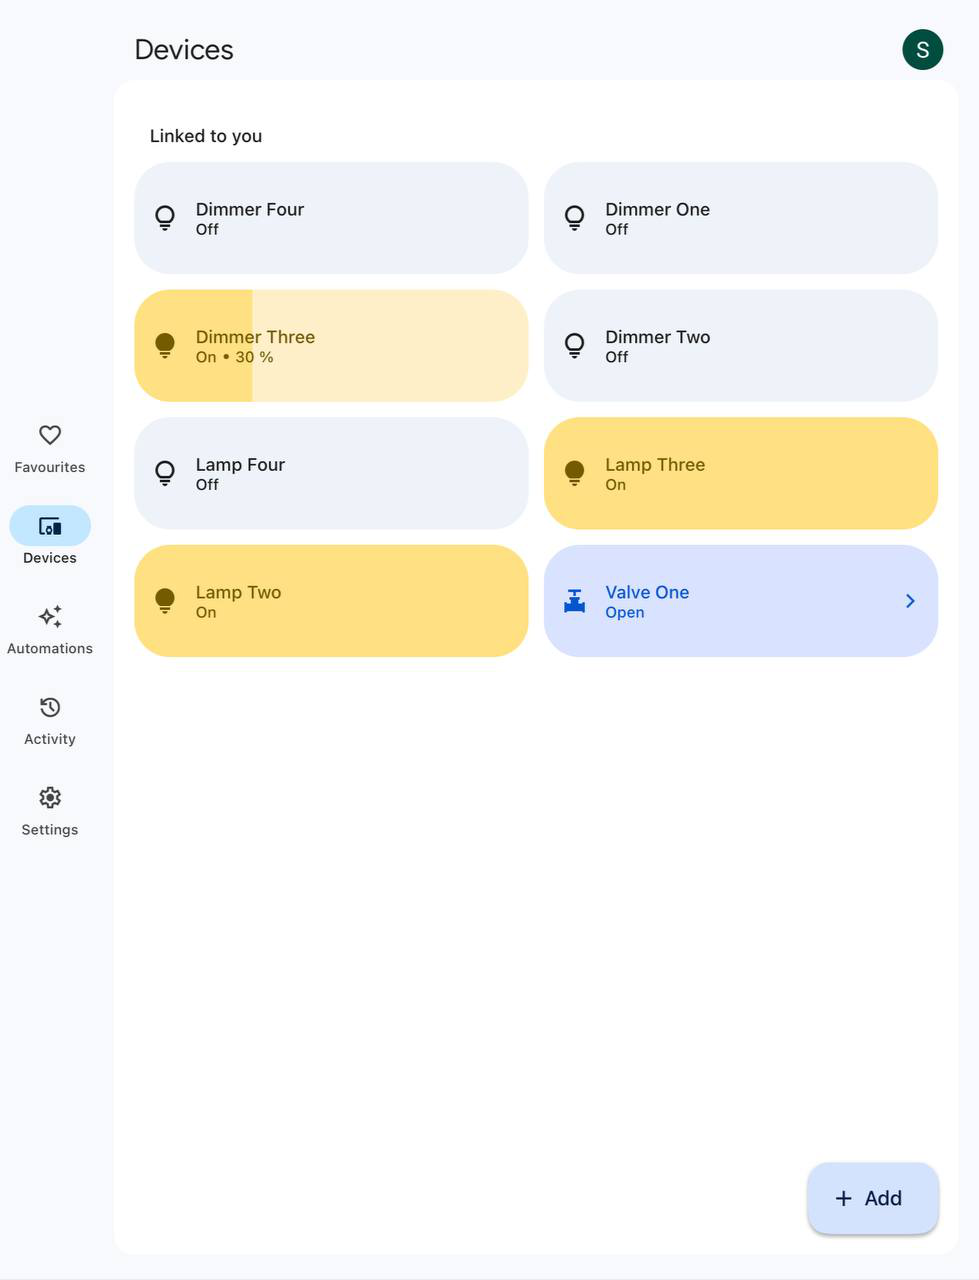
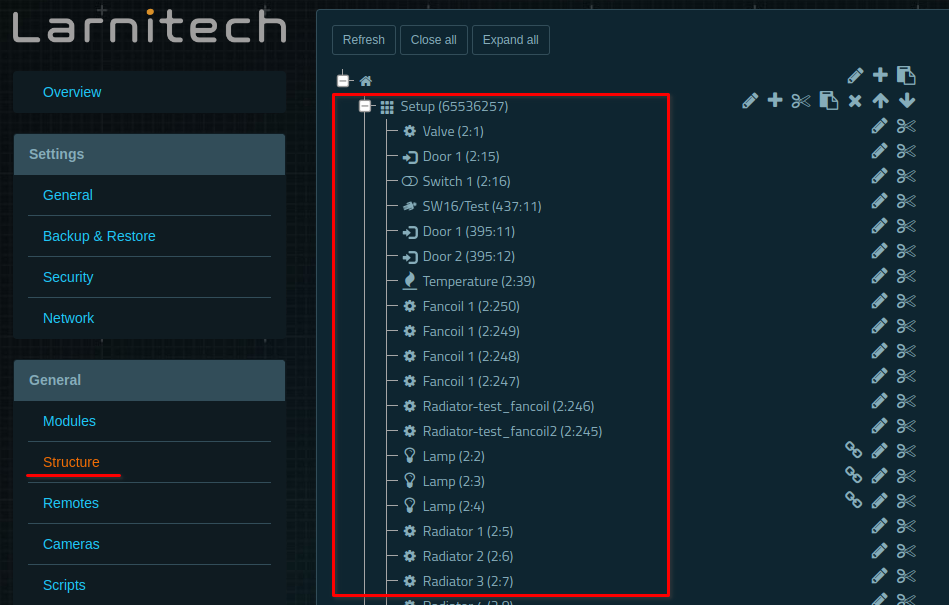
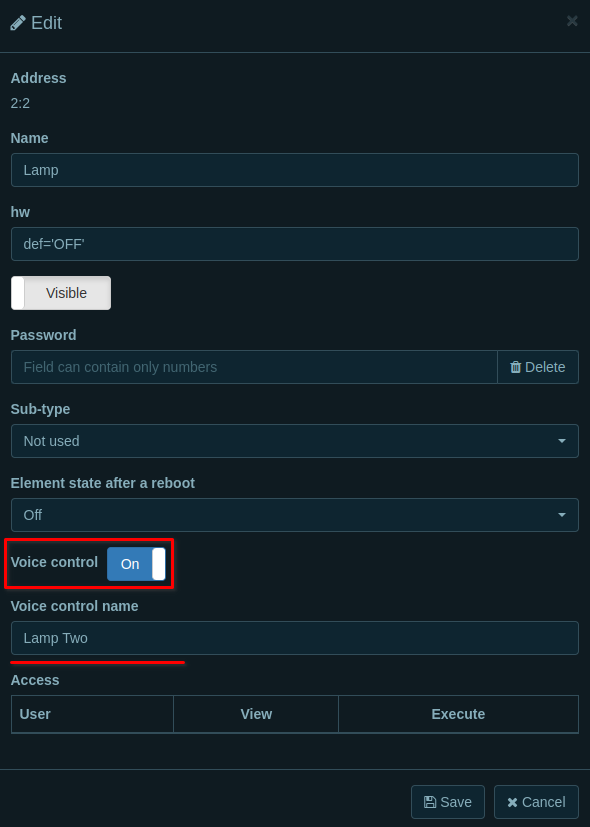
In LT Setup go to ‘Structure’ tab, choose an item which you want to manage with Google Home, enable ‘Voice control’ and enter ‘Voice control name’ (the device will be added to Google Home under this name). Repeat this action for all the items you want to control;<br /> | In LT Setup go to ‘Structure’ tab, choose an item which you want to manage with Google Home, enable ‘Voice control’ and enter ‘Voice control name’ (the device will be added to Google Home under this name). Repeat this action for all the items you want to control;<br /> | ||
| − | + | {|class="wikitable" | |
| + | |- | ||
| + | |[[File:google5-1.png|800px]]||[[File:google5_2.png|400px]] | ||
| + | |} | ||
</li> | </li> | ||
<li> | <li> | ||
| Line 29: | Line 40: | ||
<li> | <li> | ||
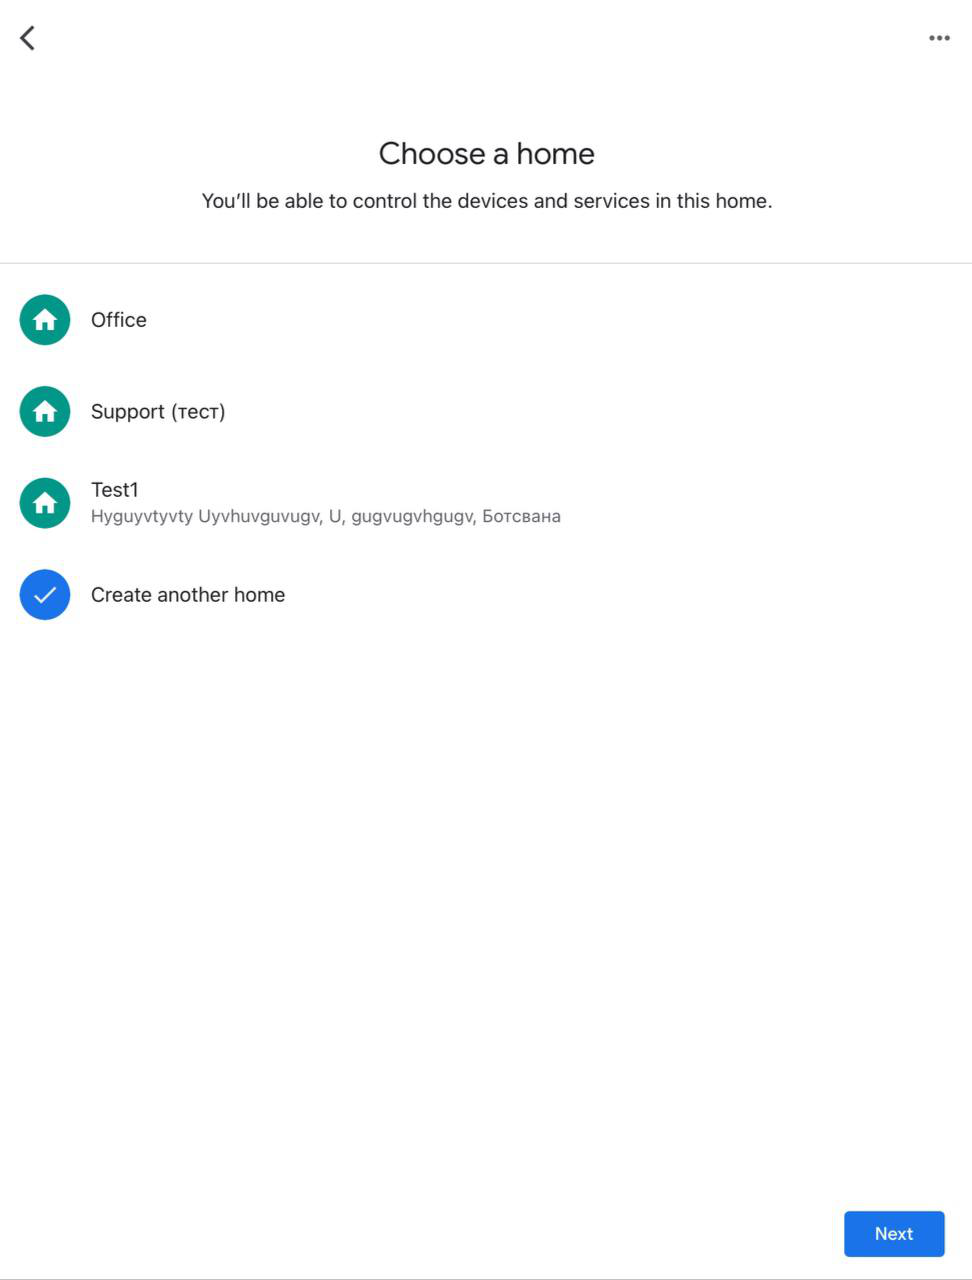
Create new home; | Create new home; | ||
| − | <table style="width: | + | <table style="width:600px;" border="1px"> |
<tr> | <tr> | ||
<td> | <td> | ||
| − | <br>[[File: | + | <br>[[File:google6_1.png|350px]]<br> |
</td> | </td> | ||
<td> | <td> | ||
| − | <br>[[File: | + | <br>[[File:google6_2.png|350px]]<br> |
| + | </td> | ||
| + | <td> | ||
| + | <br>[[File:google6_3.png|350px]]<br> | ||
</td> | </td> | ||
</tr> | </tr> | ||
| Line 42: | Line 56: | ||
<li> | <li> | ||
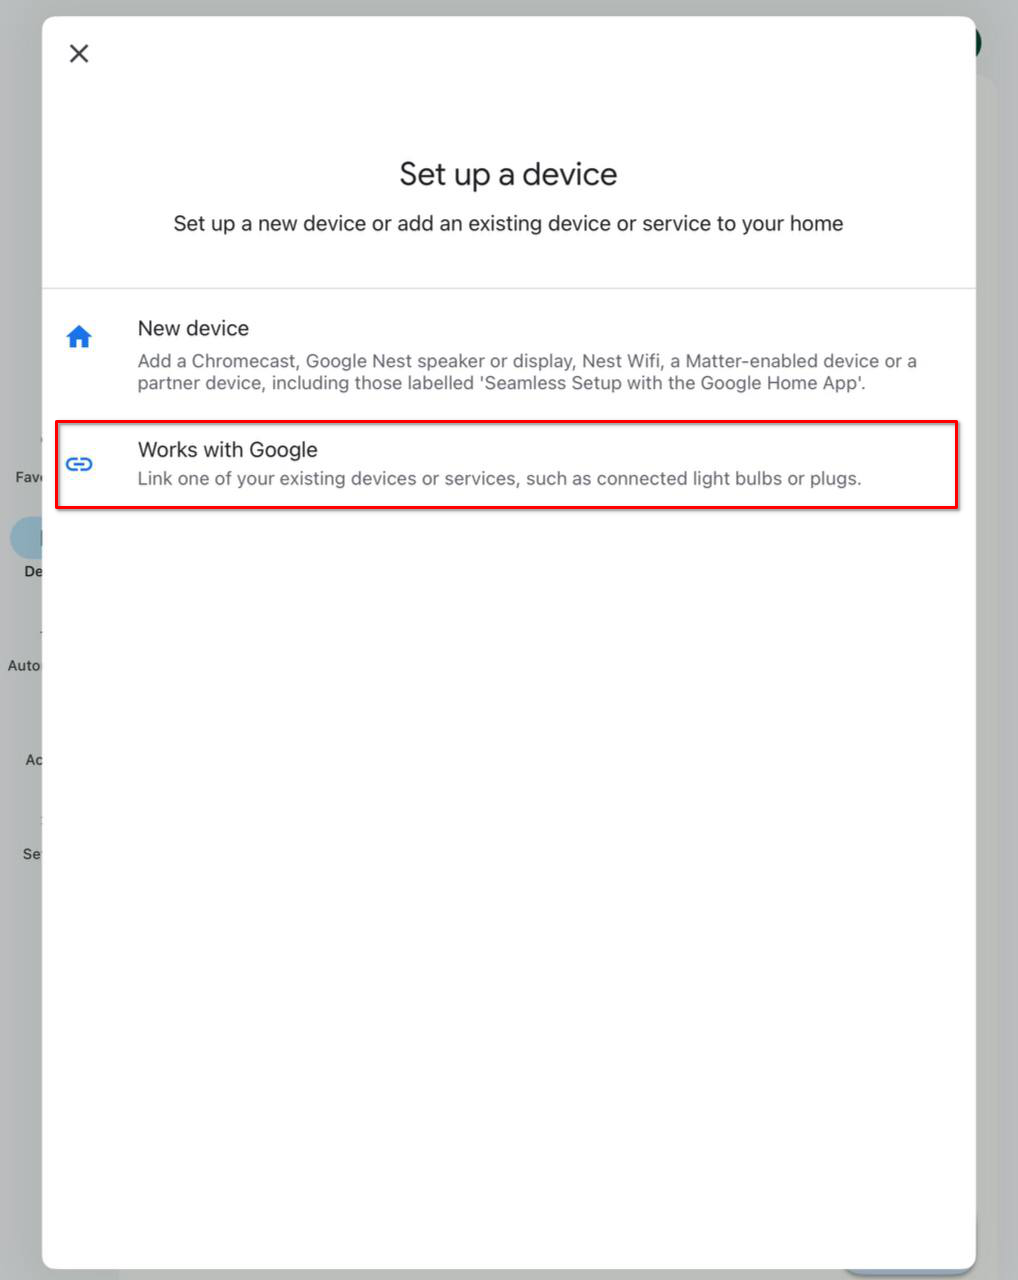
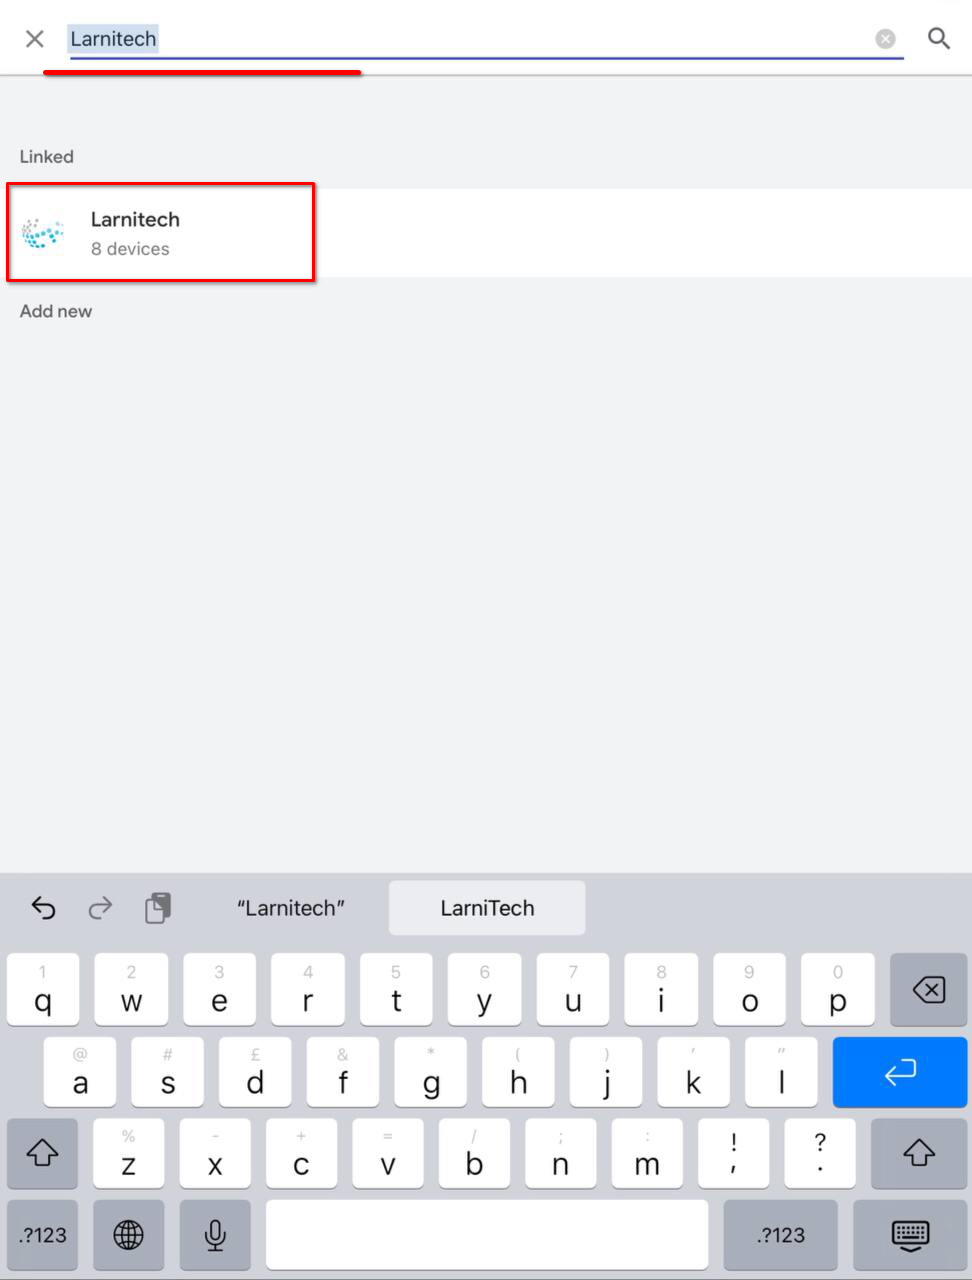
Add Larnitech service in Google Home app; | Add Larnitech service in Google Home app; | ||
| − | <table style="width: | + | <table style="width:600px;" border="1px"> |
<tr> | <tr> | ||
<td> | <td> | ||
| − | <br>[[File: | + | <br>[[File:google7-1.png|350px]]<br> |
</td> | </td> | ||
<td> | <td> | ||
| − | <br>[[File: | + | <br>[[File:google7_2.png|350px]]<br> |
</td> | </td> | ||
<td> | <td> | ||
| − | <br>[[File: | + | <br>[[File:google7-3.png|350px]]<br> |
| − | |||
| − | |||
| − | |||
</td> | </td> | ||
</tr> | </tr> | ||
| Line 61: | Line 72: | ||
<li> | <li> | ||
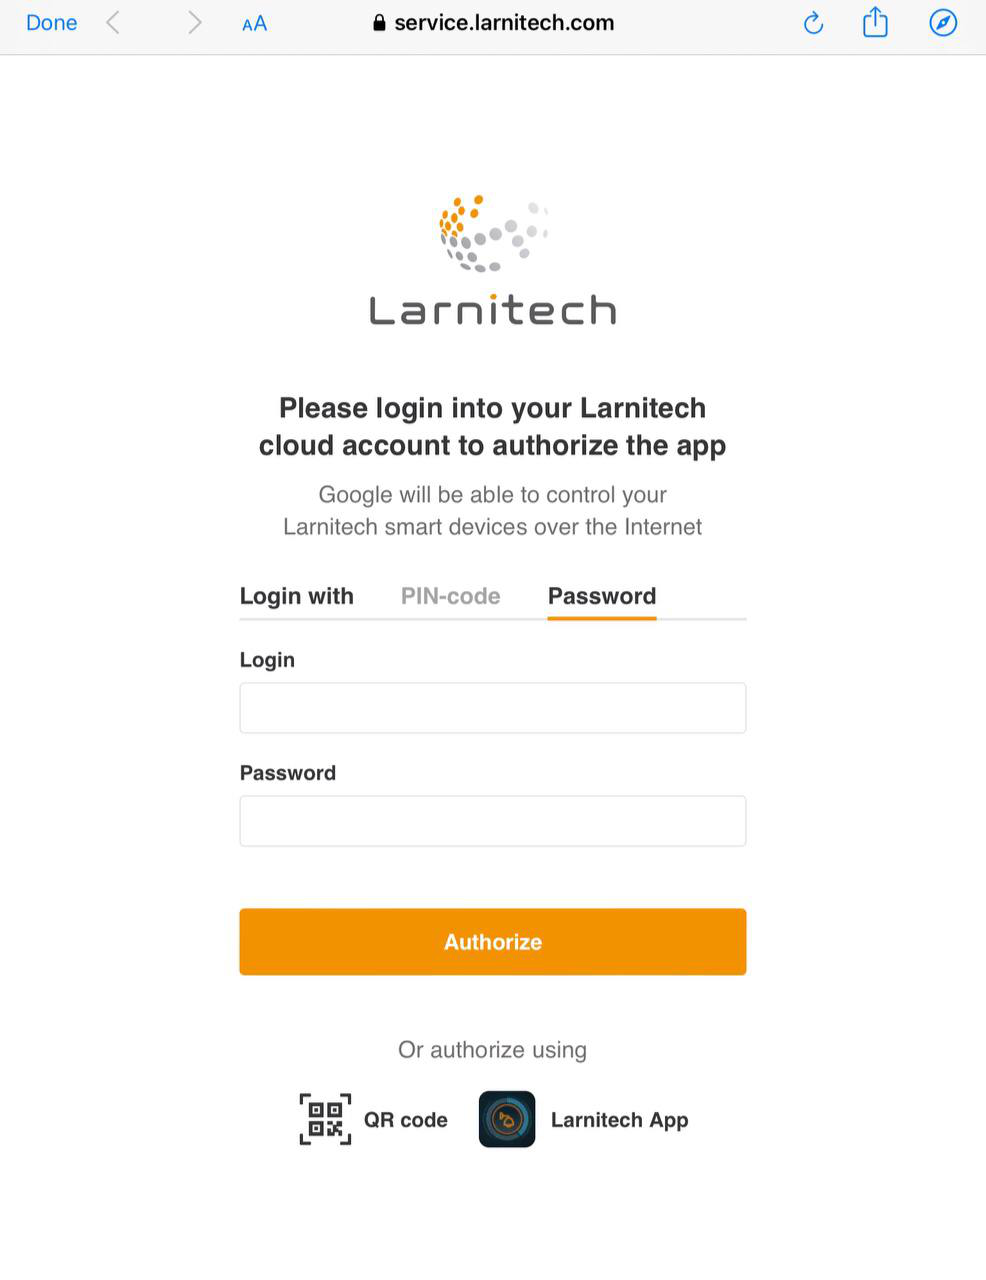
Enable Larnitech service using your Larnitech Cloud login; | Enable Larnitech service using your Larnitech Cloud login; | ||
| − | <table style="width: | + | <table style="width:400px;" border="1px"> |
<tr> | <tr> | ||
<td> | <td> | ||
| − | <br>[[File: | + | <br>[[File:google8_1.png|400px]]<br> |
</td> | </td> | ||
</tr> | </tr> | ||
| Line 71: | Line 82: | ||
<li> | <li> | ||
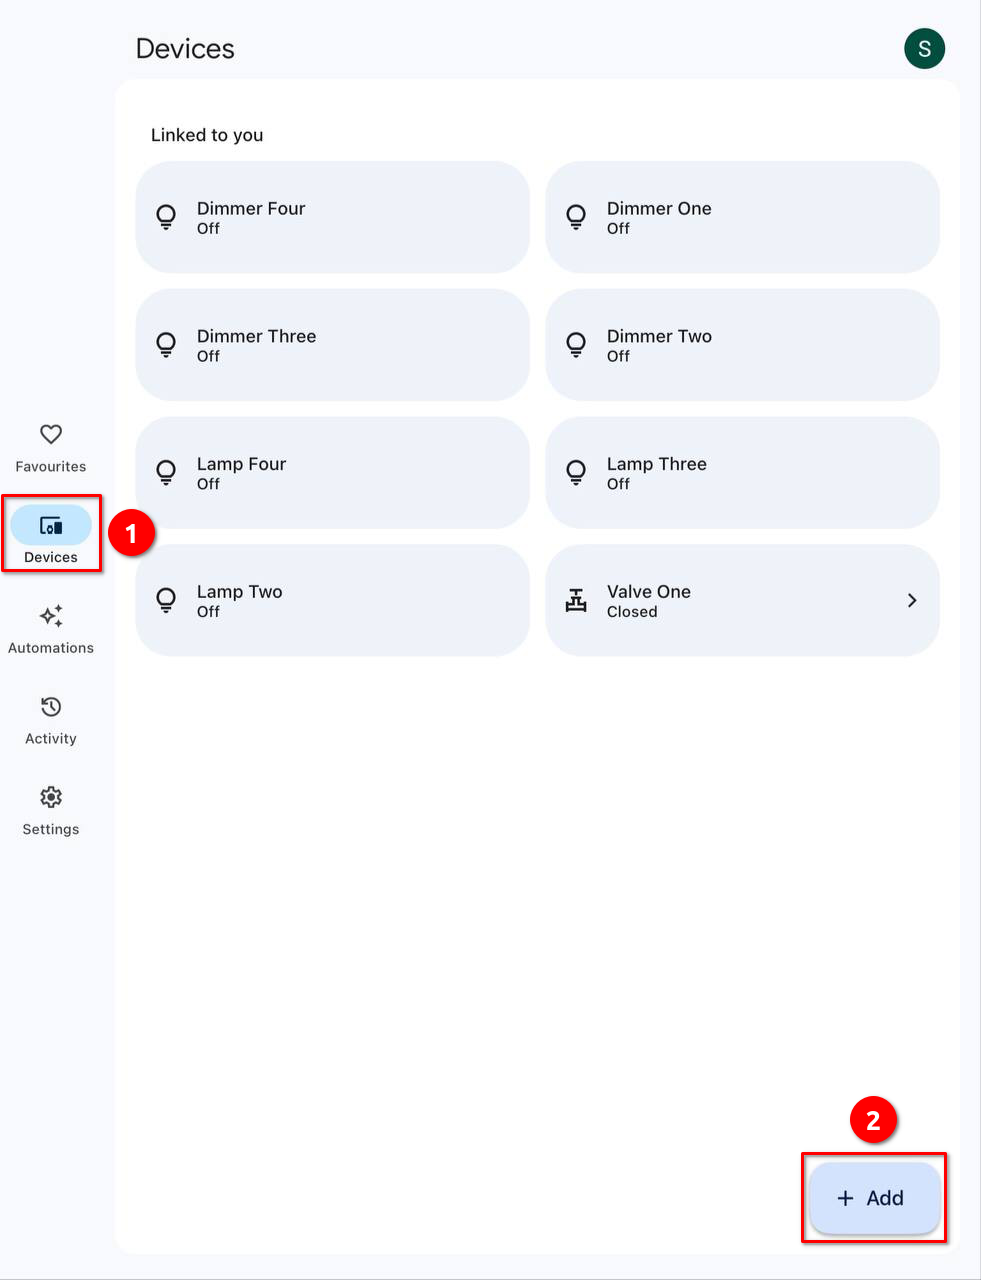
Enjoy your Google Home with Larnitech! | Enjoy your Google Home with Larnitech! | ||
| − | <table style="width: | + | <table style="width:400px;" border="1px"> |
<tr> | <tr> | ||
<td> | <td> | ||
| − | <br>[[File: | + | <br>[[File:google9_1.png|400px]]<br> |
</td> | </td> | ||
</tr> | </tr> | ||
| Line 80: | Line 91: | ||
</li> | </li> | ||
</ol> | </ol> | ||
| + | </translate> | ||
Latest revision as of 15:24, 21 November 2023
-
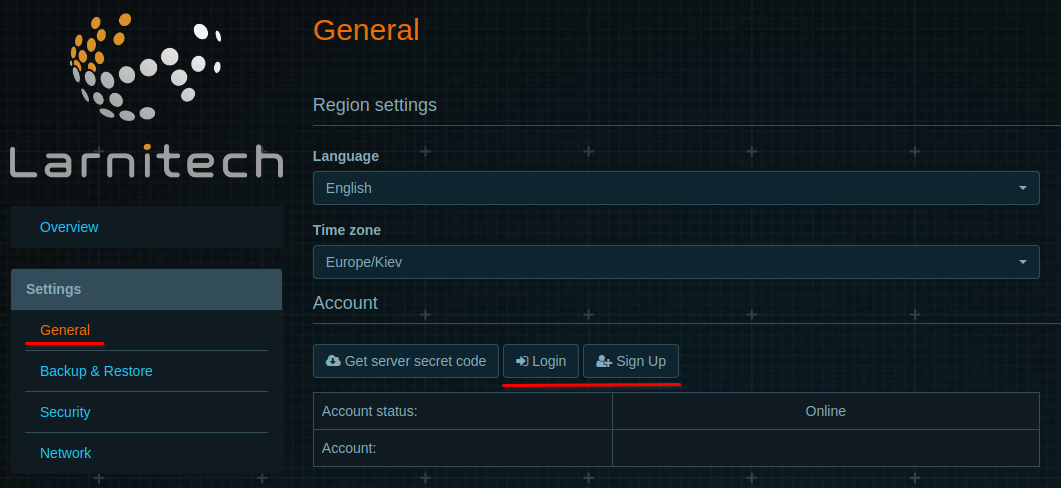
Sign Up or Login to your server in Larnitech Cloud using LT Setup, in the ‘General’ tab;
-
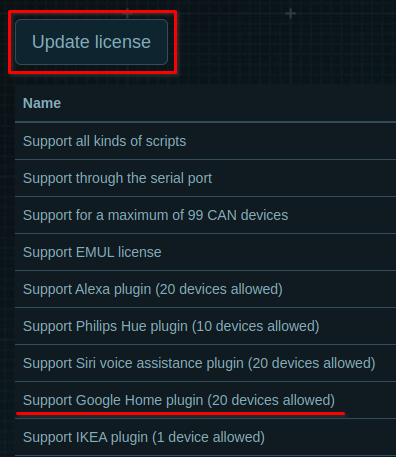
Request support for adding licenses for Google Home devices (by default one device);

-
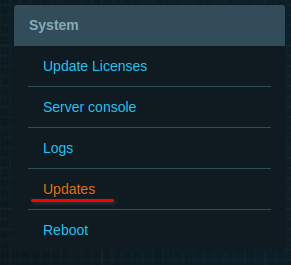
Update LT Setup, LT server, Google API plugin, in the ‘Updates’ tab;
-
In the 'Voice Assistants' tab, turn on Google Assistant;
-
In LT Setup go to ‘Structure’ tab, choose an item which you want to manage with Google Home, enable ‘Voice control’ and enter ‘Voice control name’ (the device will be added to Google Home under this name). Repeat this action for all the items you want to control;
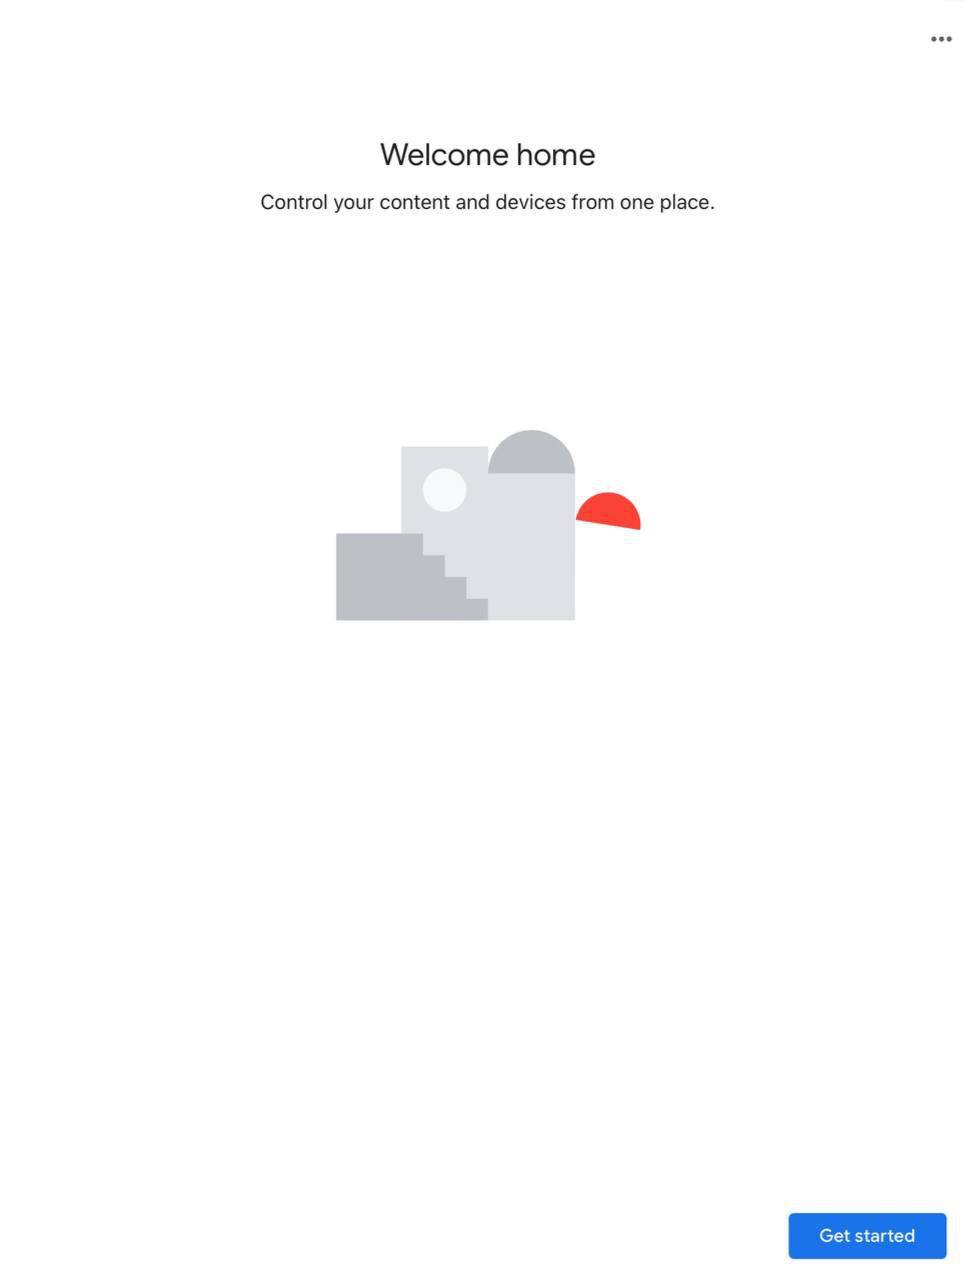
- Install Google Home app on your device;
-
Create new home;

-
Add Larnitech service in Google Home app;
-
Enable Larnitech service using your Larnitech Cloud login;
-
Enjoy your Google Home with Larnitech!