Difference between revisions of "Managing the Items"
(Marked this version for translation) |
|||
| (3 intermediate revisions by 2 users not shown) | |||
| Line 1: | Line 1: | ||
| − | ===Top panel=== | + | <languages/> |
| + | <translate> | ||
| + | ===Top panel=== <!--T:1--> | ||
In the '''Larnitech''' application, you can control the items, view the sensor readings, view the camera image, use consoles, and use many other functions. The items are grouped into sections according to their functionality; you can use the top panel to switch between the sections. | In the '''Larnitech''' application, you can control the items, view the sensor readings, view the camera image, use consoles, and use many other functions. The items are grouped into sections according to their functionality; you can use the top panel to switch between the sections. | ||
<br>[[File:instruction5.png|500px]]<br> | <br>[[File:instruction5.png|500px]]<br> | ||
| Line 17: | Line 19: | ||
<br>[[File:instruction12.png|100px]]<br>- the orange letter “A” in the right upper corner indicates activated automation mode; | <br>[[File:instruction12.png|100px]]<br>- the orange letter “A” in the right upper corner indicates activated automation mode; | ||
| + | <!--T:2--> | ||
<br>[[File:instruction13.png|100px]]<br>- the gray letter “A” in the right upper corner indicates a temporarily inactive automation setting. | <br>[[File:instruction13.png|100px]]<br>- the gray letter “A” in the right upper corner indicates a temporarily inactive automation setting. | ||
| + | <!--T:3--> | ||
<br>[[File:instruction14.png|100px]]<br>- the alarm clock in the right upper corner of the screen indicates the active schedule; | <br>[[File:instruction14.png|100px]]<br>- the alarm clock in the right upper corner of the screen indicates the active schedule; | ||
| + | <!--T:4--> | ||
<br>[[File:instruction15.png|100px]]<br>- the emergency mode: the protection has triggered on the module, it is impossible to use the items. | <br>[[File:instruction15.png|100px]]<br>- the emergency mode: the protection has triggered on the module, it is impossible to use the items. | ||
| − | A long press on the item's icon will allow you to view the history (see [[ | + | A long press on the item's icon will allow you to view the history (see [[History|History]]). |
| − | ====Dimmer==== | + | ====Dimmer==== <!--T:5--> |
<br>[[File:instruction16.png|200px]]<br> | <br>[[File:instruction16.png|200px]]<br> | ||
A Dimmer is a lamp with adjustable brightness. It is turned on and off by a single click. To change the brightness, double-click on the item. A slider will appear which can be used to set the desired brightness (see the screenshot below). | A Dimmer is a lamp with adjustable brightness. It is turned on and off by a single click. To change the brightness, double-click on the item. A slider will appear which can be used to set the desired brightness (see the screenshot below). | ||
| Line 55: | Line 60: | ||
<br>[[File:instruction29.png|100px]]<br> | <br>[[File:instruction29.png|100px]]<br> | ||
| − | ===<br>[[File:instruction30.png|80px]]<br>Sensors=== | + | ===<br>[[File:instruction30.png|80px]]<br>Sensors=== <!--T:6--> |
| − | In the section of sensors you can track the actual indications of existed sensors, find out the status of doors, etc. Long press on the sensor icon allows you to view its history (see [[ | + | In the section of sensors you can track the actual indications of existed sensors, find out the status of doors, etc. Long press on the sensor icon allows you to view its history (see [[History|History]]) |
<br>[[File:instruction31.png|500px]]<br> | <br>[[File:instruction31.png|500px]]<br> | ||
The screenshot above shows from left to right working motion, illumination, temperature and humidity sensors. | The screenshot above shows from left to right working motion, illumination, temperature and humidity sensors. | ||
| Line 76: | Line 81: | ||
<br>[[File:instruction38.png|500px]]<br> | <br>[[File:instruction38.png|500px]]<br> | ||
| − | ===<br>[[File:instruction39.png|80px]]<br>Climate=== | + | ===<br>[[File:instruction39.png|80px]]<br>Climate=== <!--T:7--> |
This section allows you to control radiators, air conditioners and fans installed in the room. | This section allows you to control radiators, air conditioners and fans installed in the room. | ||
====Ventilation==== | ====Ventilation==== | ||
| Line 144: | Line 149: | ||
<br>[[File:instruction50.png|500px]]<br> | <br>[[File:instruction50.png|500px]]<br> | ||
| − | ===<br>[[File:instruction51.png|80px]]<br>Multiroom=== | + | ===<br>[[File:instruction51.png|80px]]<br>Multiroom=== <!--T:8--> |
<br>[[File:instruction52.png|500px]]<br> | <br>[[File:instruction52.png|500px]]<br> | ||
You can use this tab to control media points in the rooms: turn on and off music, adjust the volume, download playlists and much more. | You can use this tab to control media points in the rooms: turn on and off music, adjust the volume, download playlists and much more. | ||
| Line 221: | Line 226: | ||
<li>Use the + and - buttons to set the number of minutes or tracks until the stoppage. Use 3, 4 and 5 buttons to adjust the mode parameters, and press '''Reset to''' (marked 2) to start the countdown.</li> | <li>Use the + and - buttons to set the number of minutes or tracks until the stoppage. Use 3, 4 and 5 buttons to adjust the mode parameters, and press '''Reset to''' (marked 2) to start the countdown.</li> | ||
</ol> | </ol> | ||
| − | ====Devices tab==== | + | ====Devices tab==== <!--T:9--> |
<br>[[File:instruction80.png|500px]]<br> | <br>[[File:instruction80.png|500px]]<br> | ||
This tab allows selecting which media point will be used to control | This tab allows selecting which media point will be used to control | ||
| Line 236: | Line 241: | ||
You can have multiple remote controls, and then the tabs will appear on the screen for selecting the desired remote control. | You can have multiple remote controls, and then the tabs will appear on the screen for selecting the desired remote control. | ||
<br>[[File:instruction84.png|500px]]<br> | <br>[[File:instruction84.png|500px]]<br> | ||
| + | </translate> | ||
Latest revision as of 14:41, 18 January 2022
Top panel
In the Larnitech application, you can control the items, view the sensor readings, view the camera image, use consoles, and use many other functions. The items are grouped into sections according to their functionality; you can use the top panel to switch between the sections.


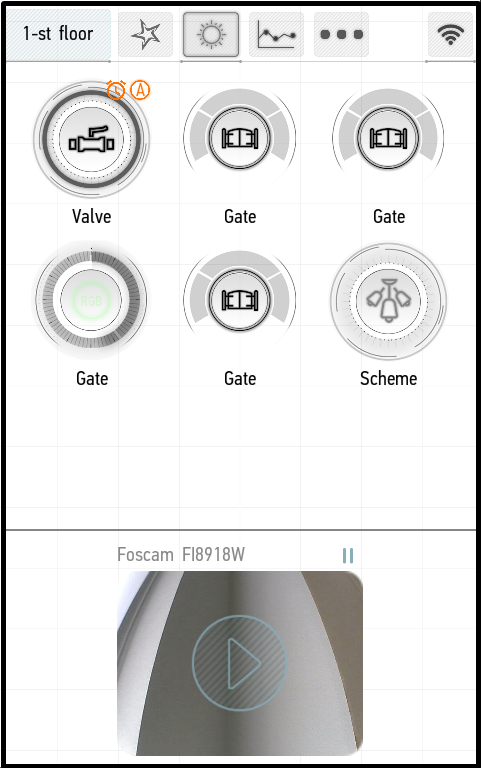
Actuators
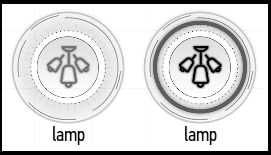
The Actuators panel includes such items as lighting, doors, gates, jalousie, etc. Consider how to manage each actuator in more detail.
Switching the lamp on and off is done by a single click on the item.
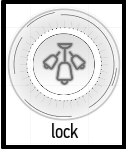
Using this item, you can open the lock. The lock is opened by a single click on the time interval specified in the system.
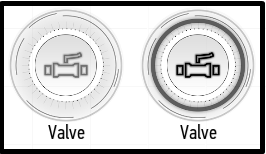
Opening and closing valves occurs by a single click on the item. Leak sensors can be attached to the valves – then they will automatically close when a leakage is detected (see Edit Items -> Auto -> Valve Automation)
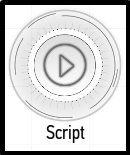
The Script item performs the specified set of actions. You will start it by a single click on the item. You can create a Script via the toolbar of the Smart Home system administration (LT Setup).
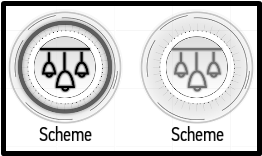
The Light-scheme item allows you to turn on and off multiple items at once. It is turned on and off by a single click.
The following pictograms that indicate customized automation or emergency mode may be located next to the item’s icons:
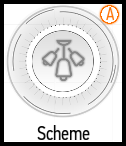
- the orange letter “A” in the right upper corner indicates activated automation mode;
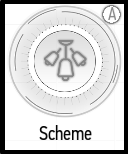
- the gray letter “A” in the right upper corner indicates a temporarily inactive automation setting.
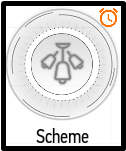
- the alarm clock in the right upper corner of the screen indicates the active schedule;
- the emergency mode: the protection has triggered on the module, it is impossible to use the items.
A long press on the item's icon will allow you to view the history (see History).
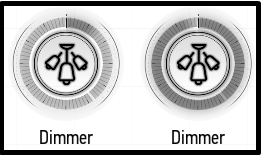
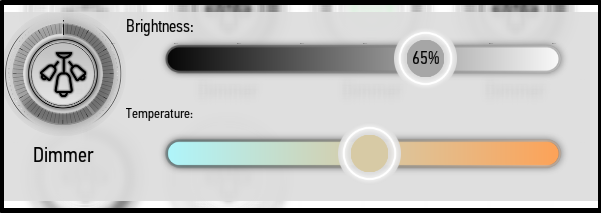
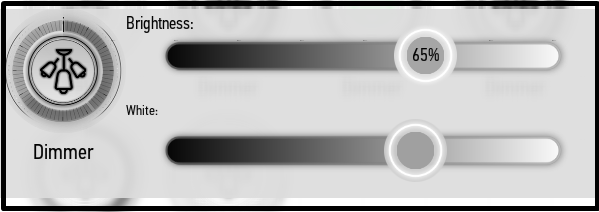
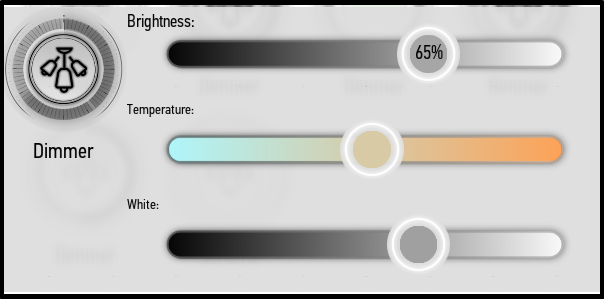
Dimmer
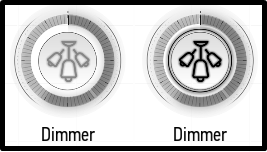
A Dimmer is a lamp with adjustable brightness. It is turned on and off by a single click. To change the brightness, double-click on the item. A slider will appear which can be used to set the desired brightness (see the screenshot below).
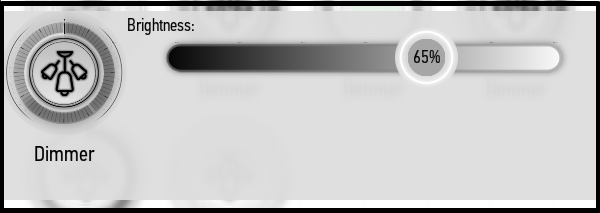
You can also change the brightness by dragging the blue scale along the contour of the item's icon:
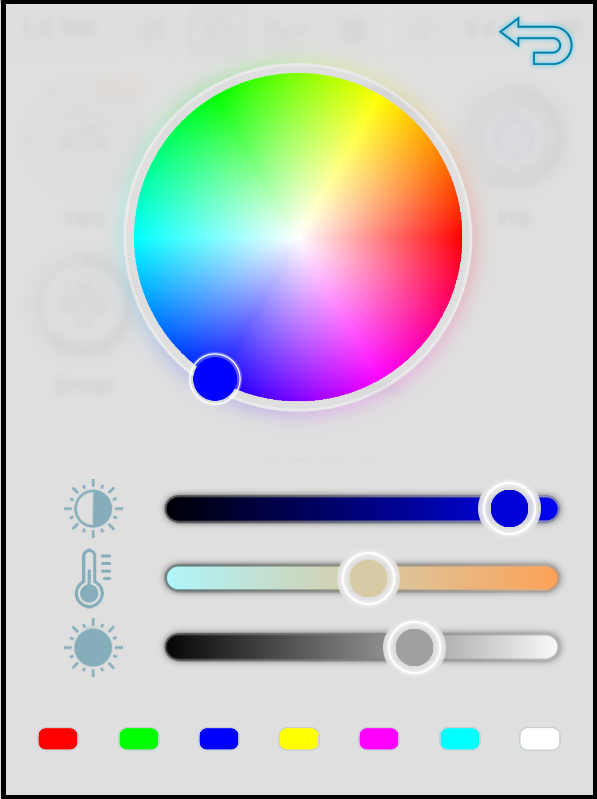
The dimmer can optionally have a color temperature and/or white balance adjustment. In the screenshots below, dimmers have these adjustments separately and together.
RGB
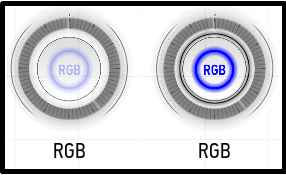
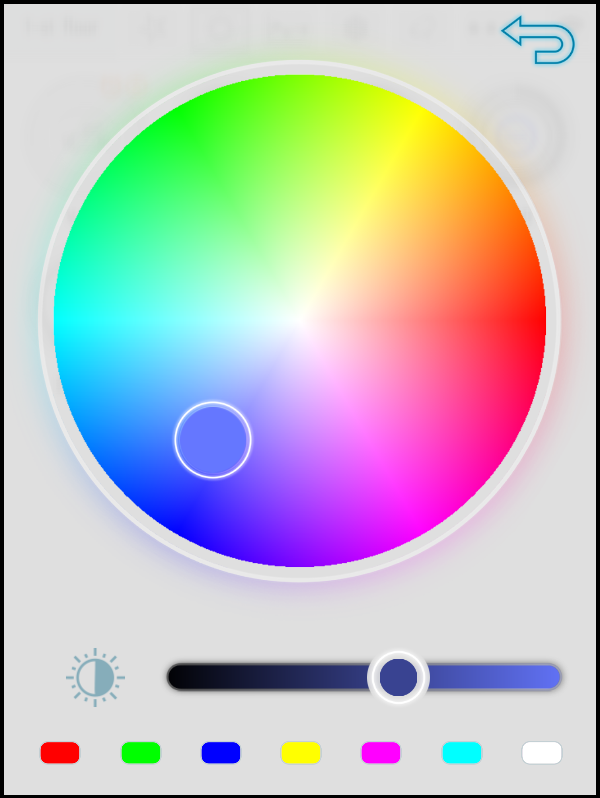
The RGB backlight can change the brightness and color. It turns on and off by a single click. If you want to change the color and brightness of the backlight, double click on the item. A palette will appear on the screen (see screenshot below). You can use the large round palette to select the desired shade. The horizontal slider below it allows you to set the desired brightness. The bottom panel provides the primary colors for quick switching.
Like a dimmer, the RGB backlight can have additional adjustment of the color temperature and white balance:
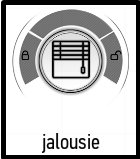
Jalousie
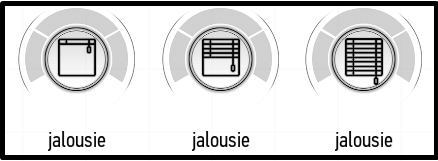
In the Larnitech application you can close, open and stop the jalousie. The pictogram of the item displays the current state of the jalousies – fully open, in the middle position, fully closed (see the screenshot above).
If single pole jalousies are connected, then the icon will always display the middle position regardless of the jalousie position.
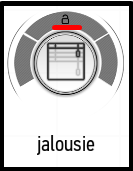
Click on the item to open available functions. The button with a closed lock closes the jalousie; the button with an open lock opens the jalousie.
After selecting the function, the jalousies will start to open or close, the corresponding animation will be enabled on the button. At any time you can stop closing or opening using the button located in the upper section of the item (see the screenshot below).
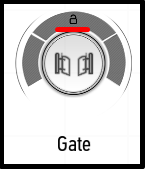
Gate
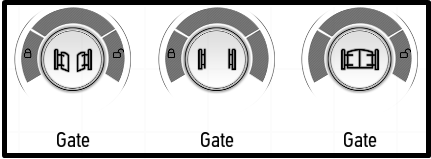
To close or open the gate, click on the button of the item and select the desired function to the left or right of the button: clicking on the open lock icon will open the gate, and clicking on the closed lock icon will close the gate.
If single pole gate is connected, then the icon will always display the middle position regardless of the gate position.
You can stop the process of opening or closing in appropriate time using the button in the upper sector of the item.

Sensors
In the section of sensors you can track the actual indications of existed sensors, find out the status of doors, etc. Long press on the sensor icon allows you to view its history (see History)
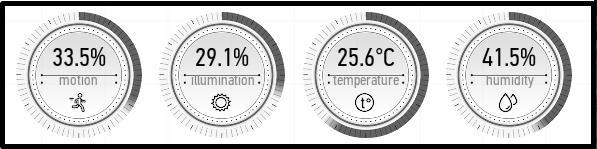
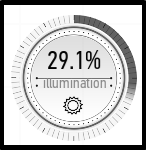
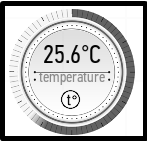
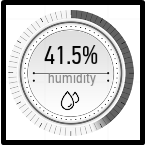
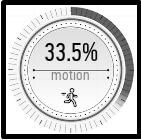
The screenshot above shows from left to right working motion, illumination, temperature and humidity sensors.
Motion sensor (Motion). It measures the motion level percentage. The motion level depends on the motion intensity and the size of the object – this allows you to filter the motion of pets.
Illumination sensor (Illumination). It measures the illumination level in relative units (from 0% to 100%).
Temperature sensor (Temperature). It measures the temperature in degrees Celsius. The range of the scale around the icon can be adjusted in the settings (see sensors, scale).
Humidity sensor (Humidity). It measures the relative humidity.
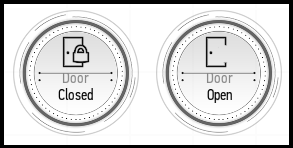
This screenshot shows the doors – closed and open.
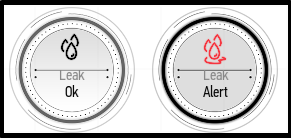
The leak sensor can indicate that the leakage is detected. The left screenshot above shows the sensor in its normal state – there is no leakage. The right screenshot shows the sensor indicating the leakage detected.
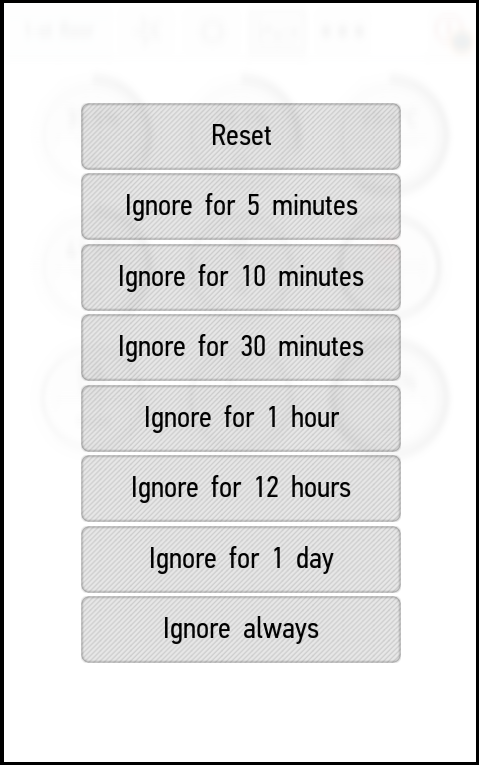
After eliminating the leakage, you need to reset the sensor in order to return it to its normal state. To do this, double-click the sensor button; in the menu that appears, click Reset.
If necessary, you can ignore the alarms received from the sensor. Double-click on it and select Ignore for and the desired period of ignoring. By pressing Ignore always, you will completely disable the alarm received from the sensor.
Until the sensor is not reset or ignored, you cannot open the water valve bound to it.

Climate
This section allows you to control radiators, air conditioners and fans installed in the room.
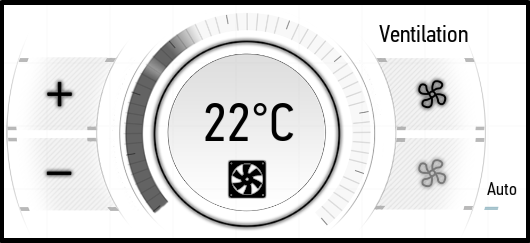
Ventilation
The ventilation control is carried out using the following interface (in the screenshot, the ventilation is turned off):
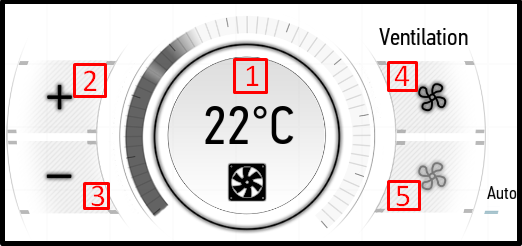
- – turning the ventilation on and off.
- – increasing the temperature.
- – decreasing the temperature.
- – increasing the air flow strength.
- – decreasing the air flow strength.
When setting the minimum level of the air flow strength, the automatic adjustment is enabled (it is enabled in the screenshot above).
The ventilation is turned on:
Radiators
The radiator control is carried out using the following panel.
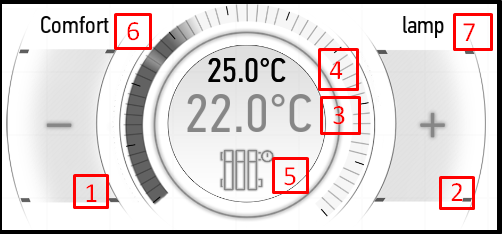
- The button for decreasing the temperature.
- The button for increasing the temperature.
- The temperature setting for the radiator.
- The temperature received from the bound sensor.
- Status: in the heating mode the button is highlighted in orange; in the inactive mode it is highlighted in gray.
- Active option of heating mode (see Heating Modes).
- Item name.
The + and - buttons can be used to set the desired temperature. Below this temperature the radiator will be turned on. In our case, the radiator is configured to a temperature of 26 degrees. If the room is colder, it will be turned on and start to heat the air. When the room temperature is 33.9 degrees, the radiator will be turned off.
If a particular temperature is specified in the settings for the current time period, then you can use the + and - buttons to change it for the current period.
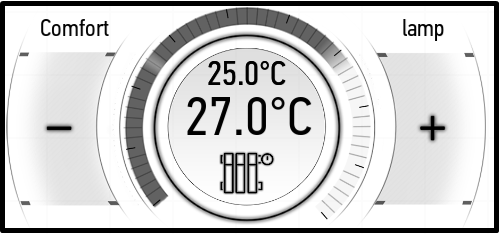
In the screenshot above, we have configured the radiator for a temperature higher than the temperature in the room. As a result, it has been turned on and started to heat the room.
If no temperature sensors are bound to the radiator, then no measured temperature will be displayed.
The active heating mode is indicated in the upper left corner. It can be set in the Heating mode menu, and you can create and configure them in the edit menu (see Edit Items -> Edit Radiators). There are also manual control (Manual) mode and always off (Always off) mode. In manual control mode, you can turn on and off the radiator yourselves. In Always off mode, the radiator will always be off.
Air conditioner
The air conditioner control is carried out using the following item (in the screenshot below it is turned off).
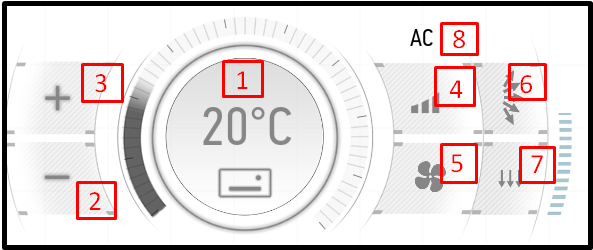
- turning the air conditioner on and off.
- decreasing the temperature.
- increasing the temperature.
- adjusting the air flow intensity.
- selecting the mode of operation.
- vertical shutter control.
- horizontal shutter control.
- item name.
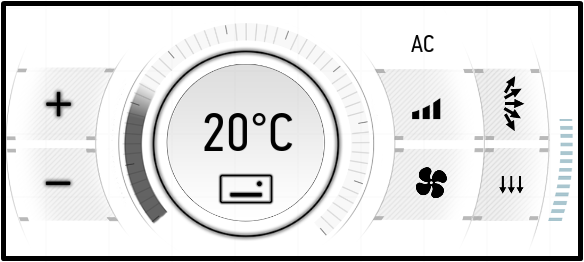
In the screenshot above, the air conditioner is configured for a temperature of 24 degrees in the heating mode at full fan power.

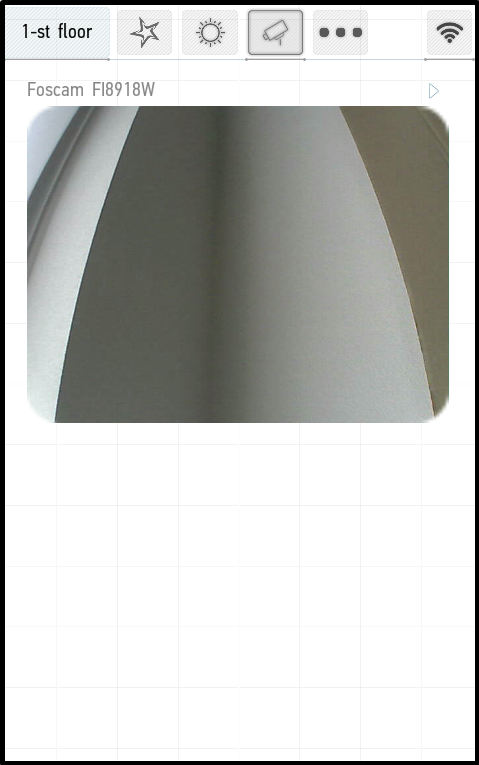
Cameras
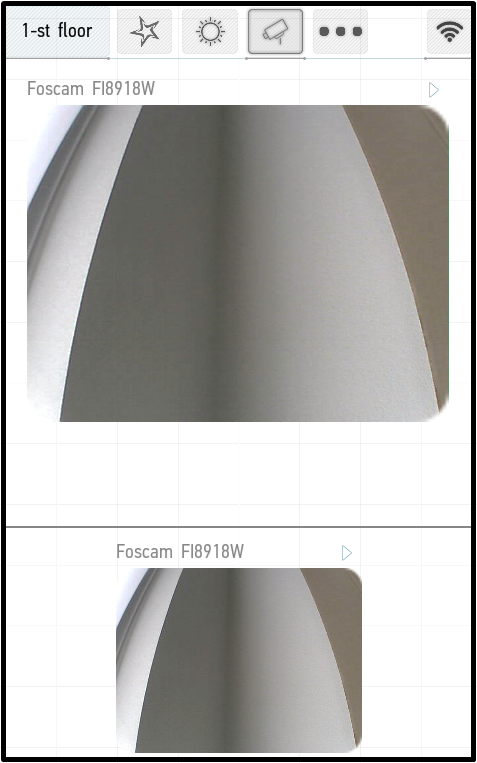
The camera menu allows you to view images from cameras connected to the system. You can start and stop the broadcast by a single click on the image.
Double click on the image will open the full screen mode. If the camera supports appropriate functions, the control panel will be displayed, which you can use to control the camera position.
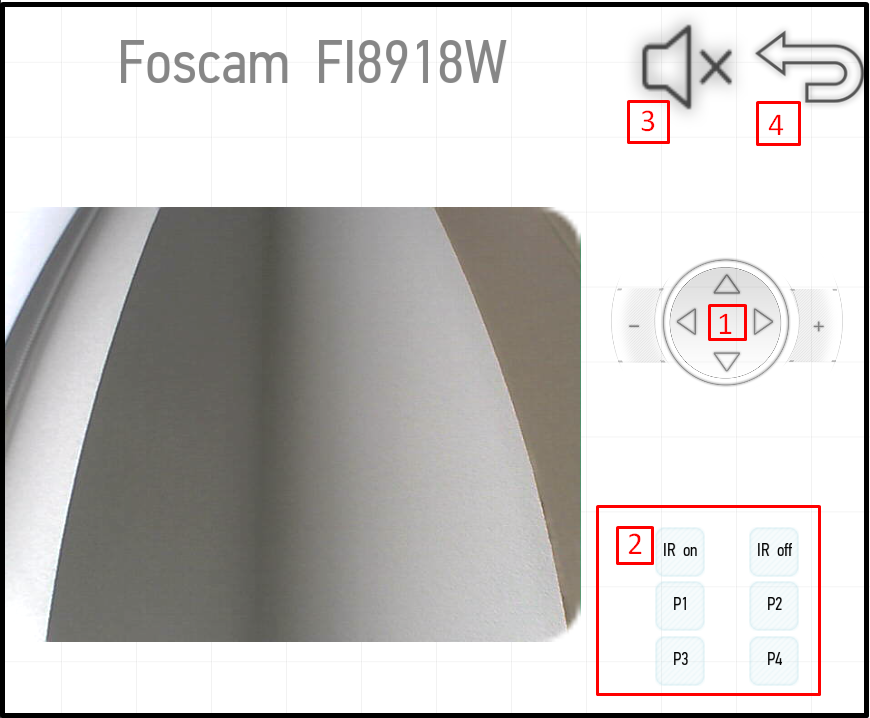
The panel contains the following buttons:
- joystick for the camera movement and buttons for zoom in and out ("+" and "-") on the sides;
- buttons for position preset (if supported by the camera): set the desired camera position, than press and hold one of the four keys (P1, P2, P3, or P4); subsequently you can quickly switch to this position by pressing the corresponding button;
- sound on/off button (if supported by the camera);
- exit button.
You can fix the image from the camera in order to go to other pages of the application and watch the image from the camera. To do this, press and hold the camera screen by your finger until an additional panel appears at the bottom of the screen (see the screenshot below).
This panel will also be available in other application menus, and the broadcast will continue. You can also fix multiple cameras.
To close the panel, press and hold the additional screen until the panel disappears.

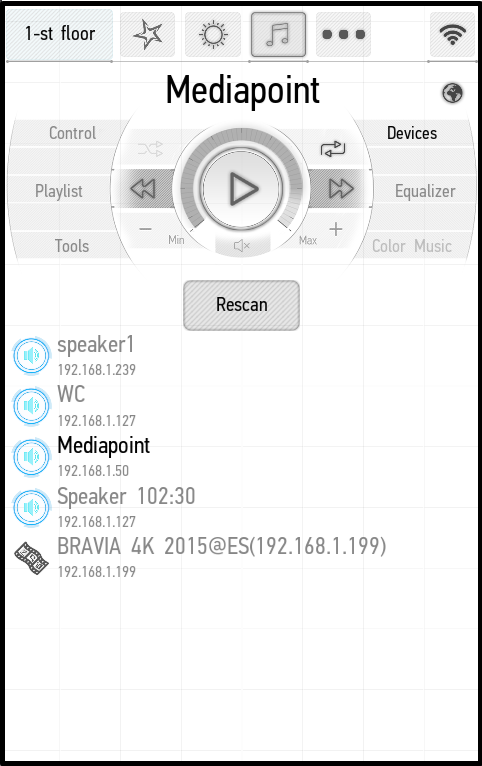
Multiroom
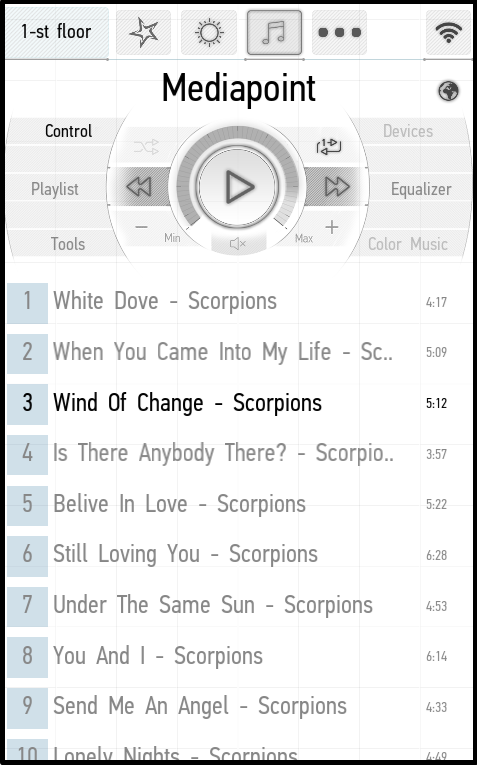
You can use this tab to control media points in the rooms: turn on and off music, adjust the volume, download playlists and much more.

- Play button: a single click starts or pause the music; double click acts as the Stop button, and stops the music completely.

- Shuffle button: when it is activated, tracks are played in random order.


- go to the previous track.

- go to the next track.
![]()
- decrease the volume level.
![]()
- increase the volume level.
![]()
- sound off and on.
You can control the sound volume not only using the buttons on the screen, but also using the volume buttons on your smartphone or tablet. Also, you can click on the round field around the Play button to set the desired volume.
Control tab
This tab displays the control panel and the current playlist.
Playlist tab
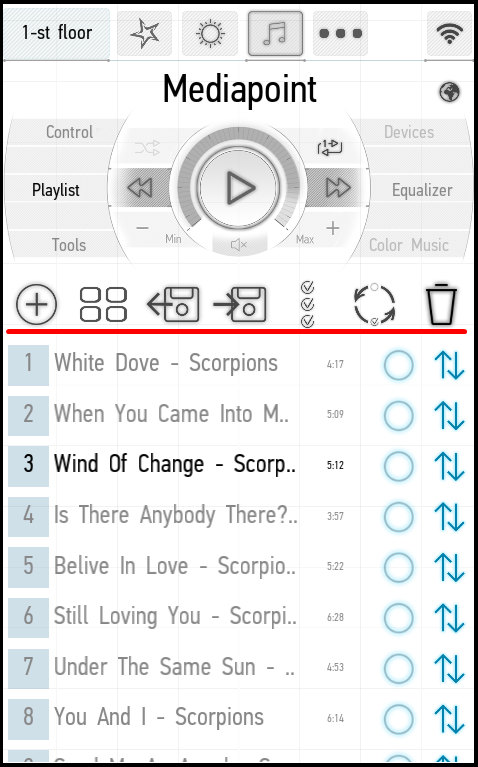
When the Playlist tab is active, an additional panel appears above the track list (above the red line in the screenshot above). The panel contains the following buttons (from left to right):

- add music – when pressed, it allows you to select the source of media files (media point, NAS, etc.); go to it and add tracks;

- download playlist – it allows you to load a previously saved playlist;

- save playlist – it saves the current playlist (the playlist is saved in the memory of your device; the playlist will not be available to other users on other devices);

- select all tracks;
- invert selection – it removes selection from the selected tracks and adds it to the rest tracks;


- delete – it deletes the selected tracks.
In addition, each track can be selected and moved to the desired place. Tick the boxes next to the tracks you want to move and drag them up or down the playlist.
Tools tab
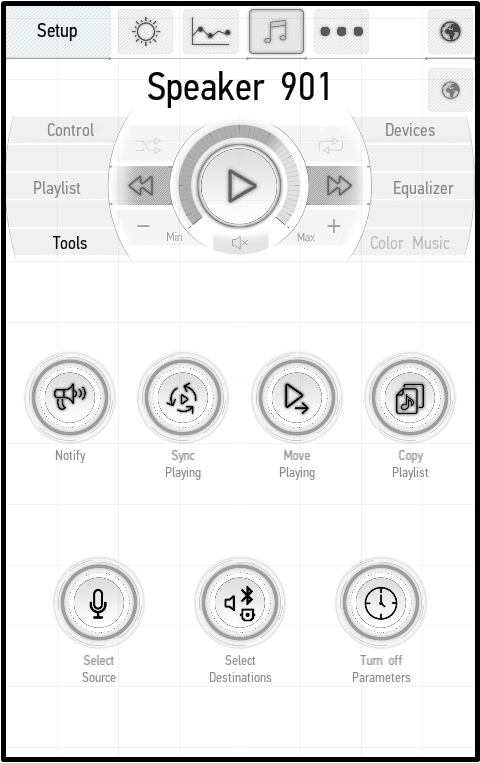
The Tools tab contains various tools:
● Notify – it allows you to select one or more media points, record a message and play it on the selected media points.
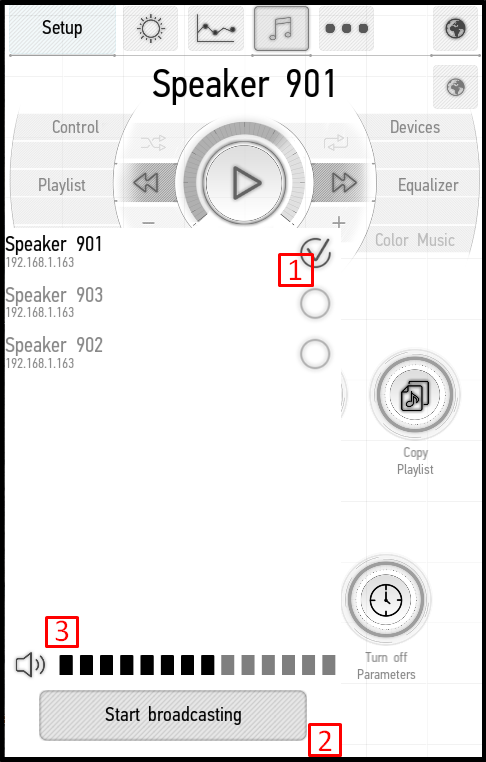
1. Tick the box (marked 1) to select the media point.
2. Click Start broadcasting (the button marked 2). A message recording will start, the Stop broadcasting inscription will appear on the button. Click on it to stop recording.
3. The selected media point will play the recorded message. The button marked 2 will have the Cancel broadcasting inscription. Click on it to cancel the message broadcasting. The slider marked 3 in the screenshot can be used to change the volume.
● Sync Playing – it allows you to synchronize several media points connected to the Smart Home system.
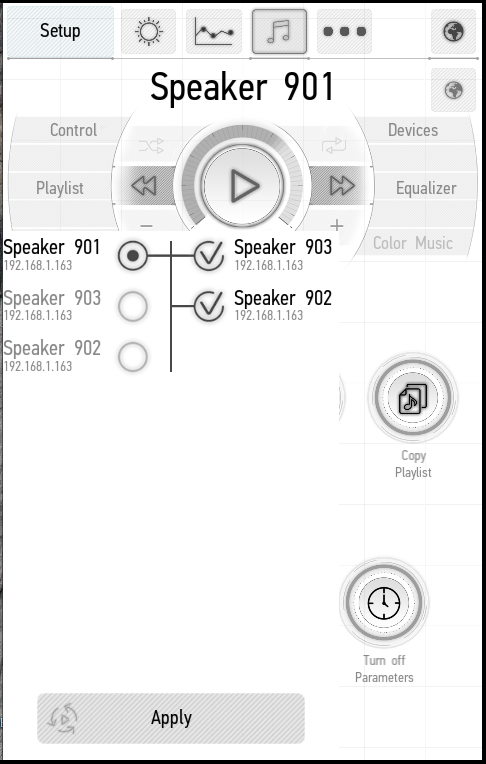
In the left part of the list you can select one media point, which will be a master used by other media points to achieve their synchronization. In the right part, you must to select the media points that will be synchronized.
To confirm the selection, click Apply at the bottom of the window. After synchronization, the selected media points will play the same playlist as the original media point.
You can control the master in order to control the playback of all synchronized media points.
● Move Playing – it allows you to transfer the playlist and the current playback position.
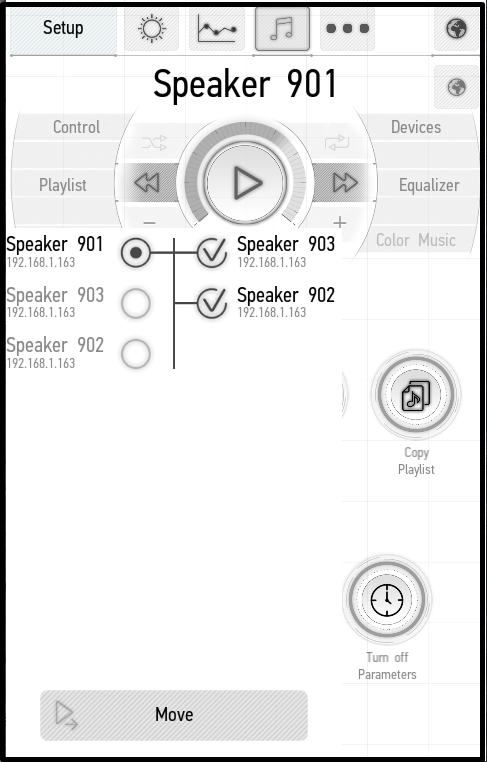
In the left part of the screen you need to select the media point which the current playback will be transferred from. In the right part, you need to select the media points which the playback will be transferred to.
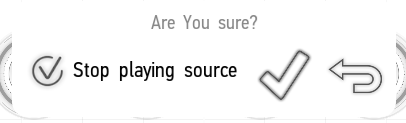
To transfer, click Move. A dialog box appears with the Stop playing source option. If you want to stop the playback at the starting point, tick the box; if you want the playback to continue, do not tick the box. After transferring, the media points will work independently.
● Copy Playlist – it allows you to copy a playlist from one media point to another.
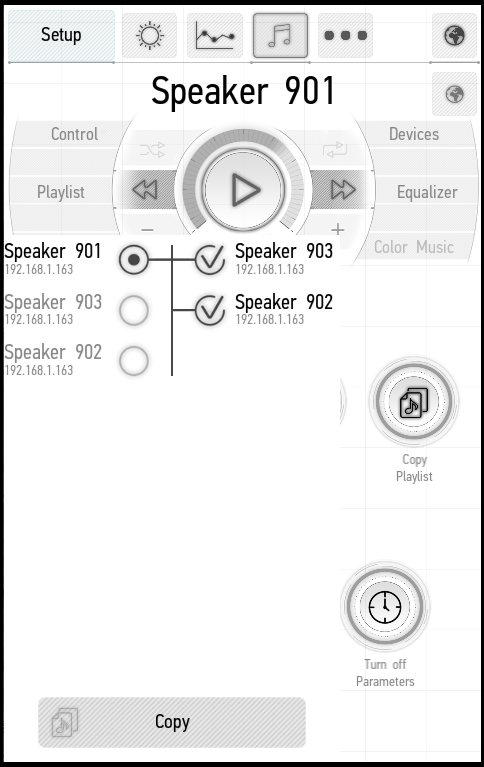
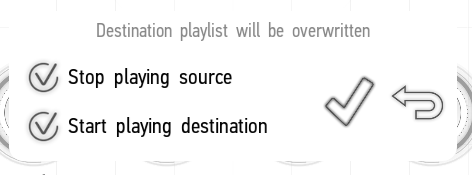
In the left part of the window you need to select the media point whose playlist will be copied. In the right part of the window you need to select the media points which the playlist will be copied to. After selecting, click Copy. A dialog box appears with the options Stop playing source (stop playing on the original media point) and Start playing destinations (start playing on the media points which the playlist is copied to). Tick the boxes next to desired options and click on the appropriate button to confirm the selection.
● Select Source – it allows you to select a playback source.
The appeared window provides the list of connected devices. The active playback source is highlighted in orange.
You can choose the source among the devices connected to the FE-MP media point (SPDIF, Bluetooth, USB-analog-to-digital-converter etc).
Click on it to change the playback source.
● Select Destinations – it allows you to select the audio output on the media point.
The appeared window provides the available audio outputs. The active audio output is highlighted in orange.
You can choose the audio output among the devices connected to the FE-MP media point (SPDIF, Bluetooth, and USB-analog-to-digital-converter etc).
Click on it to change the audio output.
● Turn off Parameters – it allows you to customize the playback stop for a specified number of minutes or tracks.
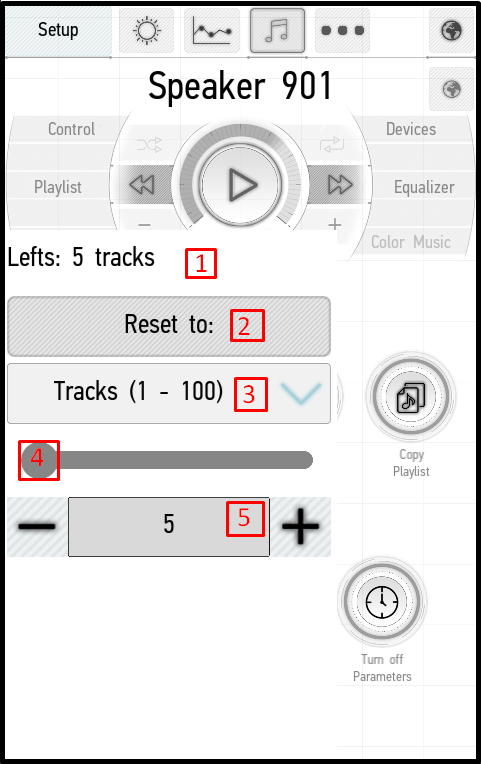
- It displays how many tracks or minutes are left before the playback stop.
- The Reset to button resets the countdown to the preset parameters.
- The choice of countdown units – Minutes or Tracks.
- The slider allows you to set the number of minutes (from 1 to 1440) or tracks (from 1 to 100) until the stoppage.
- Use the + and - buttons to set the number of minutes or tracks until the stoppage. Use 3, 4 and 5 buttons to adjust the mode parameters, and press Reset to (marked 2) to start the countdown.
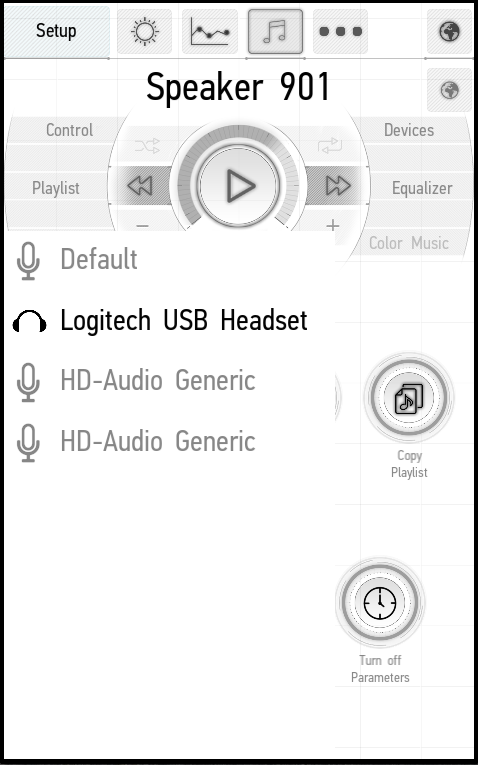
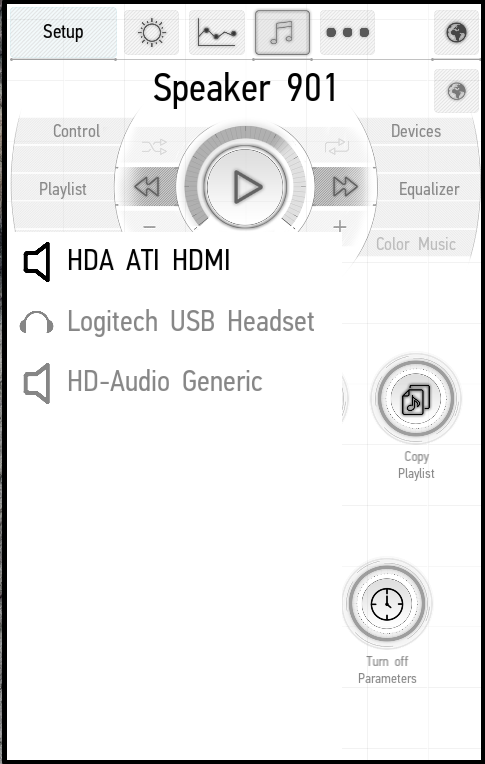
Devices tab
This tab allows selecting which media point will be used to control
Equalizer tab
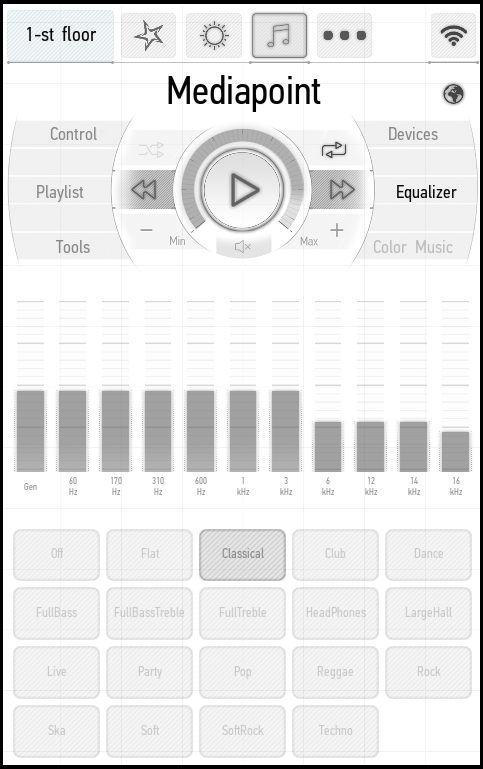
11-band equalizer – set the desired position of each band by clicking or dragging it. The buttons at the bottom of the screen are used to select presetting for different styles of music.
Color Music Tab
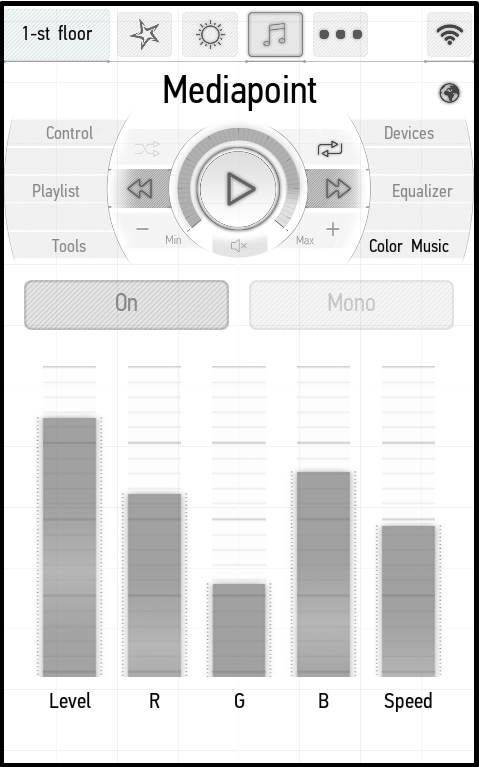
Color music panel. If you have bound an RGB backlight to the media point (see Edit Items -> Edit Multiroom -> Color Music), you can adjust the color music. The Level slider sets the intensity level of LEDs, the Speed slider sets the speed of flicker. The R, G and B sliders can be used to set the frequency of occurrence for red, green and blue color, respectively.
The On/Off switch turns the color music on and off, and the Mono/Stereo switch toggles the mono and stereo modes.

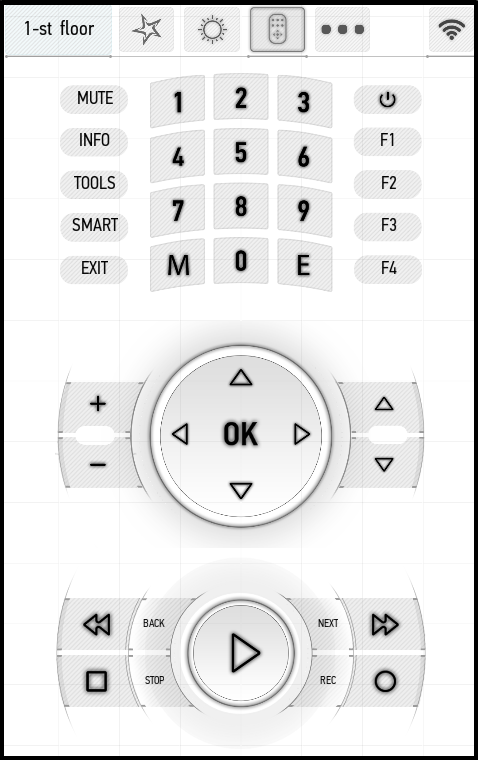
Remote controls
In the remote control panel you can control various devices through the Larnitech application. The buttons on the panel correspond to the buttons on the TV remote control. The panel provides an access to all main functions: turning the TV on and off, changing the volume, switching channels, the settings menu, etc.
You can have multiple remote controls, and then the tabs will appear on the screen for selecting the desired remote control.