Управление элементами системы
Верхняя панель
В приложении Larnitech можно управлять элементами, просматривать показания датчиков, просматривать изображение с камеры, пользоваться пультами управления и многими другими функциями. Элементы сгруппированы в разделы в соответствии с их функциональностью; вы можете использовать верхнюю панель для переключения между разделами.


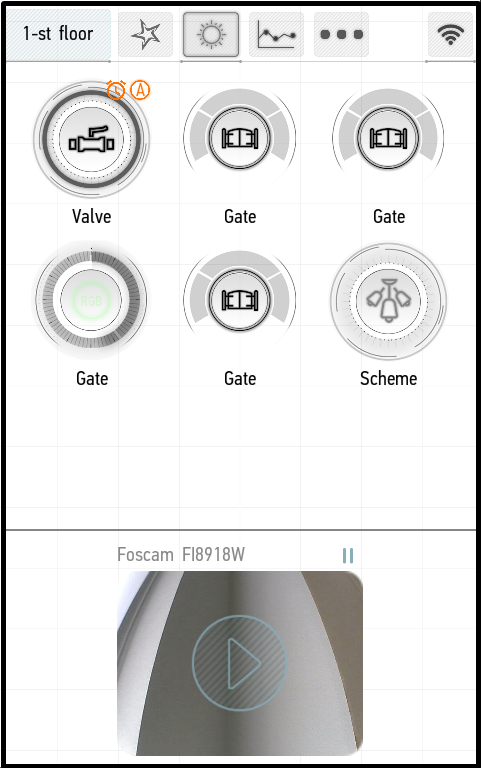
Приводы
Панель Приводы (Actuators) включает в себя такие элементы, как освещение, двери, ворота, жалюзи и т.д. Рассмотрим более подробно, как управлять каждым приводом.
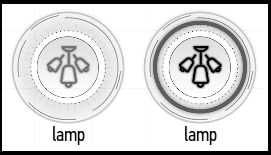
Включение и выключение освещения осуществляется однократным нажатием на элемент.
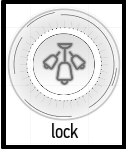
С помощью этого элемента вы сможете открыть замок. Замок открывается однократным нажатием на указанный в системе временной интервал.
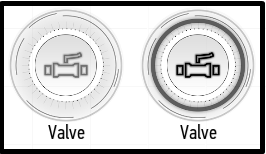
Открытие и закрытие клапанов осуществляется однократным нажатием на элемент. К клапанам можно прикрепить датчики протечки – тогда они будут автоматически закрываться при обнаружении протечки (см. Edit Items -> Auto -> Valve Automation)
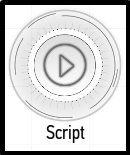
Элемент Скрипт (Script) выполняет заданный набор действий. Запускается однократным нажатием на элемент. Вы можете создать Скрипт через веб-панель управления системой Умный Дом (LT Setup).
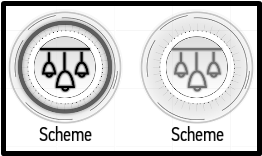
Пункт Световая схема (Light-scheme) позволяет включать и выключать несколько элементов одновременно. Включается и выключается однократным нажатием..
Рядом со значком элемента могут располагаться следующие пиктограммы, указывающие на индивидуальную автоматизацию или аварийный режим:
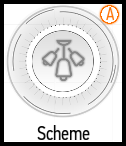
- оранжевая буква «А» в правом верхнем углу указывает на активированный режим автоматизации;
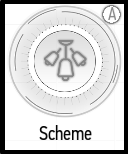
- серая буква «А» в правом верхнем углу указывает на временно неактивную настройку автоматизации.
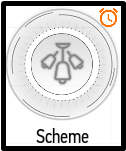
- будильник в правом верхнем углу экрана указывает на активное расписание;
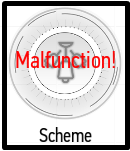
- аварийный режим: на модуле сработала защита, использование элементов невозможно.
Длительное нажатие на значок элемента позволит вам просмотреть историю (см. History).
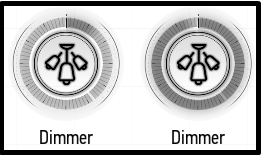
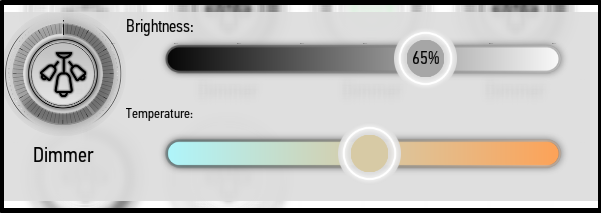
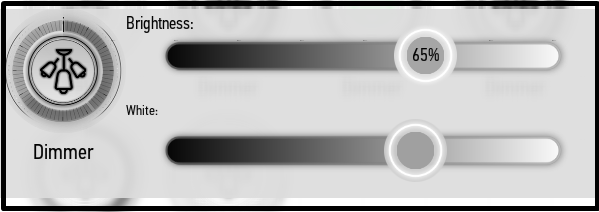
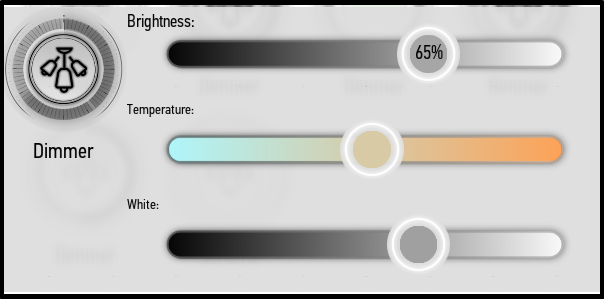
Диммер
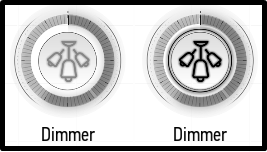
Диммер — это лампа с регулируемой яркостью. Включается и выключается однократным нажатием на элемент. Чтобы изменить яркость, нажмите на элемент дважды. Появится ползунок, с помощью которого можно установить желаемую яркость (см. скриншот ниже).
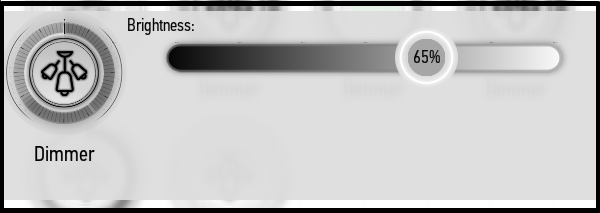
Вы также можете изменить яркость, перетащив синюю шкалу по контуру значка элемента:
Диммер может дополнительно иметь регулировку цветовой температуры и/или баланса белого. На скриншотах ниже диммеры имеют эти регулировки по отдельности и вместе.
RGB
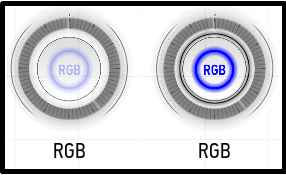
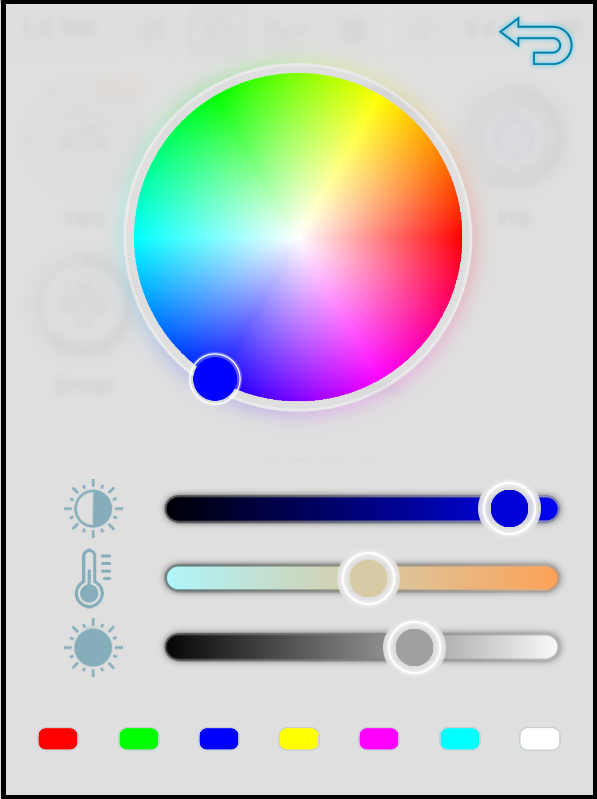
Подсветка RGB может менять яркость и цвет. Он включается и выключается однократным нажатием на элемент. Если вы хотите изменить цвет и яркость подсветки, нажмите на элемент дважды. На экране появится палитра (см. скриншот ниже). Вы можете использовать большую круглую палитру, чтобы выбрать нужный оттенок. Горизонтальный ползунок под ней позволяет установить желаемую яркость. На нижней панели представлены основные цвета для быстрого переключения.
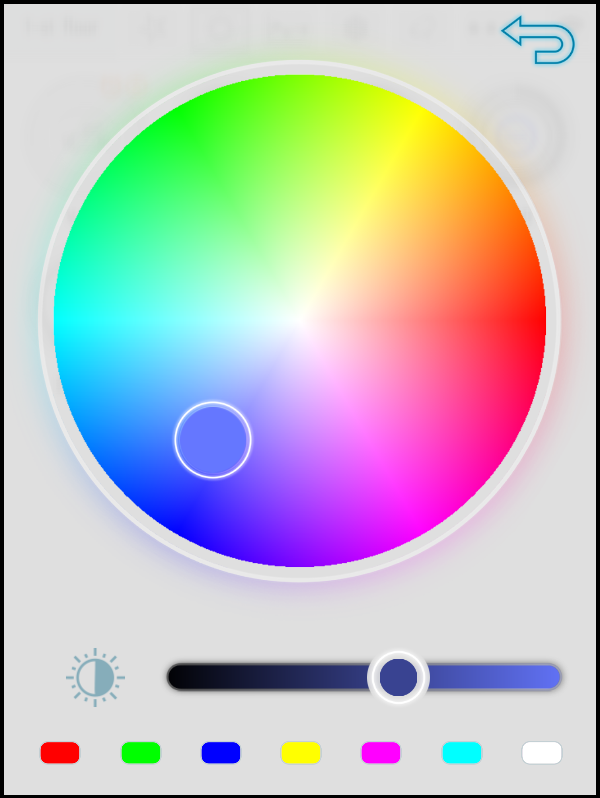
Как и диммер, RGB-подсветка может иметь дополнительную регулировку цветовой температуры и баланса белого:
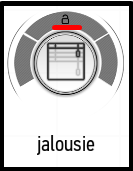
Жалюзи
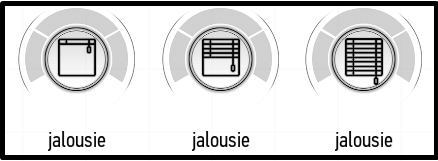
В приложении Larnitech вы можете закрывать, открывать и останавливать жалюзи. Пиктограмма элемента отображает текущее состояние жалюзи — полностью открыты, в среднем положении, полностью закрыты (см. скриншот выше).
Если подключены однополюсные жалюзи, значок всегда будет отображать среднее положение независимо от положения жалюзи.
Нажмите на элемент, чтобы открыть доступные функции. Кнопка с изображением закрытого замка закрывает жалюзи; кнопка с изображением открытого замка открывает жалюзи.
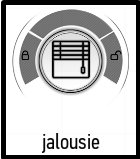
После выбора функции жалюзи начнут открываться или закрываться, на кнопке включается соответствующая анимация. В любой момент вы можете остановить закрытие или открытие с помощью кнопки, расположенной в верхней части элемента (см. скриншот ниже).
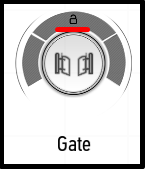
Ворота
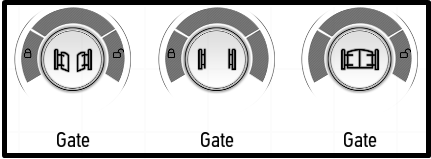
Чтобы закрыть или открыть ворота, нажмите на кнопку элемента и выберите нужную функцию слева или справа от кнопки: нажатие на значок с изображением открытого замка откроет ворота, а нажатие на значок с изображением закрытого замка закроет ворота.
Если подключены однополюсные ворота, значок всегда будет отображать среднее положение независимо от положения ворот.
Вы можете в любое время остановить процесс открытия или закрытия с помощью кнопки в верхнем секторе элемента.

Sensors
In the section of sensors you can track the actual indications of existed sensors, find out the status of doors, etc. Long press on the sensor icon allows you to view its history (see History)
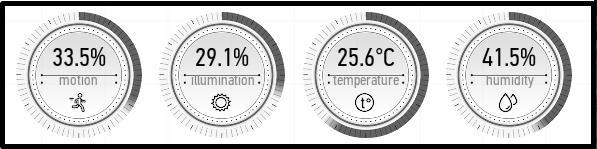
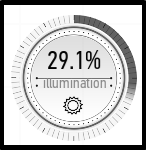
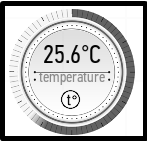
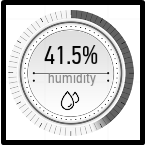
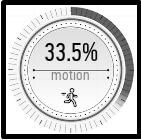
The screenshot above shows from left to right working motion, illumination, temperature and humidity sensors.
Motion sensor (Motion). It measures the motion level percentage. The motion level depends on the motion intensity and the size of the object – this allows you to filter the motion of pets.
Illumination sensor (Illumination). It measures the illumination level in relative units (from 0% to 100%).
Temperature sensor (Temperature). It measures the temperature in degrees Celsius. The range of the scale around the icon can be adjusted in the settings (see sensors, scale).
Humidity sensor (Humidity). It measures the relative humidity.
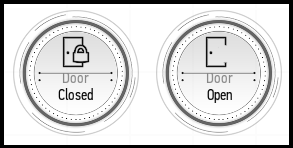
This screenshot shows the doors – closed and open.
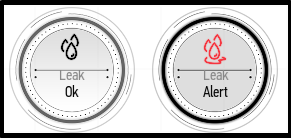
The leak sensor can indicate that the leakage is detected. The left screenshot above shows the sensor in its normal state – there is no leakage. The right screenshot shows the sensor indicating the leakage detected.
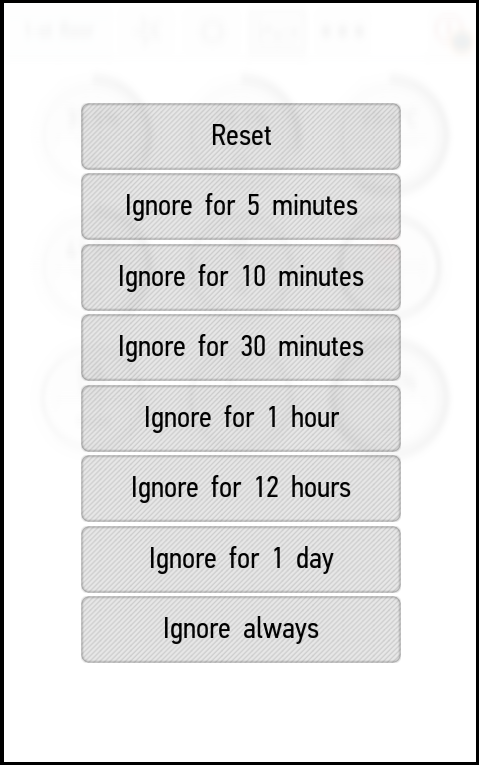
After eliminating the leakage, you need to reset the sensor in order to return it to its normal state. To do this, double-click the sensor button; in the menu that appears, click Reset.
If necessary, you can ignore the alarms received from the sensor. Double-click on it and select Ignore for and the desired period of ignoring. By pressing Ignore always, you will completely disable the alarm received from the sensor.
Until the sensor is not reset or ignored, you cannot open the water valve bound to it.

Climate
This section allows you to control radiators, air conditioners and fans installed in the room.
Ventilation
The ventilation control is carried out using the following interface (in the screenshot, the ventilation is turned off):
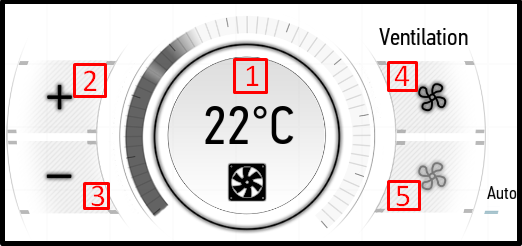
- – turning the ventilation on and off.
- – increasing the temperature.
- – decreasing the temperature.
- – increasing the air flow strength.
- – decreasing the air flow strength.
When setting the minimum level of the air flow strength, the automatic adjustment is enabled (it is enabled in the screenshot above).
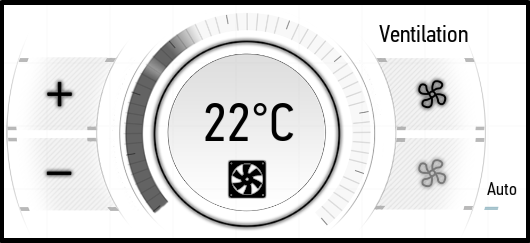
The ventilation is turned on:
Radiators
The radiator control is carried out using the following panel.
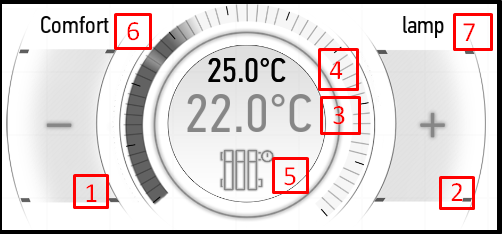
- The button for decreasing the temperature.
- The button for increasing the temperature.
- The temperature setting for the radiator.
- The temperature received from the bound sensor.
- Status: in the heating mode the button is highlighted in orange; in the inactive mode it is highlighted in gray.
- Active option of heating mode (see Heating Modes).
- Item name.
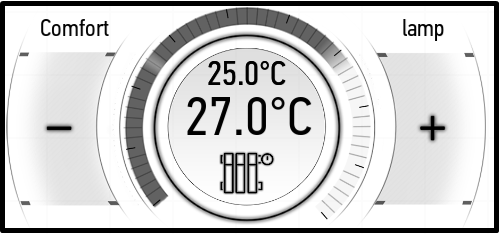
The + and - buttons can be used to set the desired temperature. Below this temperature the radiator will be turned on. In our case, the radiator is configured to a temperature of 26 degrees. If the room is colder, it will be turned on and start to heat the air. When the room temperature is 33.9 degrees, the radiator will be turned off.
If a particular temperature is specified in the settings for the current time period, then you can use the + and - buttons to change it for the current period.
In the screenshot above, we have configured the radiator for a temperature higher than the temperature in the room. As a result, it has been turned on and started to heat the room.
If no temperature sensors are bound to the radiator, then no measured temperature will be displayed.
The active heating mode is indicated in the upper left corner. It can be set in the Heating mode menu, and you can create and configure them in the edit menu (see Edit Items -> Edit Radiators). There are also manual control (Manual) mode and always off (Always off) mode. In manual control mode, you can turn on and off the radiator yourselves. In Always off mode, the radiator will always be off.
Air conditioner
The air conditioner control is carried out using the following item (in the screenshot below it is turned off).
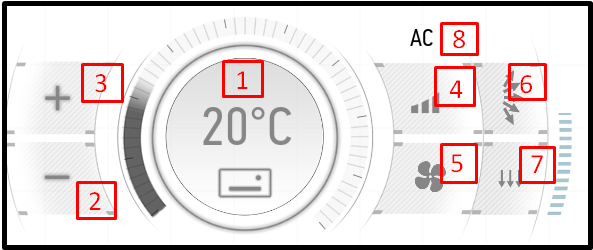
- turning the air conditioner on and off.
- decreasing the temperature.
- increasing the temperature.
- adjusting the air flow intensity.
- selecting the mode of operation.
- vertical shutter control.
- horizontal shutter control.
- item name.
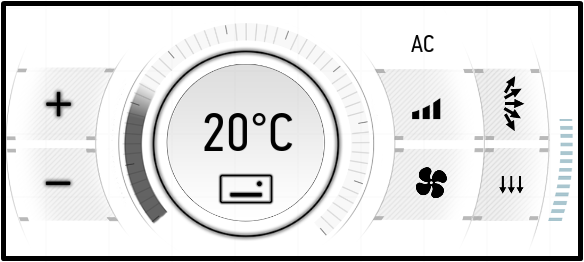
In the screenshot above, the air conditioner is configured for a temperature of 24 degrees in the heating mode at full fan power.

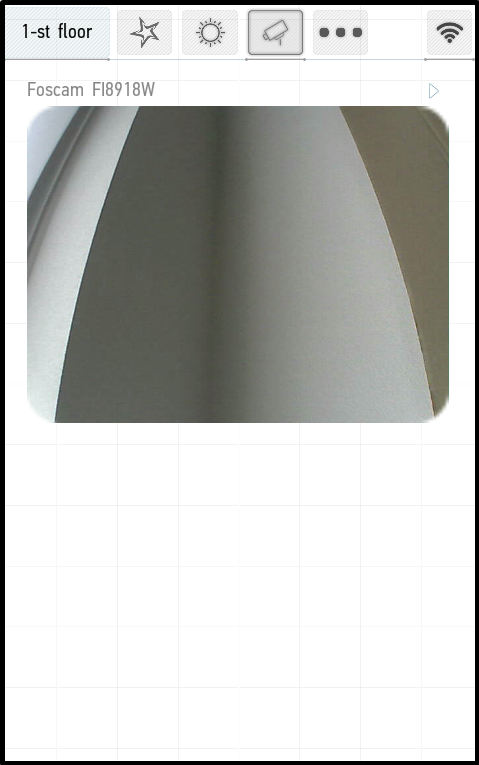
Cameras
The camera menu allows you to view images from cameras connected to the system. You can start and stop the broadcast by a single click on the image.
Double click on the image will open the full screen mode. If the camera supports appropriate functions, the control panel will be displayed, which you can use to control the camera position.
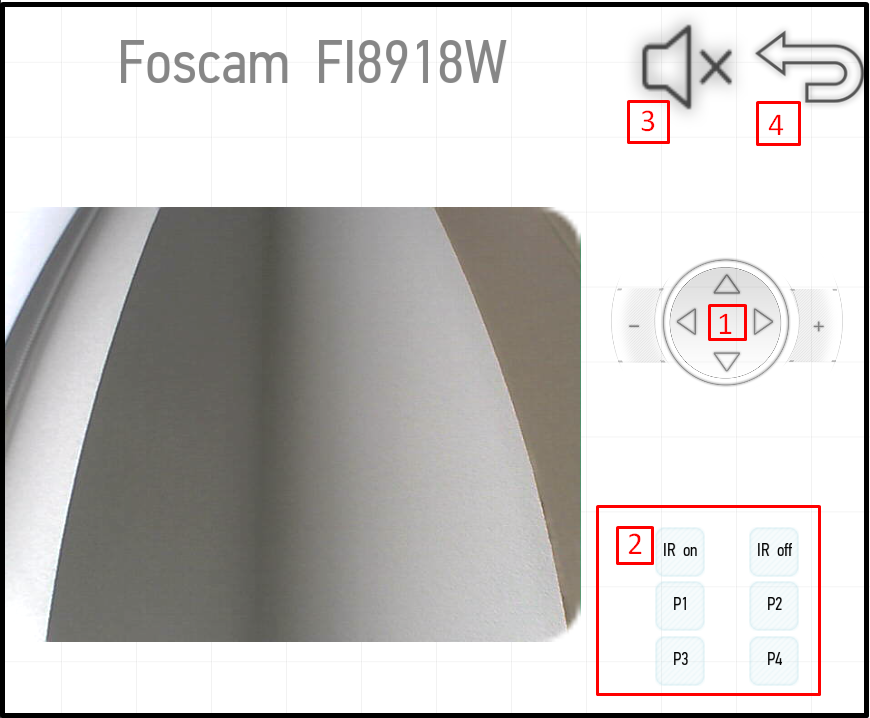
The panel contains the following buttons:
- joystick for the camera movement and buttons for zoom in and out ("+" and "-") on the sides;
- buttons for position preset (if supported by the camera): set the desired camera position, than press and hold one of the four keys (P1, P2, P3, or P4); subsequently you can quickly switch to this position by pressing the corresponding button;
- sound on/off button (if supported by the camera);
- exit button.
You can fix the image from the camera in order to go to other pages of the application and watch the image from the camera. To do this, press and hold the camera screen by your finger until an additional panel appears at the bottom of the screen (see the screenshot below).
This panel will also be available in other application menus, and the broadcast will continue. You can also fix multiple cameras.
To close the panel, press and hold the additional screen until the panel disappears.

Multiroom
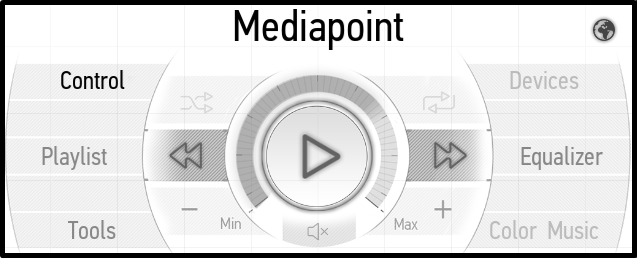
You can use this tab to control media points in the rooms: turn on and off music, adjust the volume, download playlists and much more.

- Play button: a single click starts or pause the music; double click acts as the Stop button, and stops the music completely.

- Shuffle button: when it is activated, tracks are played in random order.


- go to the previous track.

- go to the next track.
![]()
- decrease the volume level.
![]()
- increase the volume level.
![]()
- sound off and on.
You can control the sound volume not only using the buttons on the screen, but also using the volume buttons on your smartphone or tablet. Also, you can click on the round field around the Play button to set the desired volume.
Control tab
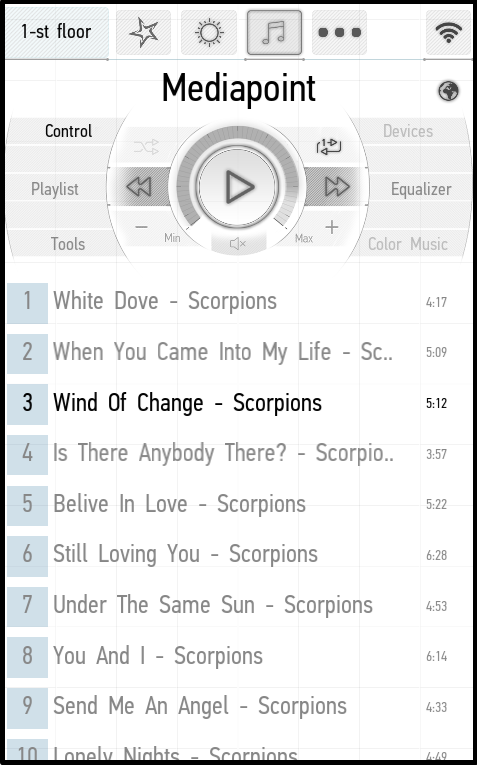
This tab displays the control panel and the current playlist.
Playlist tab
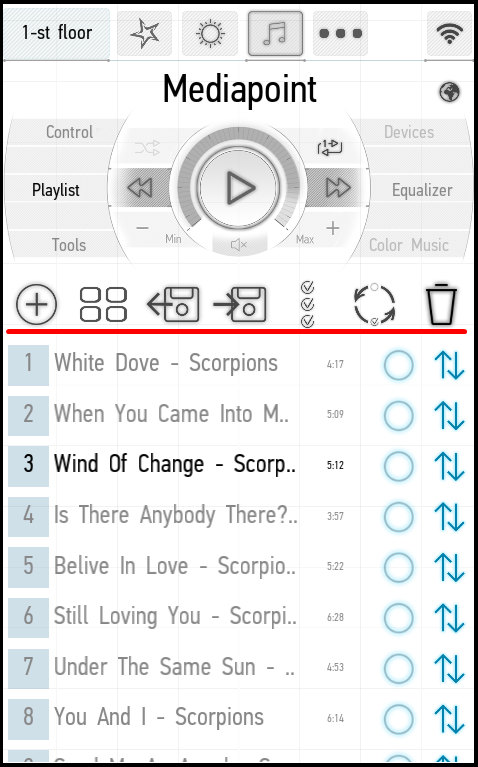
When the Playlist tab is active, an additional panel appears above the track list (above the red line in the screenshot above). The panel contains the following buttons (from left to right):

- add music – when pressed, it allows you to select the source of media files (media point, NAS, etc.); go to it and add tracks;

- download playlist – it allows you to load a previously saved playlist;

- save playlist – it saves the current playlist (the playlist is saved in the memory of your device; the playlist will not be available to other users on other devices);

- select all tracks;

- invert selection – it removes selection from the selected tracks and adds it to the rest tracks;

- delete – it deletes the selected tracks.
In addition, each track can be selected and moved to the desired place. Tick the boxes next to the tracks you want to move and drag them up or down the playlist.
Tools tab
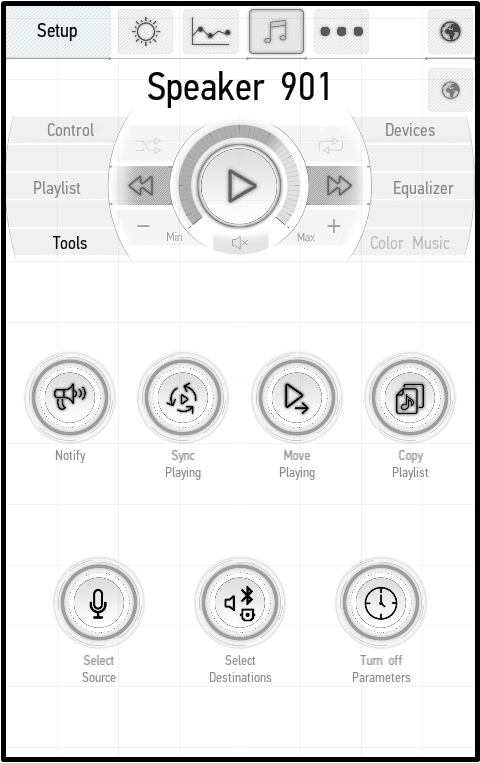
The Tools tab contains various tools:
● Notify – it allows you to select one or more media points, record a message and play it on the selected media points.
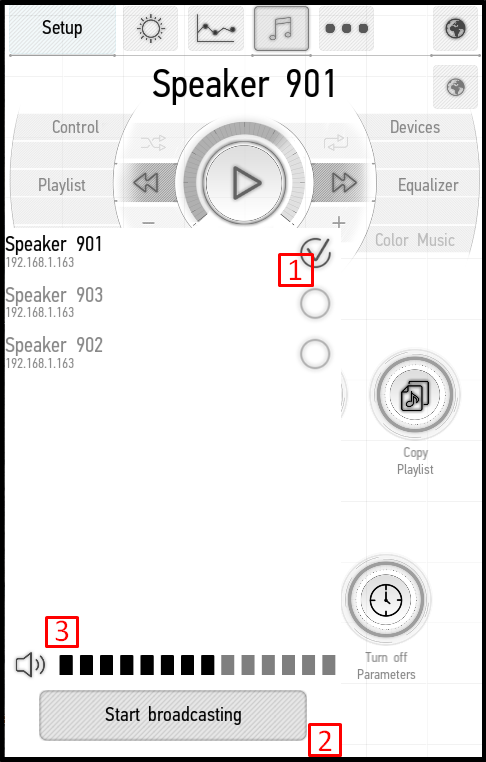
1. Tick the box (marked 1) to select the media point.
2. Click Start broadcasting (the button marked 2). A message recording will start, the Stop broadcasting inscription will appear on the button. Click on it to stop recording.
3. The selected media point will play the recorded message. The button marked 2 will have the Cancel broadcasting inscription. Click on it to cancel the message broadcasting. The slider marked 3 in the screenshot can be used to change the volume.
● Sync Playing – it allows you to synchronize several media points connected to the Smart Home system.
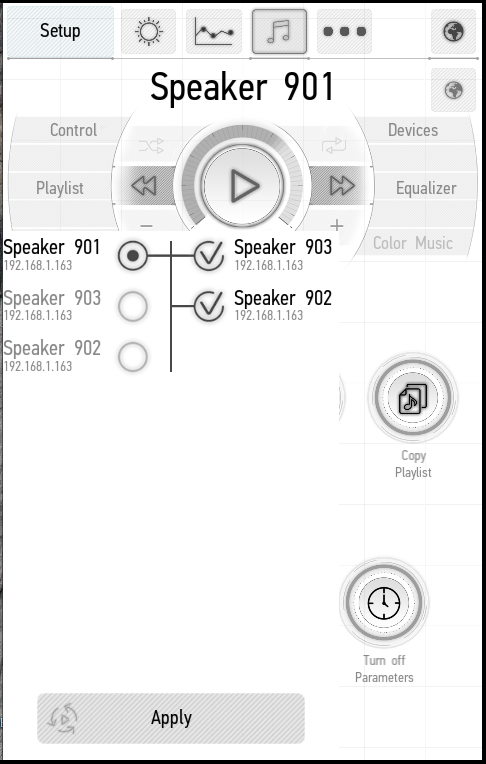
In the left part of the list you can select one media point, which will be a master used by other media points to achieve their synchronization. In the right part, you must to select the media points that will be synchronized.
To confirm the selection, click Apply at the bottom of the window. After synchronization, the selected media points will play the same playlist as the original media point.
You can control the master in order to control the playback of all synchronized media points.
● Move Playing – it allows you to transfer the playlist and the current playback position.
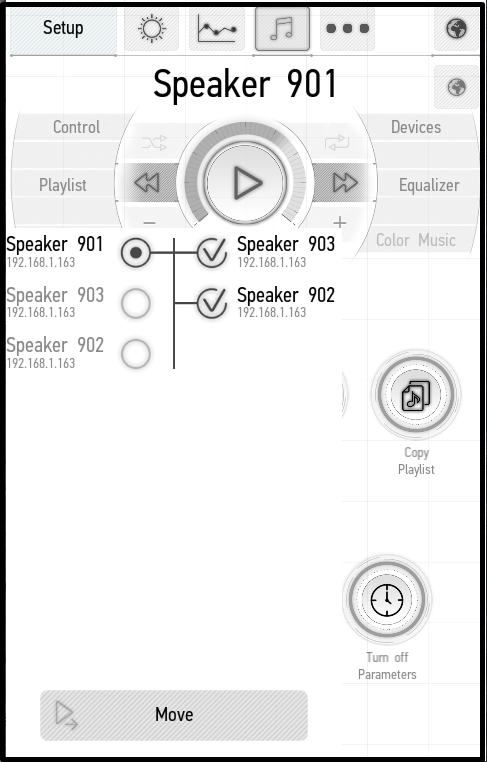
In the left part of the screen you need to select the media point which the current playback will be transferred from. In the right part, you need to select the media points which the playback will be transferred to.
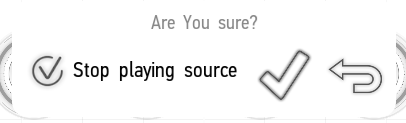
To transfer, click Move. A dialog box appears with the Stop playing source option. If you want to stop the playback at the starting point, tick the box; if you want the playback to continue, do not tick the box. After transferring, the media points will work independently.
● Copy Playlist – it allows you to copy a playlist from one media point to another.
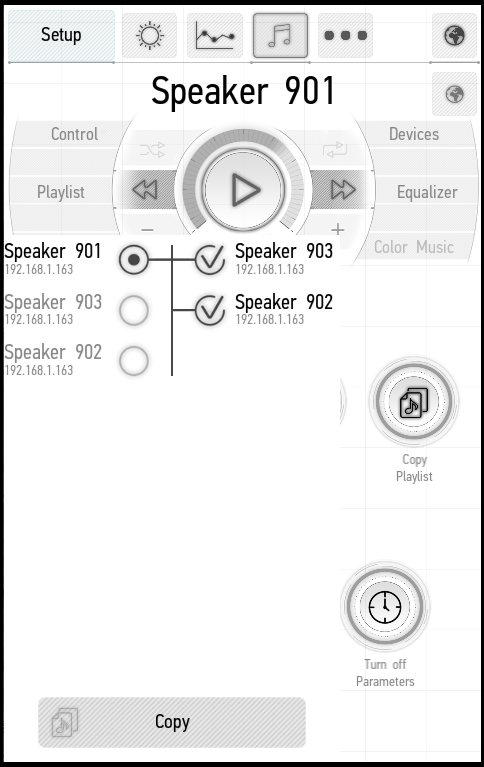
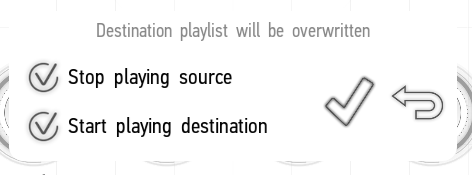
In the left part of the window you need to select the media point whose playlist will be copied. In the right part of the window you need to select the media points which the playlist will be copied to. After selecting, click Copy. A dialog box appears with the options Stop playing source (stop playing on the original media point) and Start playing destinations (start playing on the media points which the playlist is copied to). Tick the boxes next to desired options and click on the appropriate button to confirm the selection.
● Select Source – it allows you to select a playback source.
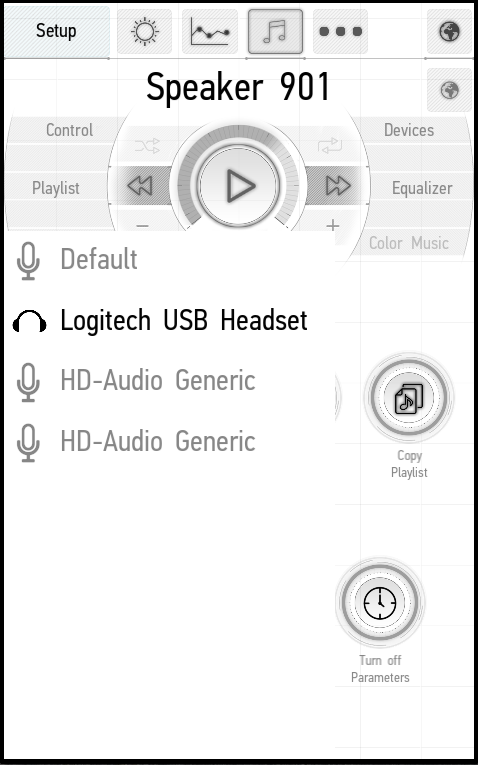
The appeared window provides the list of connected devices. The active playback source is highlighted in orange.
You can choose the source among the devices connected to the FE-MP media point (SPDIF, Bluetooth, USB-analog-to-digital-converter etc).
Click on it to change the playback source.
● Select Destinations – it allows you to select the audio output on the media point.
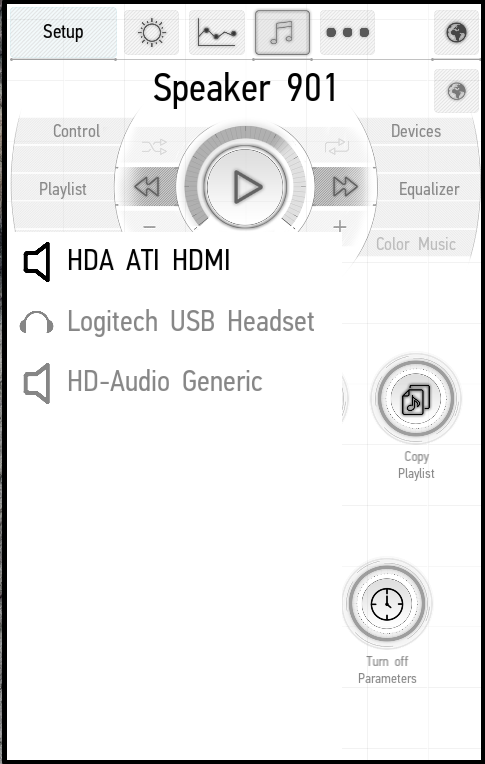
The appeared window provides the available audio outputs. The active audio output is highlighted in orange.
You can choose the audio output among the devices connected to the FE-MP media point (SPDIF, Bluetooth, and USB-analog-to-digital-converter etc).
Click on it to change the audio output.
● Turn off Parameters – it allows you to customize the playback stop for a specified number of minutes or tracks.
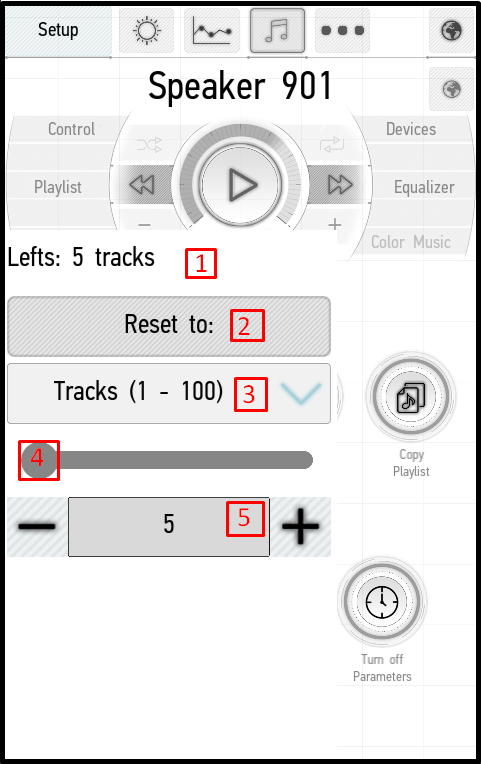
- It displays how many tracks or minutes are left before the playback stop.
- The Reset to button resets the countdown to the preset parameters.
- The choice of countdown units – Minutes or Tracks.
- The slider allows you to set the number of minutes (from 1 to 1440) or tracks (from 1 to 100) until the stoppage.
- Use the + and - buttons to set the number of minutes or tracks until the stoppage. Use 3, 4 and 5 buttons to adjust the mode parameters, and press Reset to (marked 2) to start the countdown.
Devices tab
This tab allows selecting which media point will be used to control
Equalizer tab
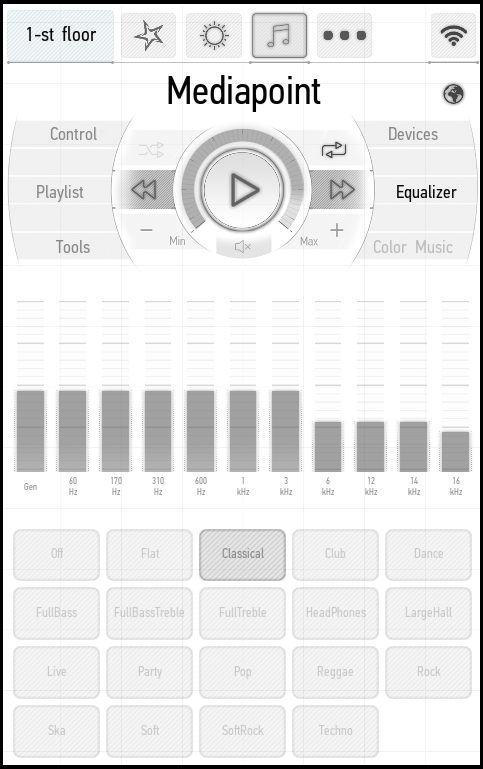
11-band equalizer – set the desired position of each band by clicking or dragging it. The buttons at the bottom of the screen are used to select presetting for different styles of music.
Color Music Tab
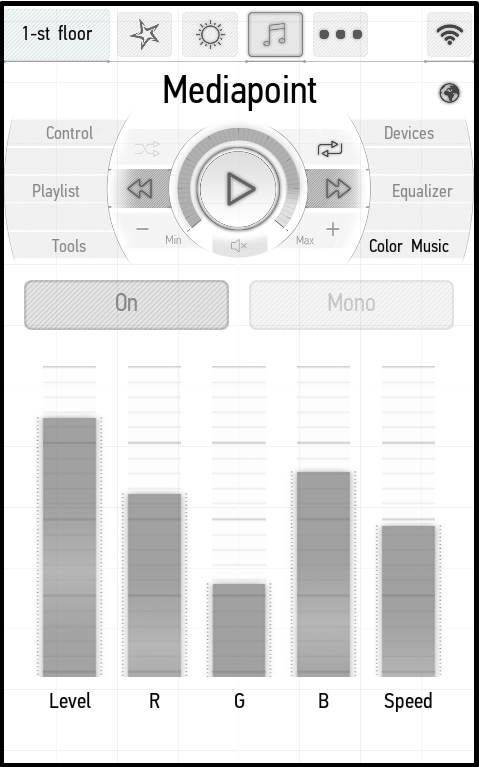
Color music panel. If you have bound an RGB backlight to the media point (see Edit Items -> Edit Multiroom -> Color Music), you can adjust the color music. The Level slider sets the intensity level of LEDs, the Speed slider sets the speed of flicker. The R, G and B sliders can be used to set the frequency of occurrence for red, green and blue color, respectively.
The On/Off switch turns the color music on and off, and the Mono/Stereo switch toggles the mono and stereo modes.

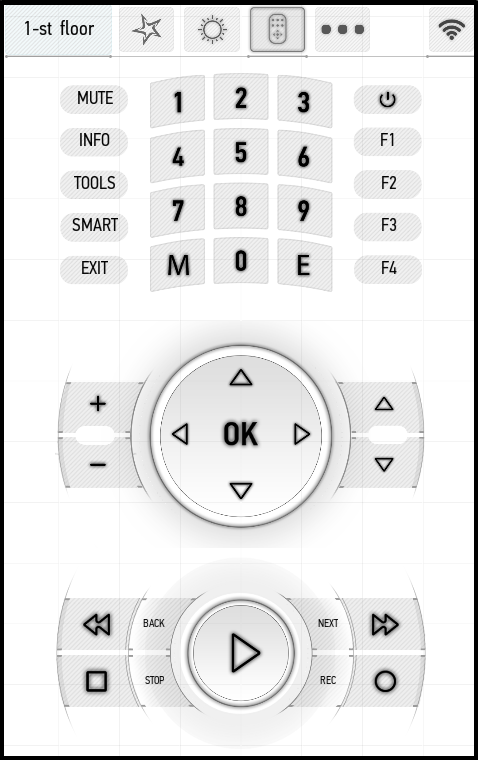
Remote controls
In the remote control panel you can control various devices through the Larnitech application. The buttons on the panel correspond to the buttons on the TV remote control. The panel provides an access to all main functions: turning the TV on and off, changing the volume, switching channels, the settings menu, etc.
You can have multiple remote controls, and then the tabs will appear on the screen for selecting the desired remote control.