Difference between revisions of "Modbus TCP/ru"
Jump to navigation
Jump to search
(Created page with "<li>Убедитесь, что у вас установлены последние версии программ LT Setup, LT Server, плагина ModBus TCP. <br>file:new...") |
(Created page with "<li>Перед включением настройте плагин. <br>700px|link=<br> <br>700px|link=<br> <br>file:newmodb...") |
||
| Line 10: | Line 10: | ||
</li> | </li> | ||
| − | <li> | + | <li>Перед включением настройте плагин. |
<br>[[file:newmodbus3.png|700px|link=]]<br> | <br>[[file:newmodbus3.png|700px|link=]]<br> | ||
<br>[[file:newmodbus4.png|700px|link=]]<br> | <br>[[file:newmodbus4.png|700px|link=]]<br> | ||
<br>[[file:newmodbus5.png|700px|link=]]<br> | <br>[[file:newmodbus5.png|700px|link=]]<br> | ||
| − | '''IP''' - IP | + | '''IP''' - IP-адрес устройства ModBus TCP, убедитесь, что вы можете пропинговать это устройство<br> |
| − | '''Port''' - 502 | + | '''Port''' - порт 502 в большинстве случаев является портом по умолчанию, однако проверьте документацию вашего устройства ModBus TCP для уточнений<br> |
| − | '''Master/Slave''' - | + | '''Master/Slave''' - опция выбора статуса добавляемого устройства - ведущее или ведомое<br> |
</li> | </li> | ||
Revision as of 10:39, 17 January 2022
Установка и настройка плагина ModBus TCP
- Убедитесь, что у вас есть лицензии ModBus TCP.
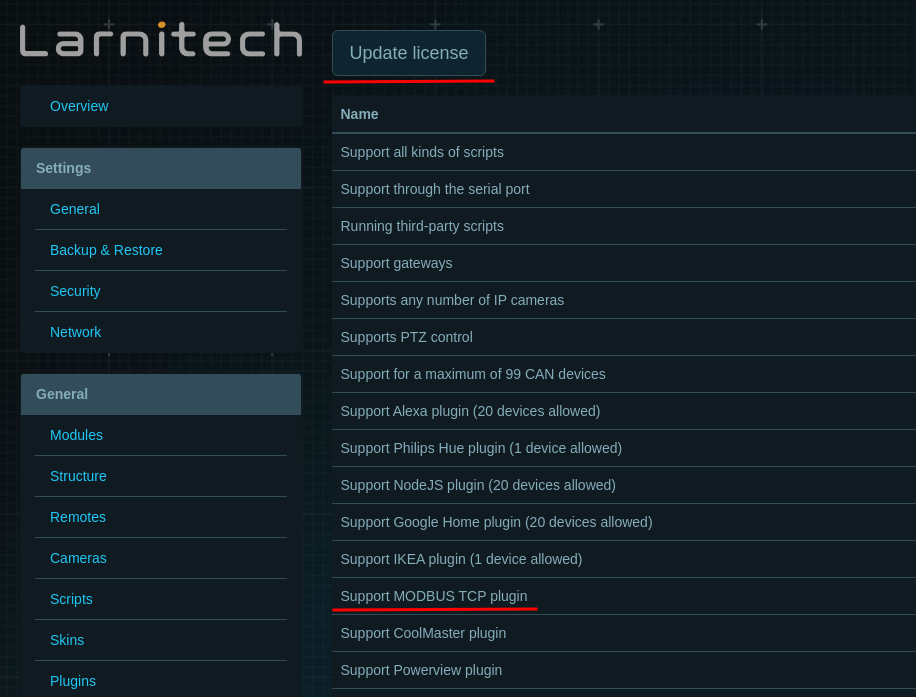
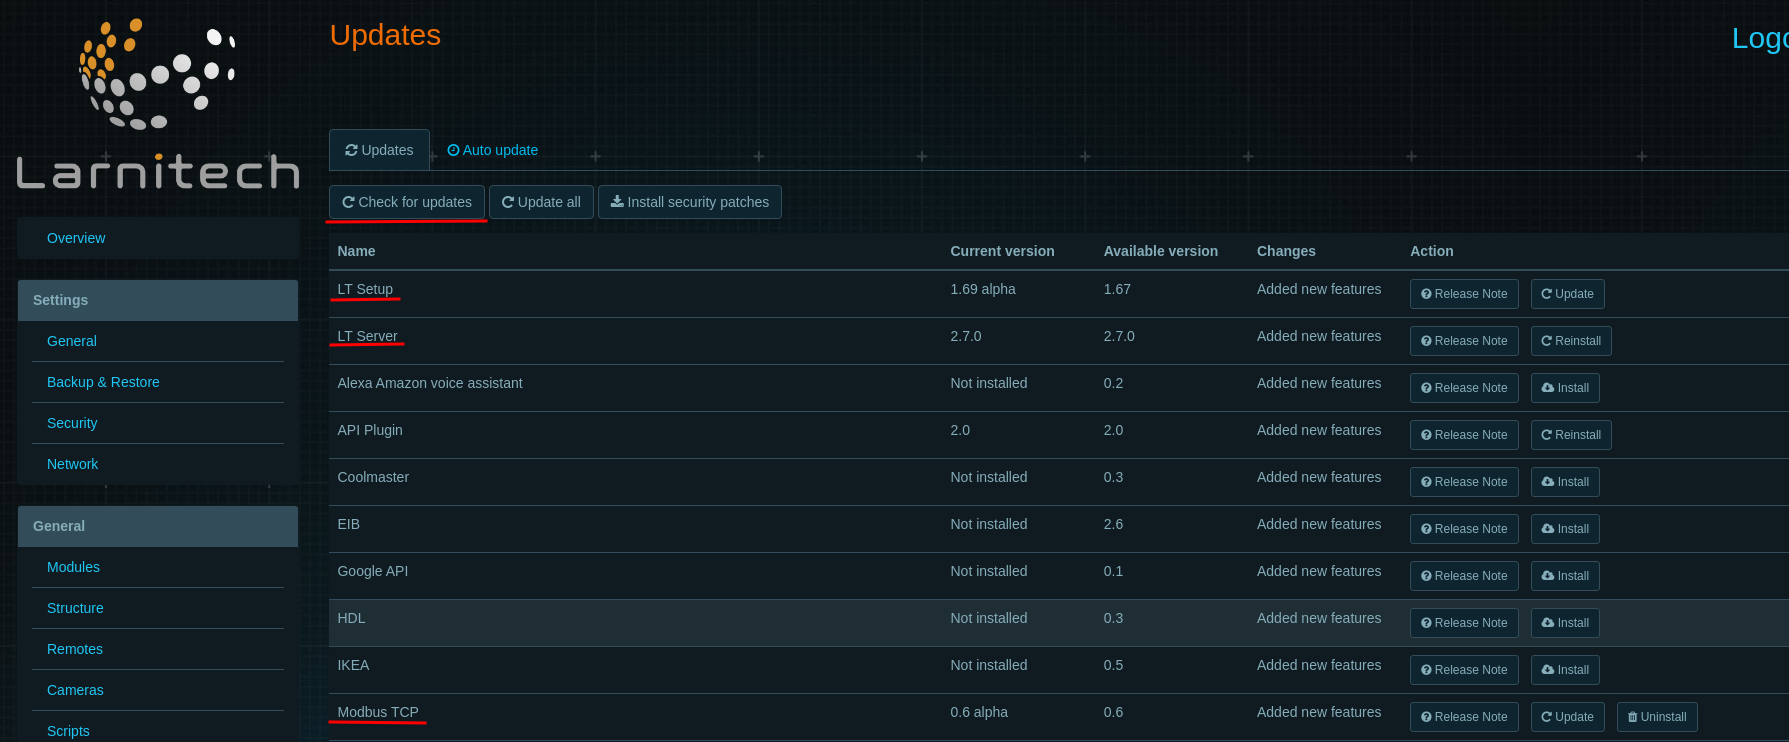
- Убедитесь, что у вас установлены последние версии программ LT Setup, LT Server, плагина ModBus TCP.
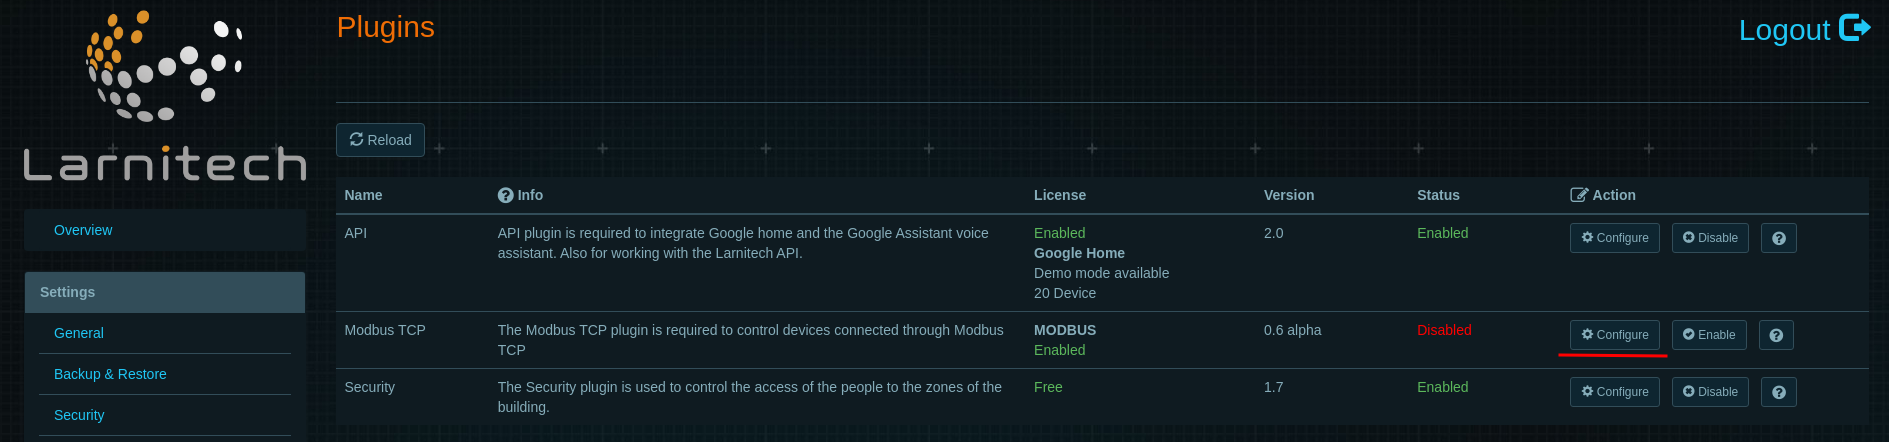
- Перед включением настройте плагин.

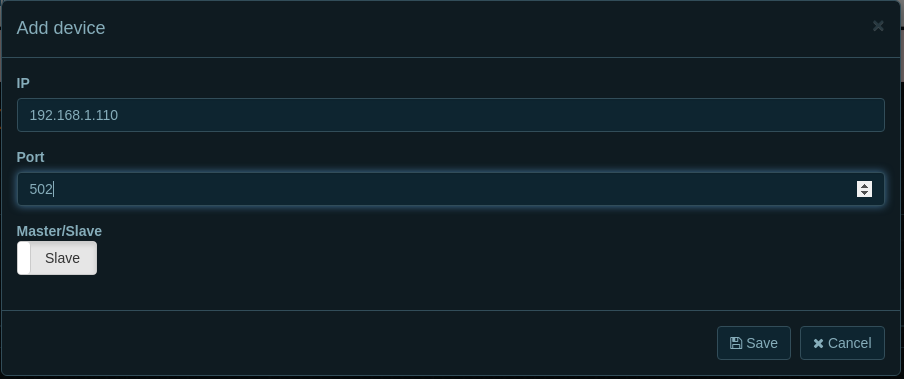
IP - IP-адрес устройства ModBus TCP, убедитесь, что вы можете пропинговать это устройство
Port - порт 502 в большинстве случаев является портом по умолчанию, однако проверьте документацию вашего устройства ModBus TCP для уточнений
Master/Slave - опция выбора статуса добавляемого устройства - ведущее или ведомое
- Enable plugin.

Examples
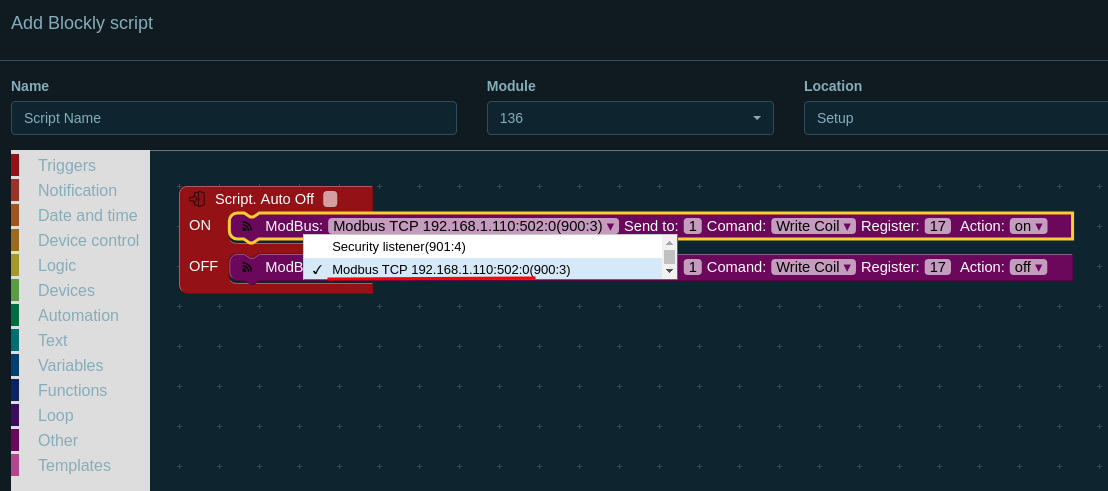
- Go to Scripts page and create Blockly script

- Add ModBus block from Other tab
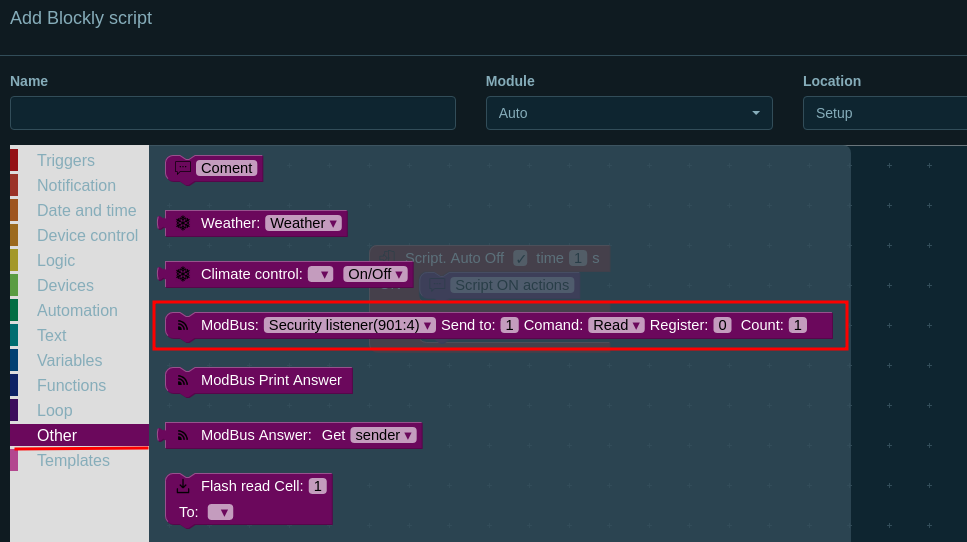
- Choose ModBus TCP com-port from dropdown list and fill other fields. Save script and try it.
Logs
Starting Service of MODBUS TCP plugin for Larnitech system...
Started Service of MODBUS TCP plugin for Larnitech system.
Compiled: Jul  7 2021 13:59:57
INF: Settings:
INF: debug yes - Debug mode is enabled
INF: modbus-devices 192.168.1.110:502:0
INF: Modbus 192.168.1.110:502:0 thread created
INF: Modbus 192.168.1.110:502:0 thread started
DEBUG: Modbus client: connected to 192.168.1.110:502:0 - Plugin connected to the device
DEBUG: Modbus client: waiting for messages for 192.168.1.110:502:0
DEBUG: Add message 01050011FF00 to 192.168.1.110:502:0 queue
DEBUG: Modbus thread unlocked for 192.168.1.110:502:0
DEBUG: Modbus client: send packet to 192.168.1.110:502:0 0x01050011FF00 - Send ‘ON’ to first coil
DEBUG: Modbus client: confirmation from 192.168.1.110:502:0 0x01050011FF00 - Right feedback from the device
DEBUG: Modbus client: waiting for messages for 192.168.1.110:502:0
DEBUG: Add message 010500110000 to 192.168.1.110:502:0 queue
DEBUG: Modbus thread unlocked for 192.168.1.110:502:0
DEBUG: Modbus client: send packet to 192.168.1.110:502:0 0x010500110000 - Send ‘OFF’ to first coil
DEBUG: Modbus client: confirmation from 192.168.1.110:502:0 0x010500110000 - Right feedback from the device
DEBUG: Modbus client: waiting for messages for 192.168.1.110:502:0