Краткое руководство по началу работы
Jump to navigation
Jump to search
- Connect DE-MG/Metaforsa to the local network and other devices via CAN bus.
- Power on the DE-MG/Metaforsa module and make sure that the power indicator light on the module is green.
- Use the PC browser to open the web interface of the DE-MG/Metaforsa system configuration http://192.168.1.111 (login: admin; password: admin by default).
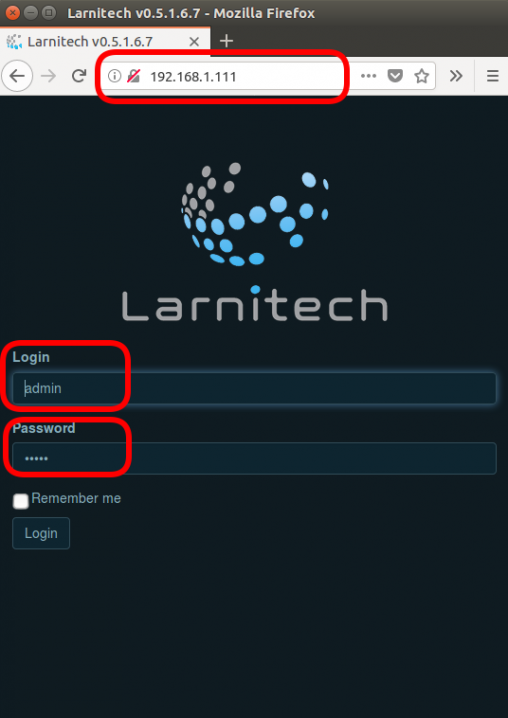
Make sure that your PC is applied to the same local network as the DE-MG/Metaforsa module and that the local network uses the address 192.168.1.x (otherwise follow the instruction to change the IP address). - Update the system in the Updates section if needed.
- Install the Larnitech application from Appstore or PlayMarket to your tablet or smartphone.
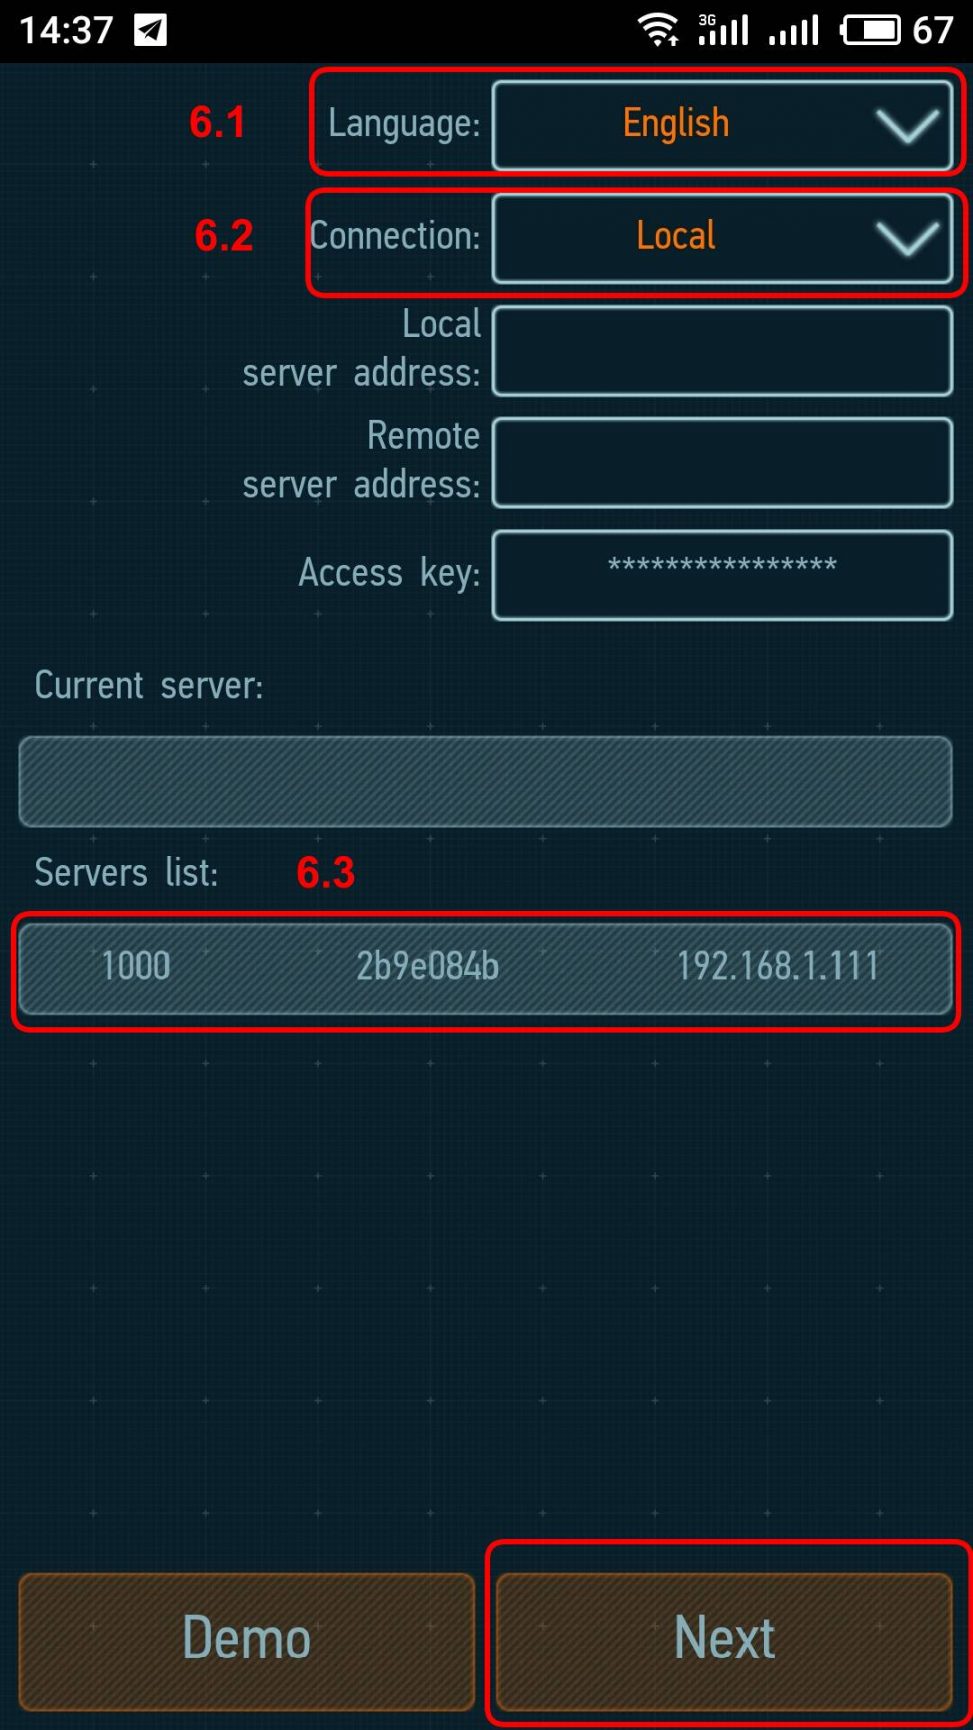
- Make sure that your tablet/smartphone is connected to the same local Wi-Fi network which the DE-MG/Metaforsa module is registered on. Start the application and enter the following parameters that will appear in the Settings field.
- Choose the language.
- Set the 'Connection' parameter to 'Local'.
- Your DE-MG/Metaforsa server should appear under the 'Servers list'. Choose it, then apply the settings by clicking ‘Next’.
- Available elements will be shown in the Setup field.
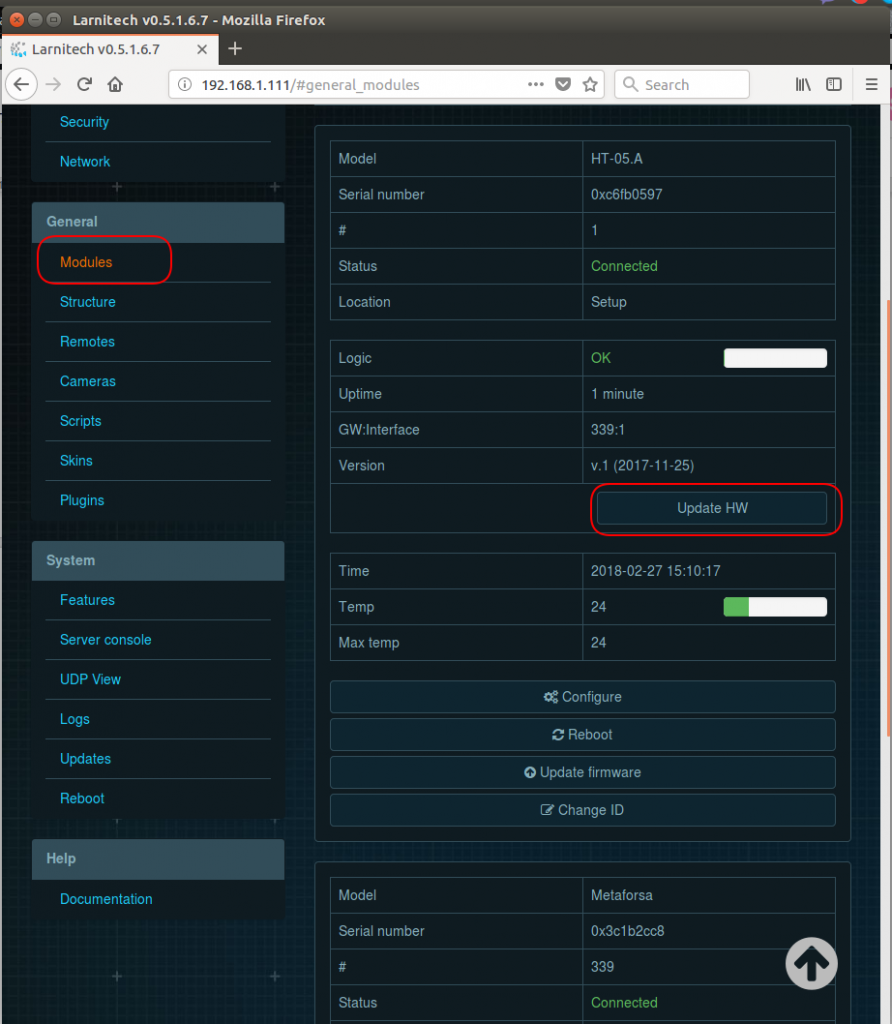
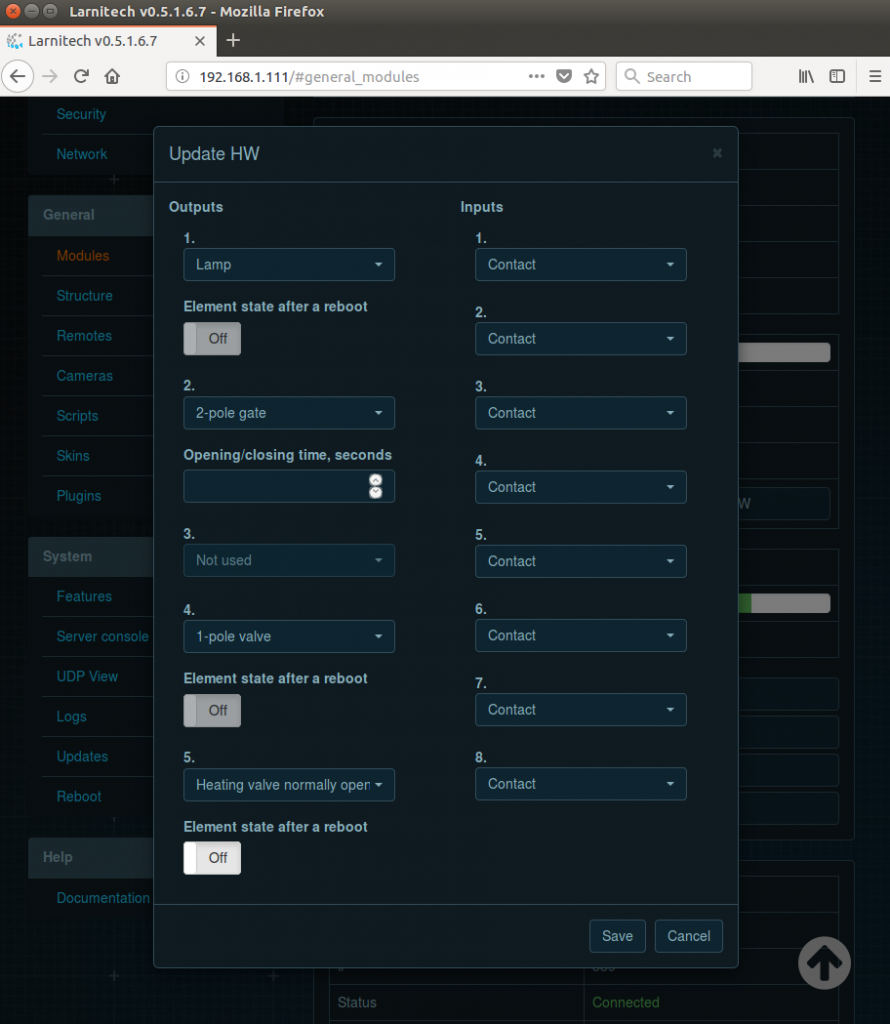
- Using the web interface, go to the Modules section, where available modules will be shown. If necessary, use the ‘Update HW’ button to configure each of them for working with the equipment connected to them.
- Power on the equipment connected to the net and make sure it works correctly.
- Use the Setup section of the application or the Structure section of the web interface in order to create areas, place the elements in the areas and configure the settings.
- Bind the buttons to the load according to the instruction.
- If necessary, create light schemes according to the instruction.
- If necessary, set up the automatization according to the instruction.
- Add and set up the equipment remote control.
- Add video surveillance cameras.
- Add scenarios.
- Set up the connection to the cloud service.
- Add and set up the necessary plugins.
- Change the security settings by changing the password to the web interface and system access key.
- Enjoy