Difference between revisions of "Satel integration"
Jump to navigation
Jump to search
| Line 26: | Line 26: | ||
<li>Select Connection/ TCP/IP: DLOADX -> ETHM (You can use different options for connection). Click ‘Connect’ | <li>Select Connection/ TCP/IP: DLOADX -> ETHM (You can use different options for connection). Click ‘Connect’ | ||
| + | |||
<br>'''Connection error log example:'''<br> | <br>'''Connection error log example:'''<br> | ||
| − | |||
| − | |||
| − | |||
| − | |||
| − | Hanged up. | + | Connecting to server: 192.168.1.223:7090 |
| + | Establishing connection | ||
| + | Module: ETHM-1 V2.07 | ||
| + | Wrong panel identifier - '''Wrong INTEGRA Ident.''' | ||
| + | |||
| + | Hanged up. | ||
| + | |||
| + | Connecting to server: 192.168.1.223:7090 | ||
| + | Establishing connection | ||
| + | Module: ETHM-1 V2.07 | ||
| + | Wrong PC identifier - '''Wrong DLOADX Ident. or GUARDX Ident.''' | ||
| − | + | Hanged up. | |
| − | |||
| − | |||
| − | |||
| − | Hanged up. | ||
</li> | </li> | ||
| Line 64: | Line 67: | ||
===Create zone/device=== | ===Create zone/device=== | ||
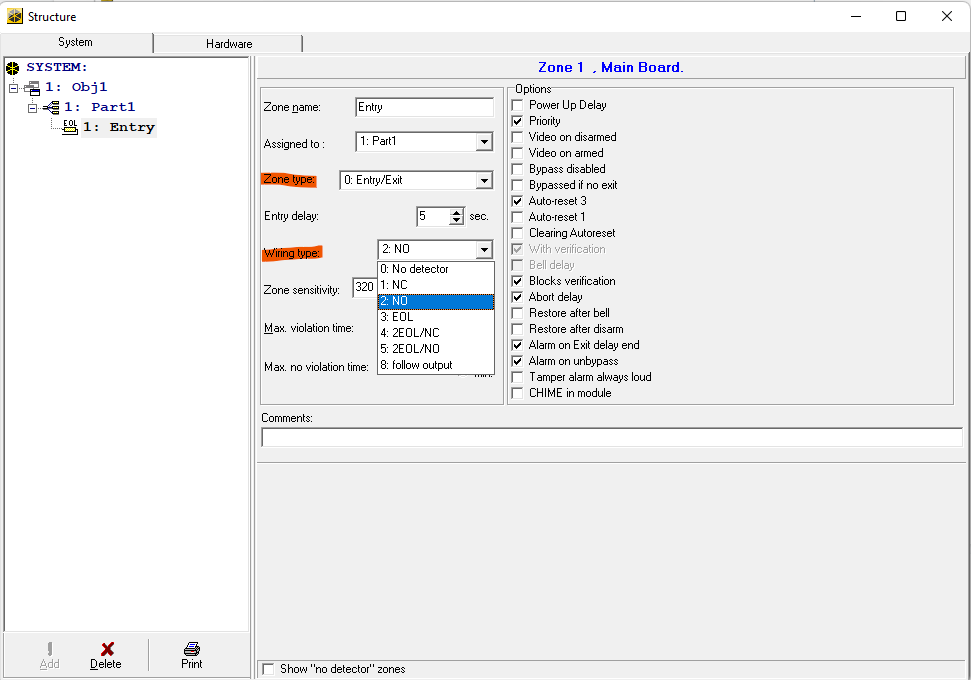
<br><br>[[file:satel9.png|700px]]<br><br> | <br><br>[[file:satel9.png|700px]]<br><br> | ||
| − | |||
==Larnitech Security Plugin configuration:== | ==Larnitech Security Plugin configuration:== | ||
Revision as of 14:01, 23 November 2021
Security - SATEL installation & configuration
SATEL Keypad - Preparing to integration
- Connect ethernet cable to your TCP module.
- Enter the service code (by default 12345) and press [*].
- Select the item SERVICE MODE from the list and press the [#] or [X] key.
- Select Configuration from the list and press the [#] or [X] key.
- Select INTEGRA Ident.
- Write down the code and repeat the same for DloadX Ident. and GuadX Ident.
- Exit from Configuration page, and Select Structure page/Modules/LCD-Keypads/Setup/
- Select your TCP module from the list and press the [#] or [X] key.
- Select Key (DloadX)
- Write down the code
SATEL - DloadX
- When the program starts, it will ask you to enter a password. Default password 1234
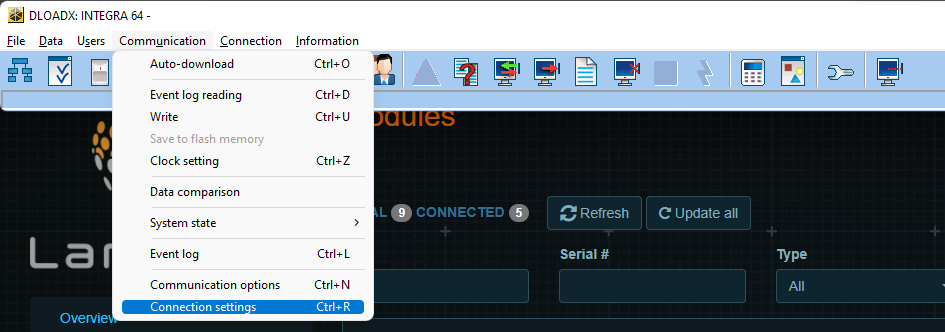
- Select Communication/Connection Settings page
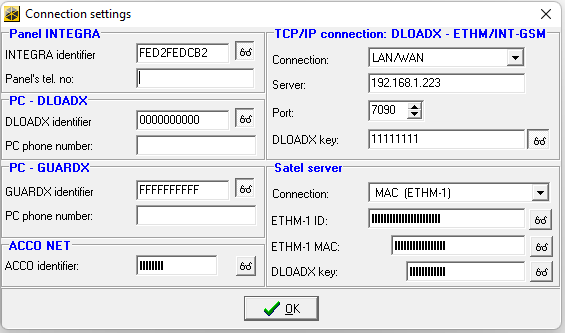
- Fill in the fields similar to the screenshot below. Use identifiers obtained from the panel, IP address of your SATEL module.
- Select Connection/ TCP/IP: DLOADX -> ETHM (You can use different options for connection). Click ‘Connect’
Connection error log example:
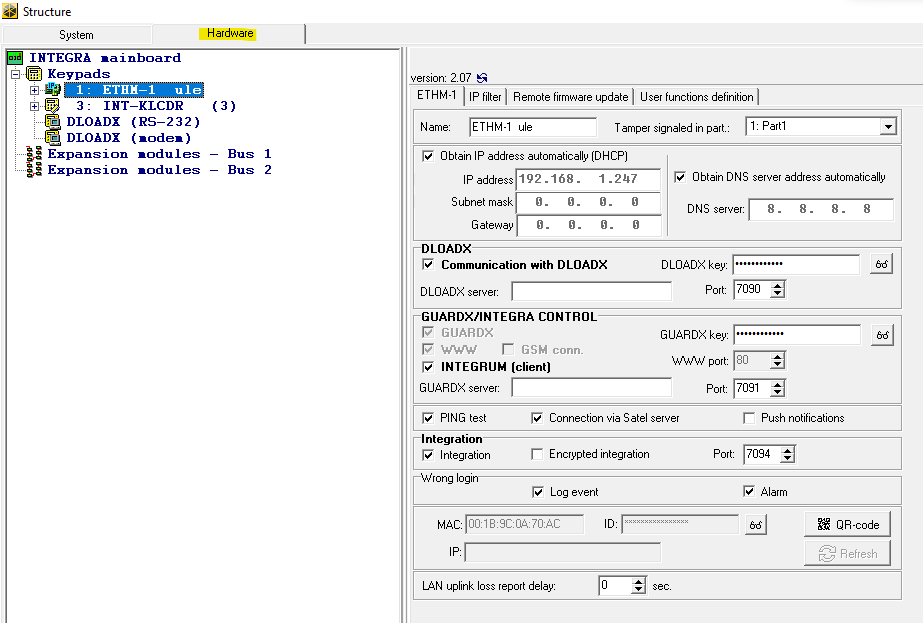
Connecting to server: 192.168.1.223:7090 Establishing connection Module: ETHM-1 V2.07 Wrong panel identifier - Wrong INTEGRA Ident. Hanged up. Connecting to server: 192.168.1.223:7090 Establishing connection Module: ETHM-1 V2.07 Wrong PC identifier - Wrong DLOADX Ident. or GUARDX Ident. Hanged up. - You can find your connection settings there after reading data from the TCP module. Check that you have similar settings.

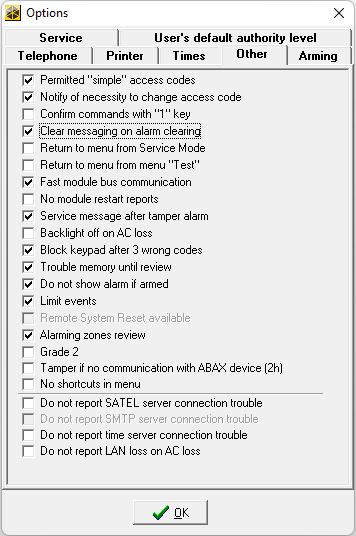
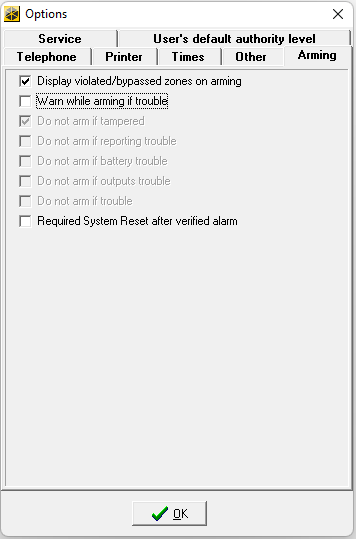
- Example of configuration default NO - normally open reed switch
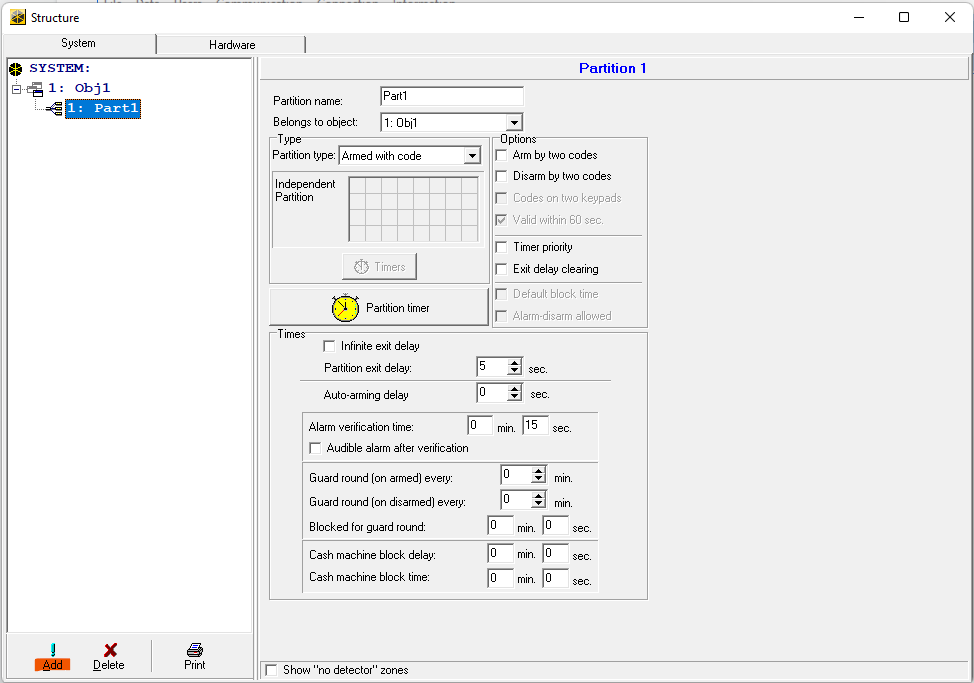
Open Structure settings

Create Partition
Create zone/device
Larnitech Security Plugin configuration:
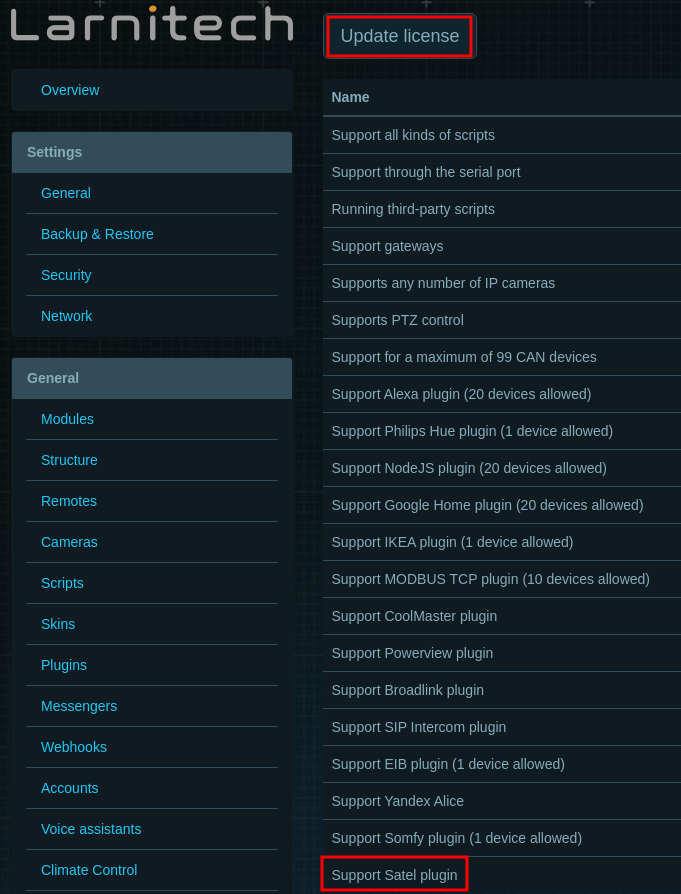
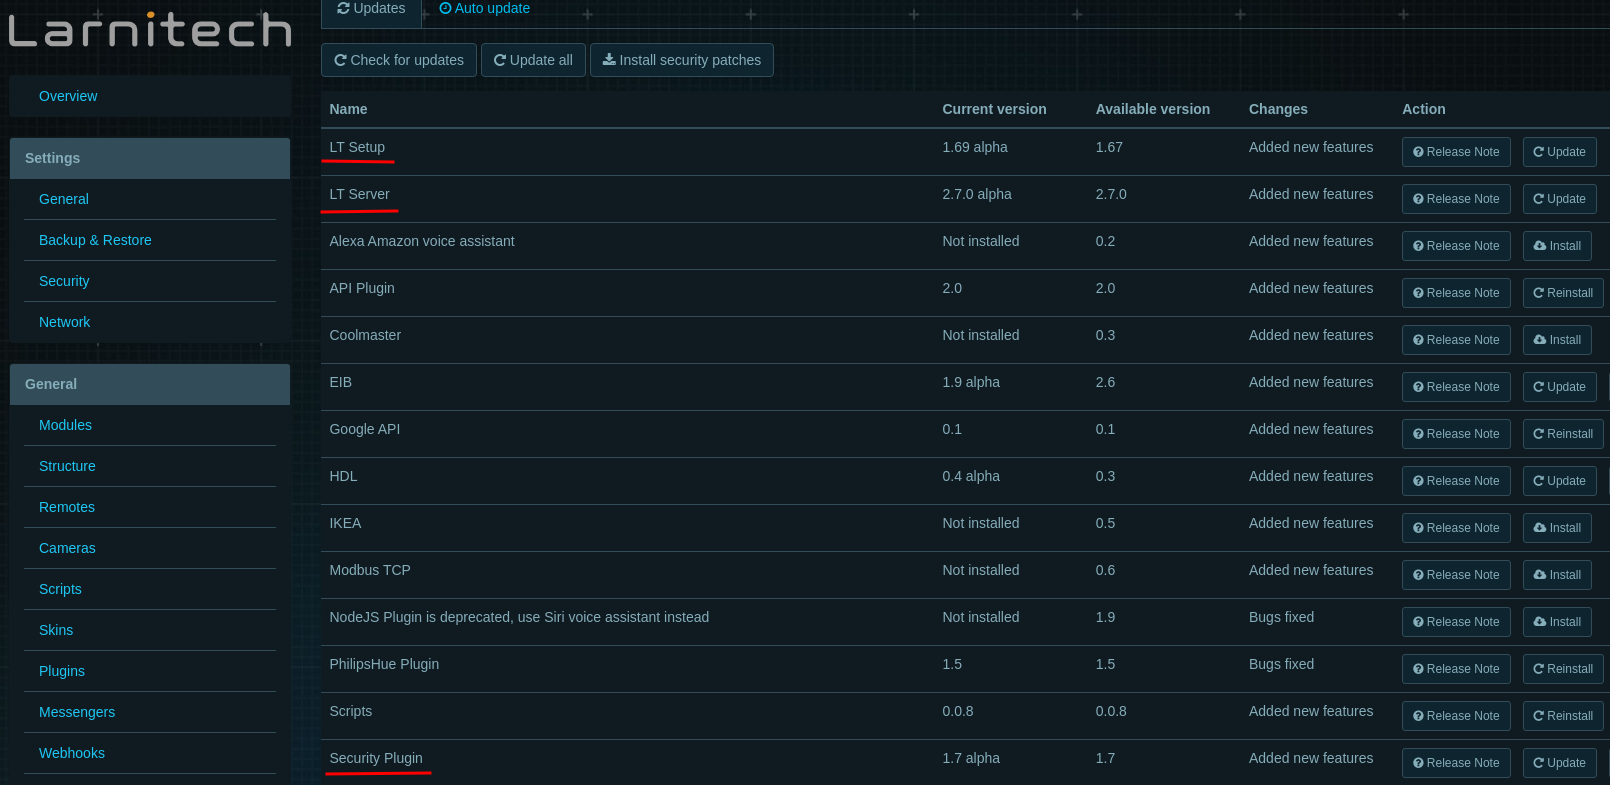
- Make sure you have SATEL licenses
- Make sure you have the latest versions of LT Setup, LT Server, Security plugin installed
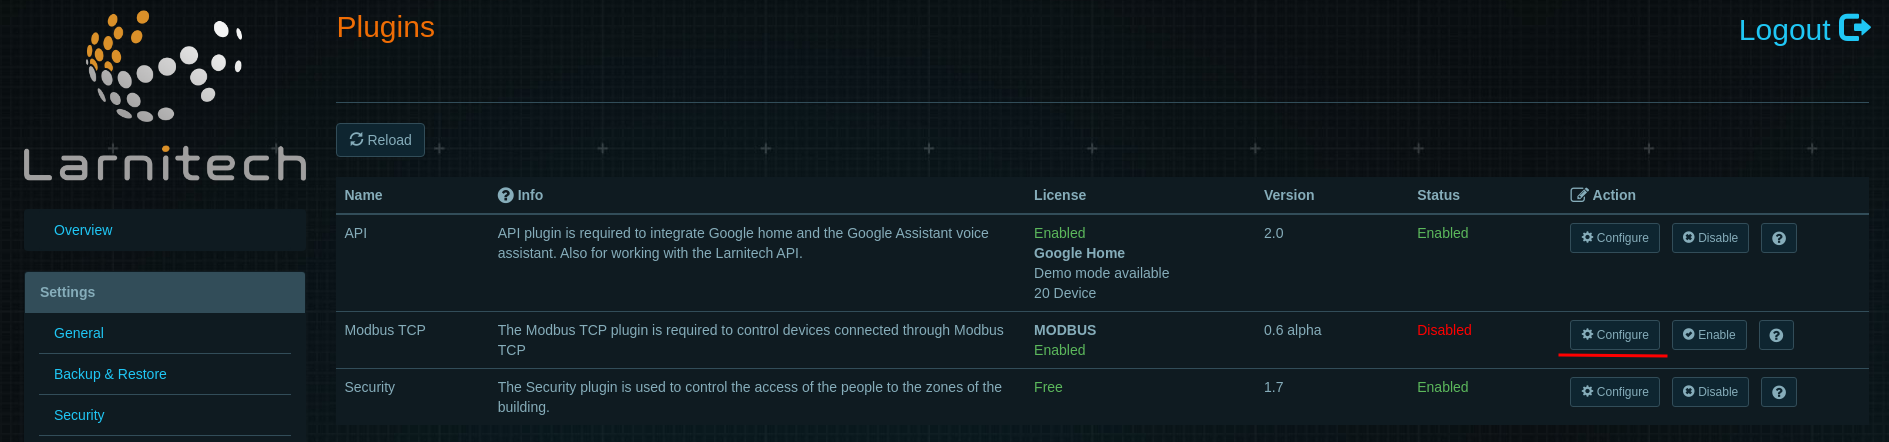
- Configure plugin and enable.
- Select the Satel page, fill in the fields similar to the screenshot below and enable the integration
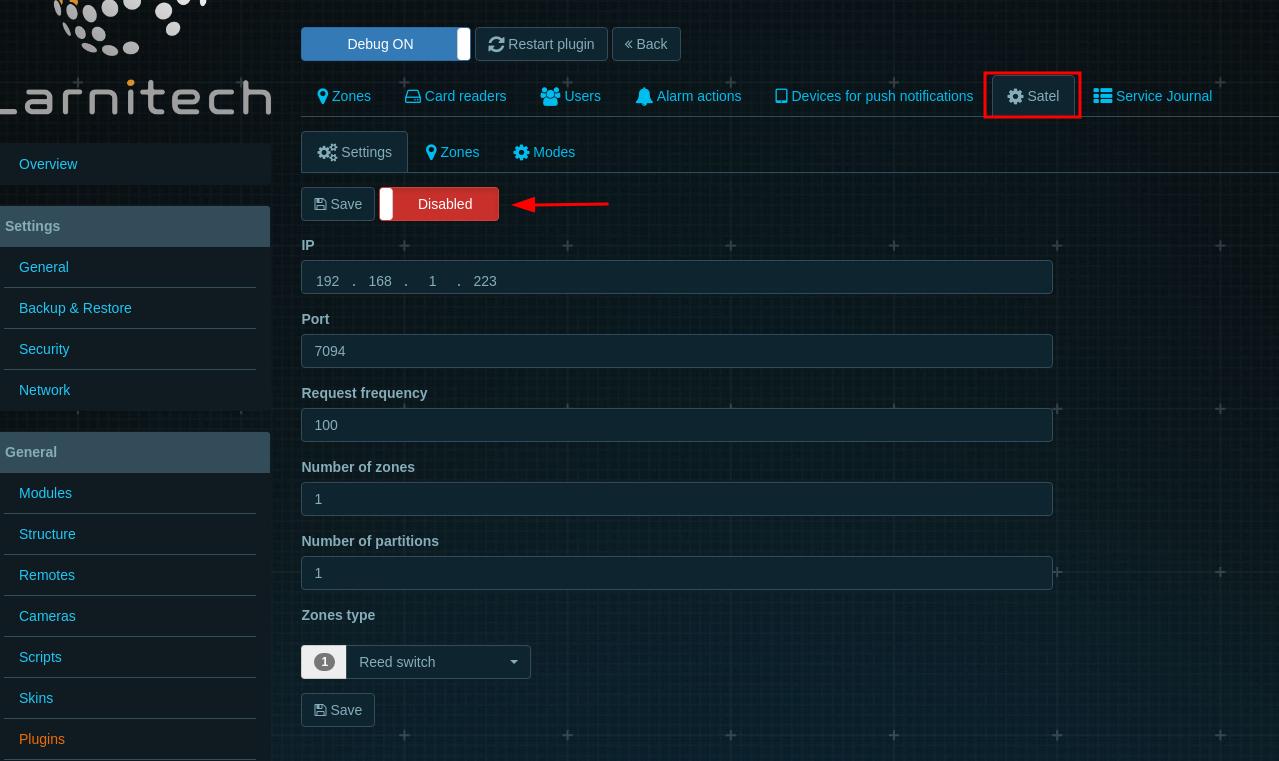
IP: Your Satel TCP module Port: Integration port. Default: 7094 c
How does integration work?
Our plugin is just a receiver for Satel data, we send only a couple commands like Reset alarms, pin, arm and disarm. But the logic of these commands are processed by Satel.