Difference between revisions of "Security plugin settings"
(Marked this version for translation) |
|||
| Line 32: | Line 32: | ||
[[File:11.png|250px]] | [[File:11.png|250px]] | ||
[[File:12.png|700px]]<br> | [[File:12.png|700px]]<br> | ||
| − | 12. After the creation of the user, the Security plugin becomes available in-app<br> | + | 12. If you want to get notifications in the app, go to the "Devices for push notifications" tab and add your device's ID with chosen types of notifications, or use "2047" ID for broadcast notifications<br> |
| + | [[File:Notification1.png]] | ||
| + | [[File:Notification2.png]] <br> | ||
| + | 13. After the creation of the user, the Security plugin becomes available in-app<br> | ||
Open the app, click on the wi-fi icon, then on the Security icon. Will open the window with pin code confirmation<br> | Open the app, click on the wi-fi icon, then on the Security icon. Will open the window with pin code confirmation<br> | ||
Enter the pin you created for user, and then Ok<br> | Enter the pin you created for user, and then Ok<br> | ||
[[File:13.png|400px]] | [[File:13.png|400px]] | ||
[[File:14.png|300px]]<br> | [[File:14.png|300px]]<br> | ||
| − | + | 14. In Home tab, you will see your zones, and after clicking on the right corner icon, the sensors that you set<br> | |
[[File:15.png|300px]]<br> | [[File:15.png|300px]]<br> | ||
| − | + | 15. In Security tab, you will see the widget<br> | |
[[File:16.png|250px]]<br> | [[File:16.png|250px]]<br> | ||
*ARM - full arming of the house with your zones<br> | *ARM - full arming of the house with your zones<br> | ||
| Line 54: | Line 57: | ||
*To reset the sensors, click on Alarm button, Reset sensors and Ok<br> | *To reset the sensors, click on Alarm button, Reset sensors and Ok<br> | ||
[[File:23.png|350px]]<br> | [[File:23.png|350px]]<br> | ||
| − | + | 16. Also, you can set the scenarios for the Partial arm. For that, you need to go settings of the Security plugin<br> | |
On your zone, click on +Add device<br> | On your zone, click on +Add device<br> | ||
[[File:24.png|600px]]<br> | [[File:24.png|600px]]<br> | ||
| − | + | 17. In pop-up window, click on Device type - in drop-down list choose Arm<br> | |
New fields will be appears<br> | New fields will be appears<br> | ||
[[File:25.png|220px]]<br> | [[File:25.png|220px]]<br> | ||
| − | + | 18. Click on +Add mode. In the new window, set any name you like, Save settings and your mode will appear below<br> | |
[[File:26.png|600px]]<br> | [[File:26.png|600px]]<br> | ||
| − | + | 19. After that, you can set the mode for your zones. For example day/night, and Save settings<br> | |
[[File:27.png|250px]]<br> | [[File:27.png|250px]]<br> | ||
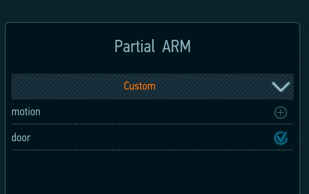
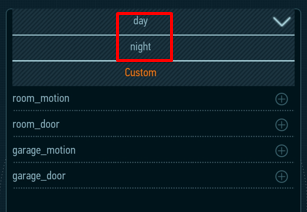
| − | + | 20. Open app, enter in Security plugin, move to Partial arm<br> | |
Your modes will appear in the drop-down list<br> | Your modes will appear in the drop-down list<br> | ||
[[File:28.png|350px]]<br> | [[File:28.png|350px]]<br> | ||
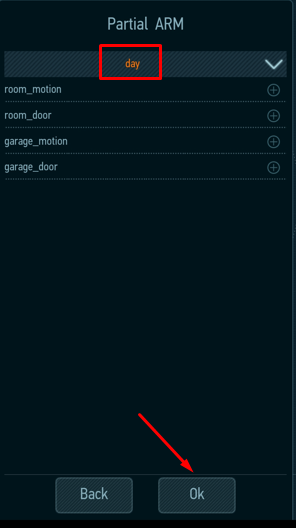
| − | + | 21. Click on the mode you want to arm and then Ok. The system will be activated<br> | |
[[File:29.png|300px]]<br> | [[File:29.png|300px]]<br> | ||
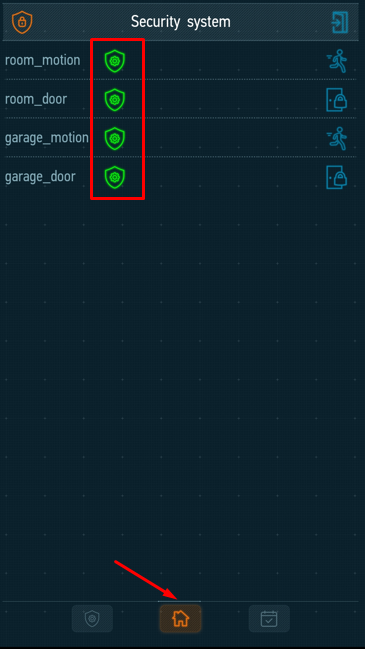
| − | + | 22. To see, what zones are actually enabled, click on the Home tab<br> | |
[[File:30.png|300px]]<br> | [[File:30.png|300px]]<br> | ||
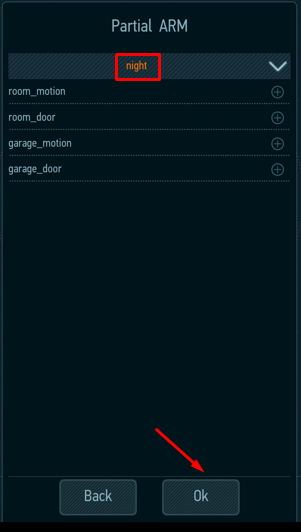
| − | + | 23. Do the same with another mode - Night, in our case. And your settings will be activated<br> | |
[[File:31.png|300px]]<br> | [[File:31.png|300px]]<br> | ||
| − | + | 24. Check the settings in Home tab<br> | |
[[File:32.png|300px]]<br> | [[File:32.png|300px]]<br> | ||
</translate> | </translate> | ||
Revision as of 10:34, 22 November 2022
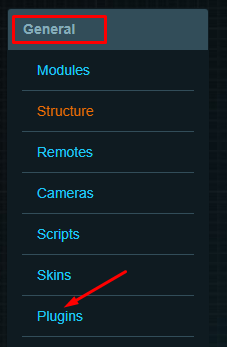
1. Open LT Setup, General tab, click on Plugins
2. Find Security plugin, click on Enable button to launch it

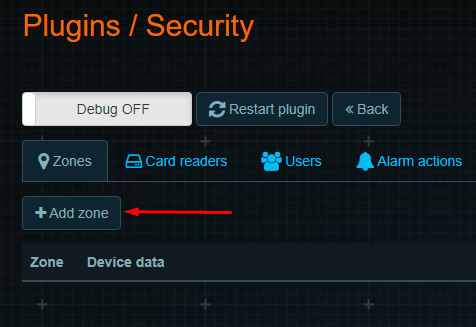
3. Then click on Configure button

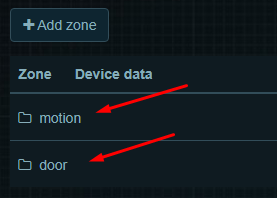
4. Click on +Add zone, to set actions for alarm settings
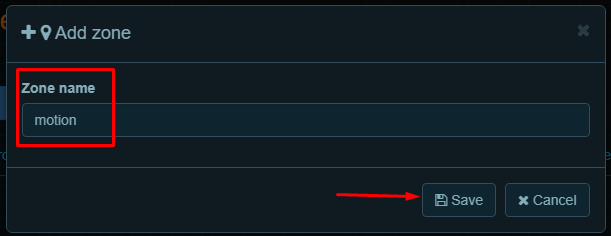
5. Zone name - any you like, but to understand what system/sensors you will use
6. You can add different zones. All added scenarios will appear below
7. Then click on +Add device button, to add responsible sensors for the action

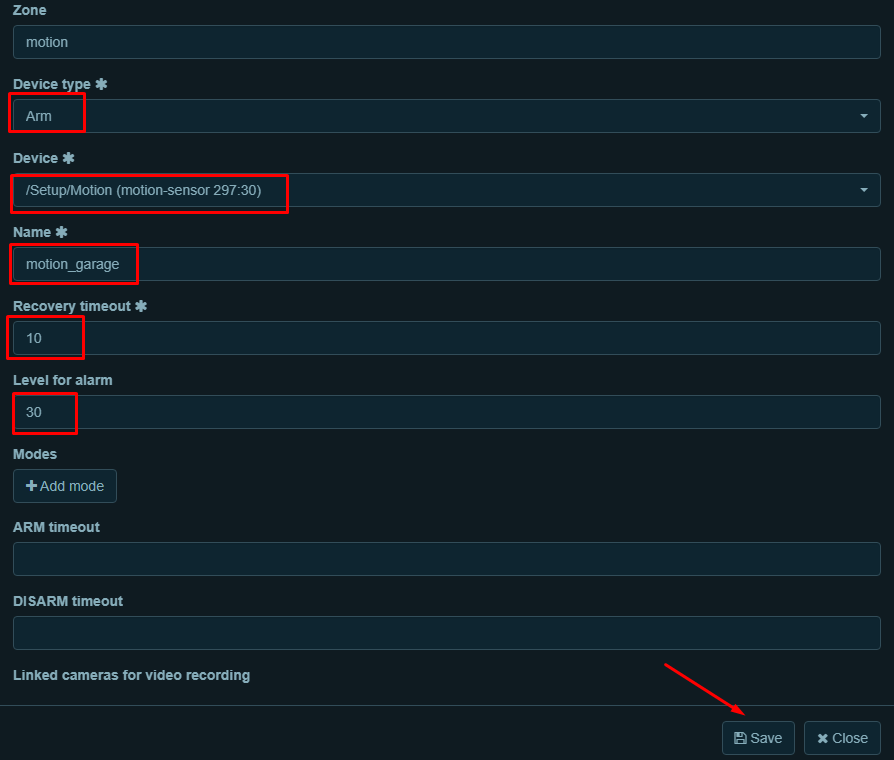
8. In pop-up window set sensor and settings for it and save changes
- Device type - set Arm
- Device - choose you sensor
- Name - sensors name in security plugin
- Recovery timeout - time in seconds, when sensor resets after an alarm is triggered, until the problem disappears (door closing, no movement)
- Level for alarm - range of values 1-100 for motion sensors
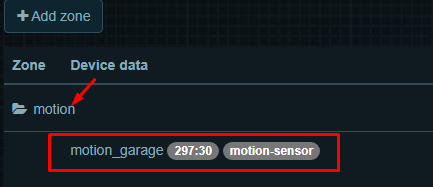
9. To watch, what the sensor is responsible for action, click on the folder. You can add some sensors into a zone
For all other zones, identic procedure
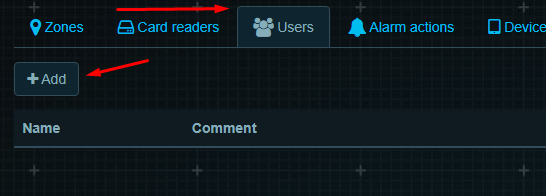
10. After settings of zones, you need to add at least one user, create a password, and set the permissions for the user
Click on the Users tab, and then on +Add
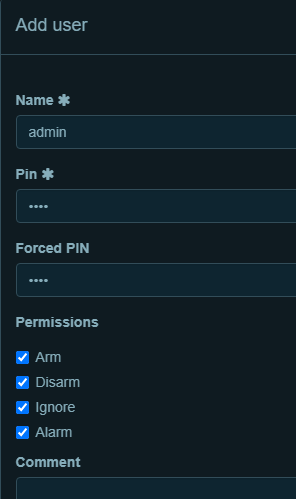
11. In pop-up window, made a settings for the user, and save changes

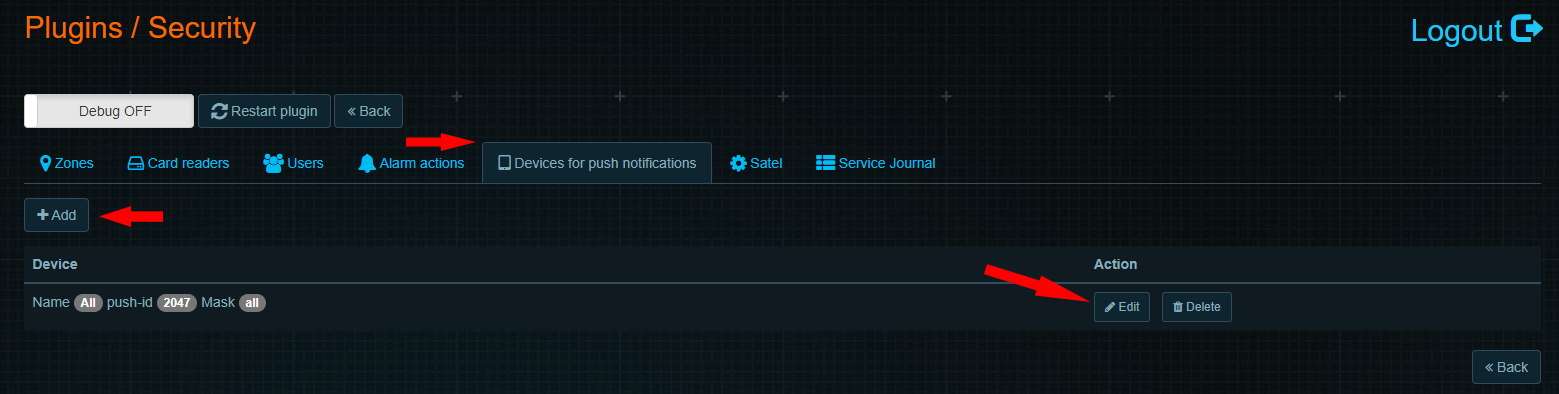
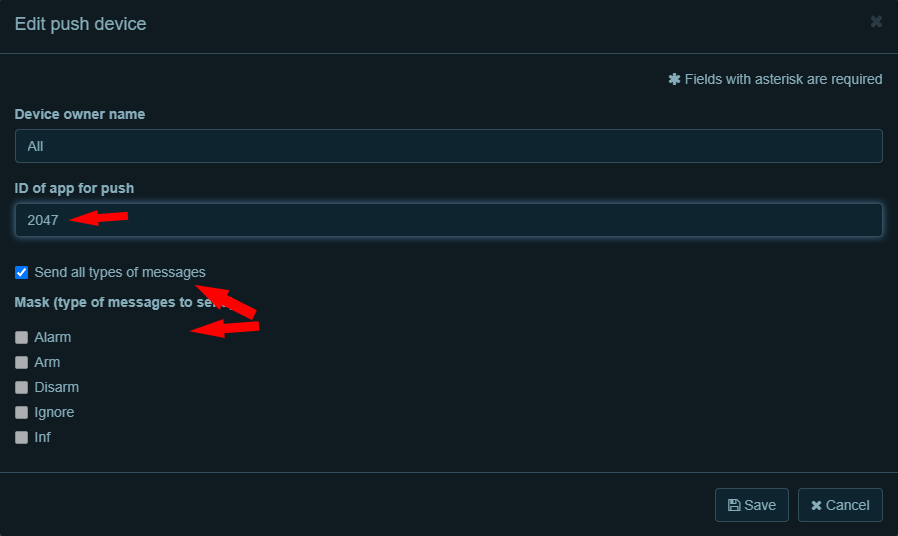
12. If you want to get notifications in the app, go to the "Devices for push notifications" tab and add your device's ID with chosen types of notifications, or use "2047" ID for broadcast notifications
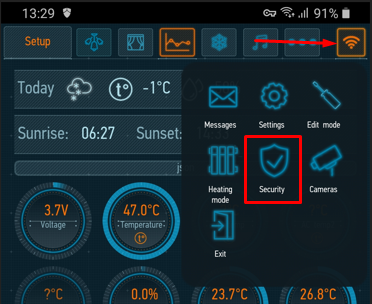
13. After the creation of the user, the Security plugin becomes available in-app
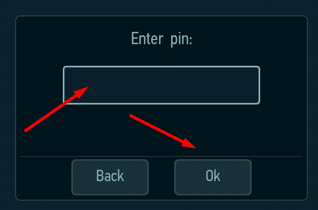
Open the app, click on the wi-fi icon, then on the Security icon. Will open the window with pin code confirmation
Enter the pin you created for user, and then Ok
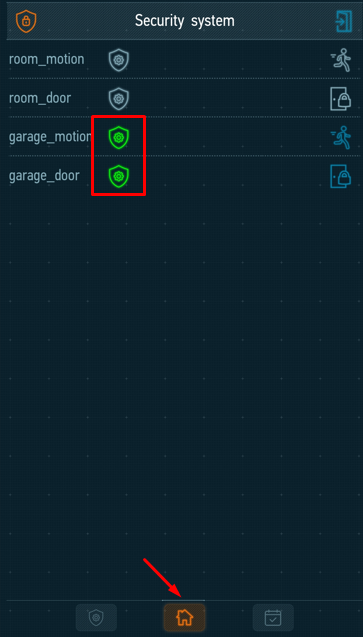
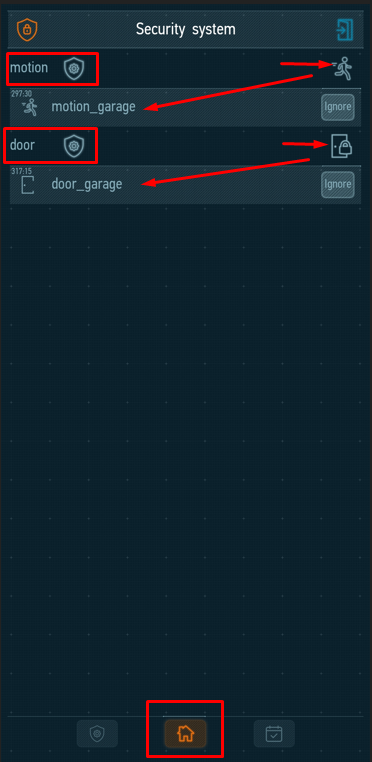
14. In Home tab, you will see your zones, and after clicking on the right corner icon, the sensors that you set
15. In Security tab, you will see the widget
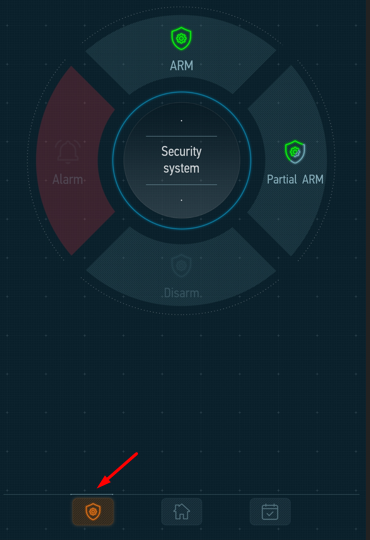
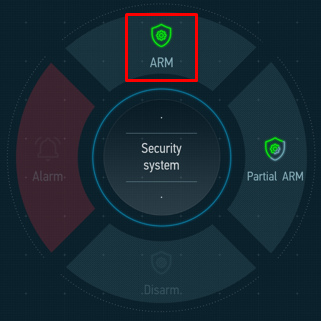
- ARM - full arming of the house with your zones
- Partial ARM - you can choose one or some zones for arming
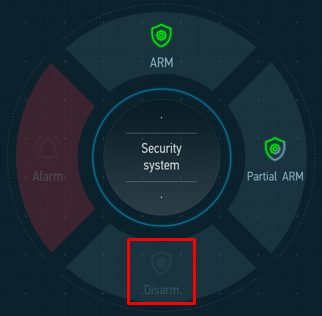
- Disarm - disarming the house
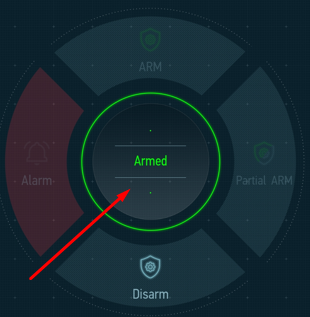
- Armed - house under protection
- Alarm - when sensors are triggering, the widget will turn Red and push-notification sent to your phone
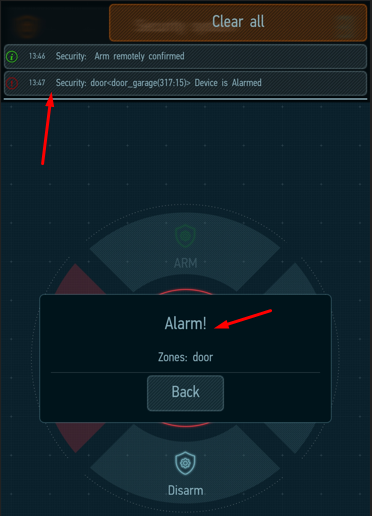
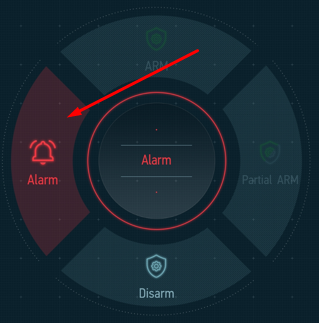
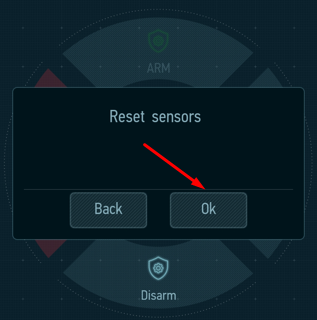
- To reset the sensors, click on Alarm button, Reset sensors and Ok
16. Also, you can set the scenarios for the Partial arm. For that, you need to go settings of the Security plugin
On your zone, click on +Add device

17. In pop-up window, click on Device type - in drop-down list choose Arm
New fields will be appears
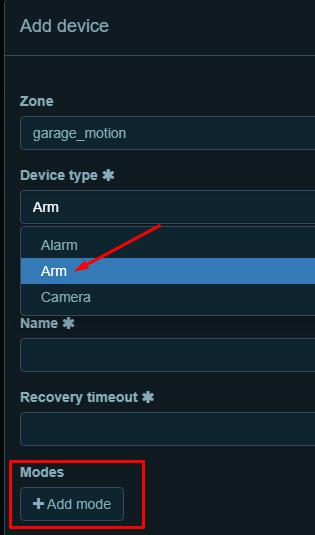
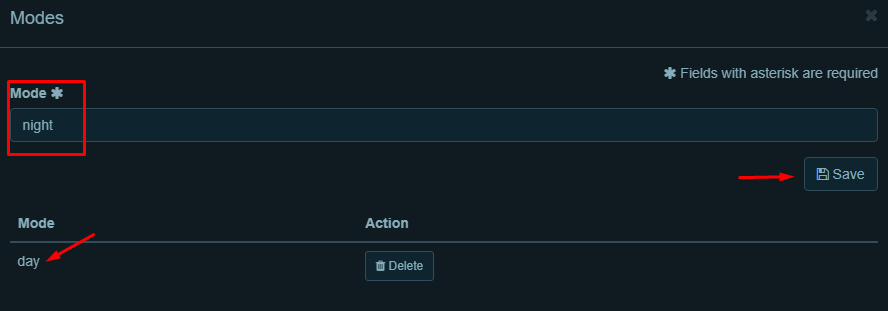
18. Click on +Add mode. In the new window, set any name you like, Save settings and your mode will appear below
19. After that, you can set the mode for your zones. For example day/night, and Save settings

20. Open app, enter in Security plugin, move to Partial arm
Your modes will appear in the drop-down list
21. Click on the mode you want to arm and then Ok. The system will be activated
22. To see, what zones are actually enabled, click on the Home tab
23. Do the same with another mode - Night, in our case. And your settings will be activated
24. Check the settings in Home tab