Difference between revisions of "Weather/ru"
Jump to navigation
Jump to search
(Created page with "Плагин Погода (Weather)") |
(Created page with "<ol class="l2"> <li>Войдите в раздел Обновить лицензии (Update Licenses) в LTSetup и нажмите кнопку Обновить лицен...") |
||
| Line 1: | Line 1: | ||
<languages/> | <languages/> | ||
<ol class="l2"> | <ol class="l2"> | ||
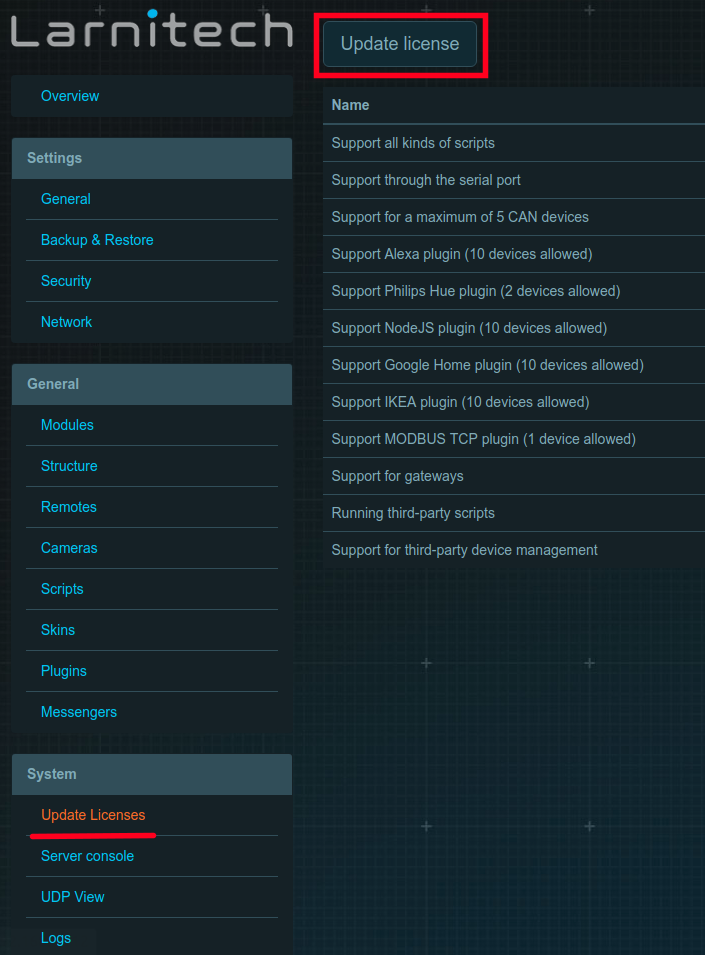
| − | <li> | + | <li>Войдите в раздел Обновить лицензии (Update Licenses) в LTSetup и нажмите кнопку Обновить лицензию (Update license). Нажмите кнопку ОК во всплывающем окне. |
<br>[[File:weather1.png|600px]]<br></li> | <br>[[File:weather1.png|600px]]<br></li> | ||
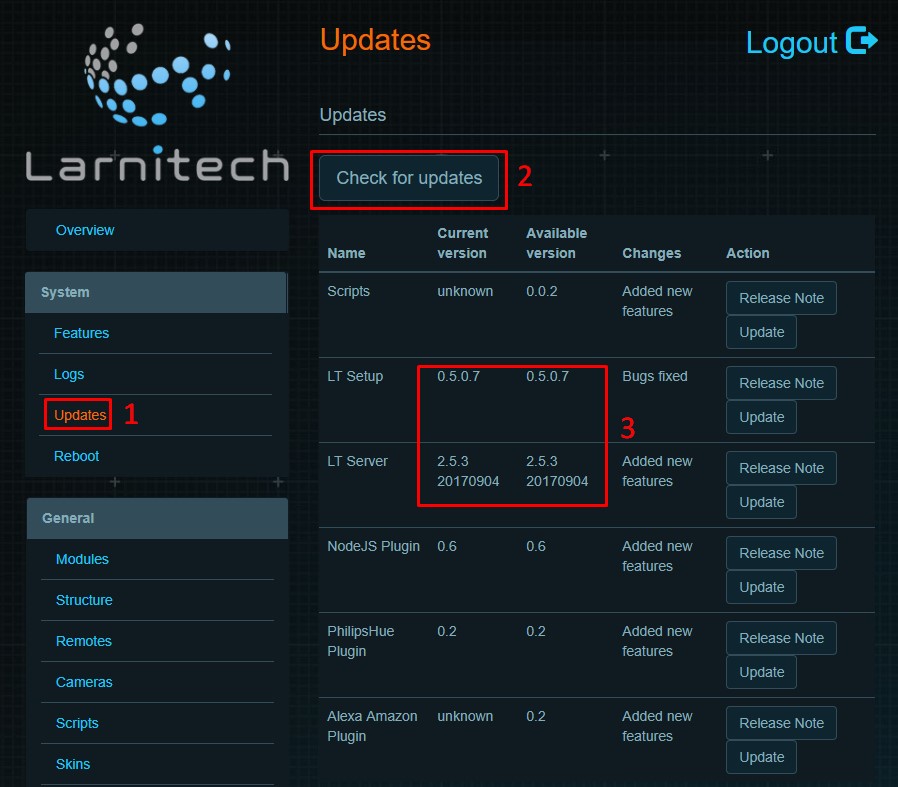
| − | <li> | + | <li>Перейдите на вкладку Обновления (Updates). Убедитесь, что у вас установлены последние версии программ LTSetup и LTServer. Если ваша текущая версия не соответствует имеющейся, нажмите кнопку Обновить (Update) в соответствующем разделе.. |
<br>[[File:weather2.jpg|600px]]<br></li> | <br>[[File:weather2.jpg|600px]]<br></li> | ||
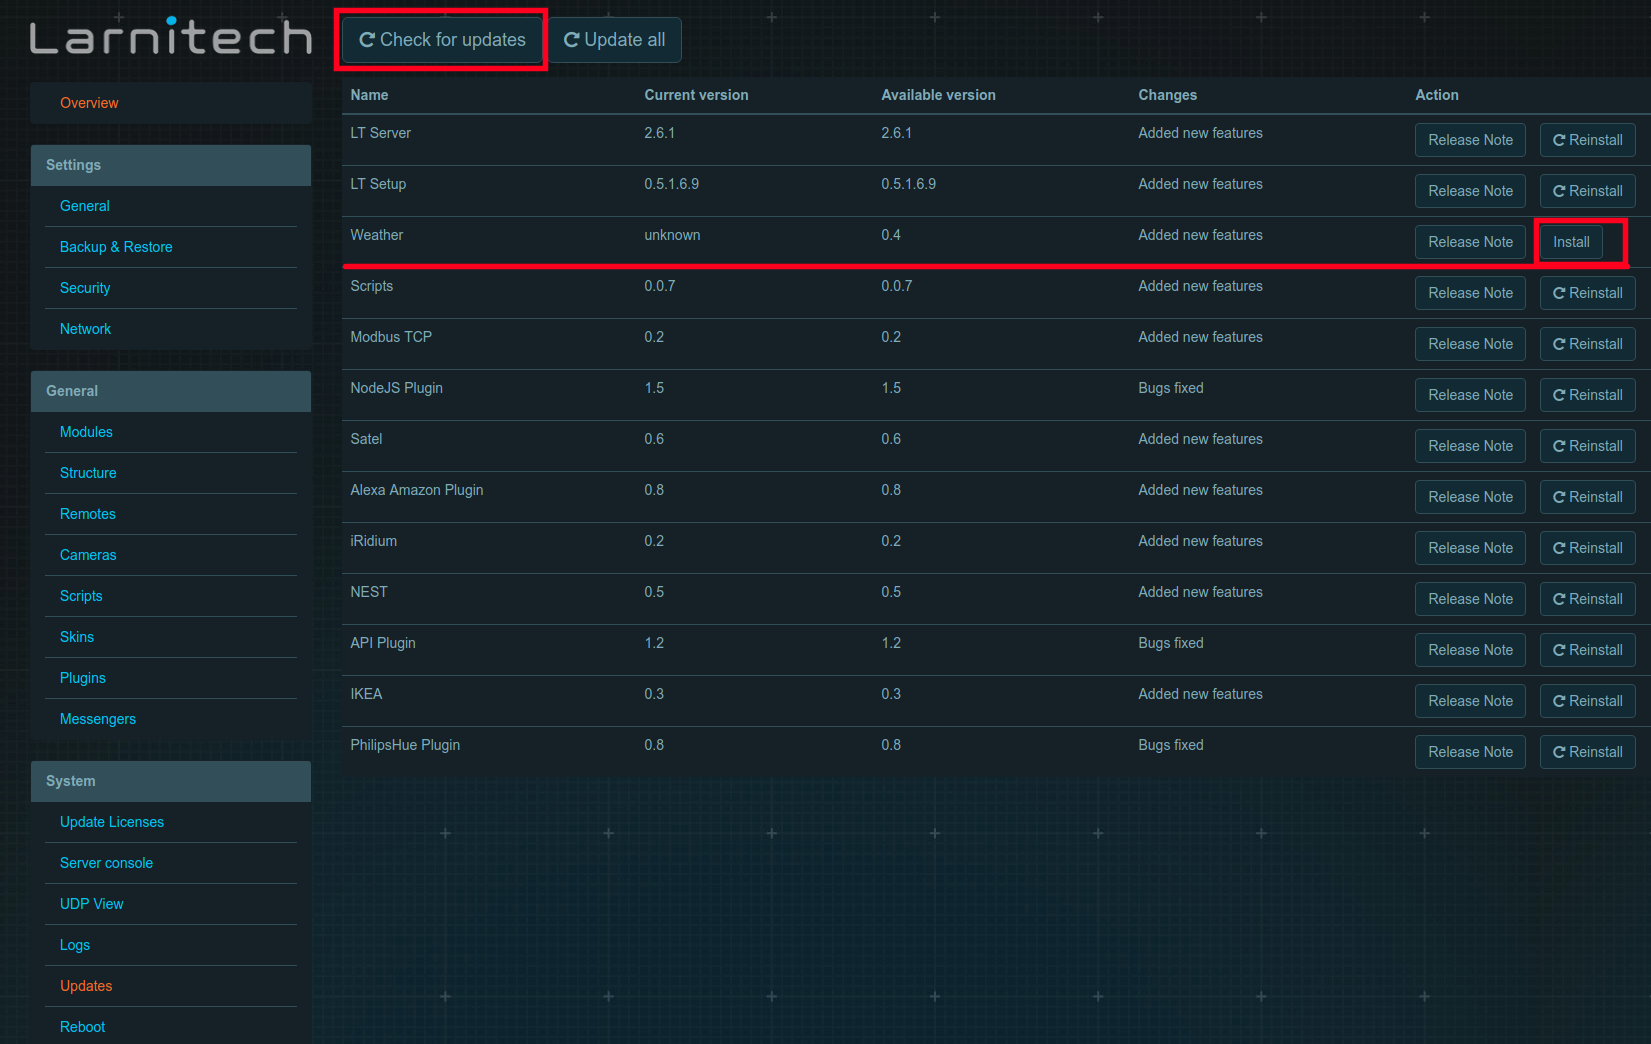
| − | <li> | + | <li>Нажмите кнопку Установить (Install) в разделе плагина Погода (Weather). |
<br>[[File:weather3.png|600px]]<br></li> | <br>[[File:weather3.png|600px]]<br></li> | ||
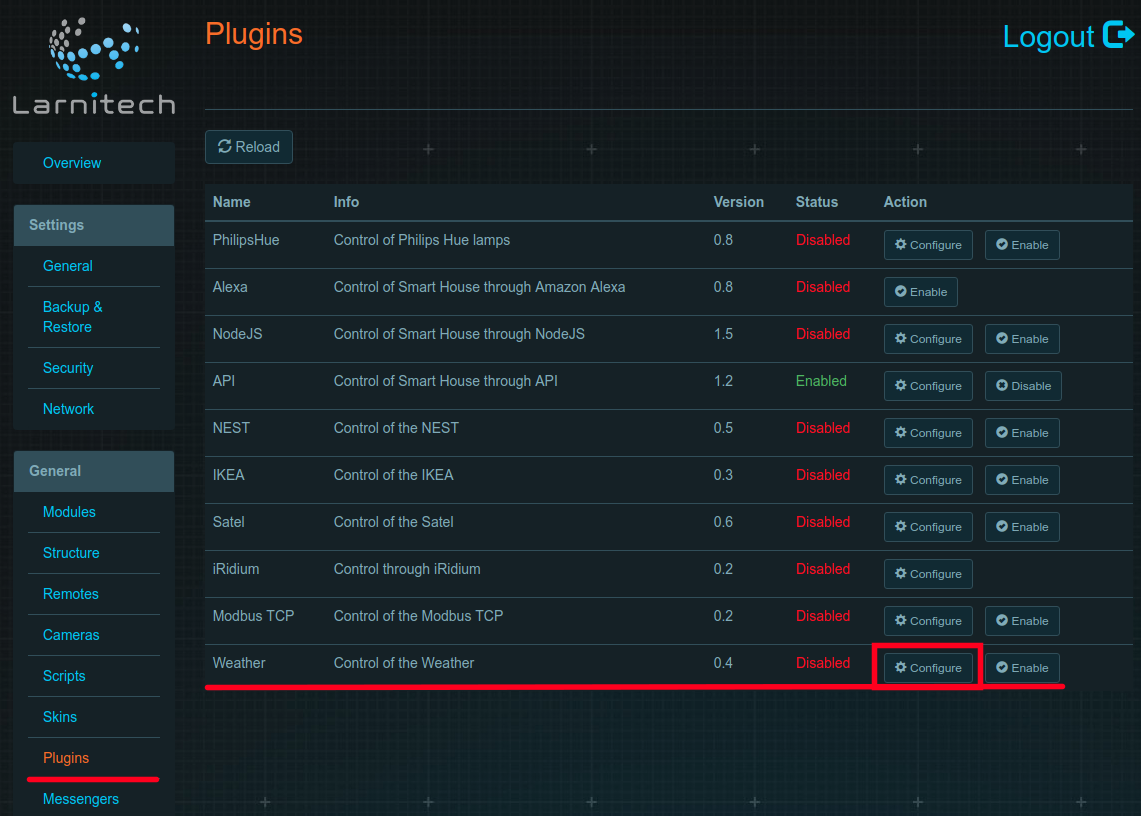
| − | <li> | + | <li>Перейдите на вкладку Плагины (Plugins), найдите раздел Погода (Weather) и нажмите кнопку Настроить (Configure). |
<br>[[File:weather4.png|600px]]<br></li> | <br>[[File:weather4.png|600px]]<br></li> | ||
| − | <li> | + | <li>После обновления окна нажмите кнопку Найти (Find) и выберите свое местоположение в раскрывающемся списке. Нажмите кнопки Сохранить (Save) и ОК во всплывающем окне. |
<br>[[File:weather5.png|600px]]<br> | <br>[[File:weather5.png|600px]]<br> | ||
<ol> | <ol> | ||
| − | <li> | + | <li>Вы также можете задать свои координаты вручную. Для этого заполните поля Широта (Latitude) и Долгота (Longitude). Значения можно найти с помощью сервиса Google карты, введя свой адрес. Затем нажмите кнопки Сохранить (Save) и ОК во всплывающем окне. |
<br>[[File:weather6.png|600px]] | <br>[[File:weather6.png|600px]] | ||
Revision as of 14:12, 16 January 2022
- Войдите в раздел Обновить лицензии (Update Licenses) в LTSetup и нажмите кнопку Обновить лицензию (Update license). Нажмите кнопку ОК во всплывающем окне.
- Перейдите на вкладку Обновления (Updates). Убедитесь, что у вас установлены последние версии программ LTSetup и LTServer. Если ваша текущая версия не соответствует имеющейся, нажмите кнопку Обновить (Update) в соответствующем разделе..
- Нажмите кнопку Установить (Install) в разделе плагина Погода (Weather).
- Перейдите на вкладку Плагины (Plugins), найдите раздел Погода (Weather) и нажмите кнопку Настроить (Configure).
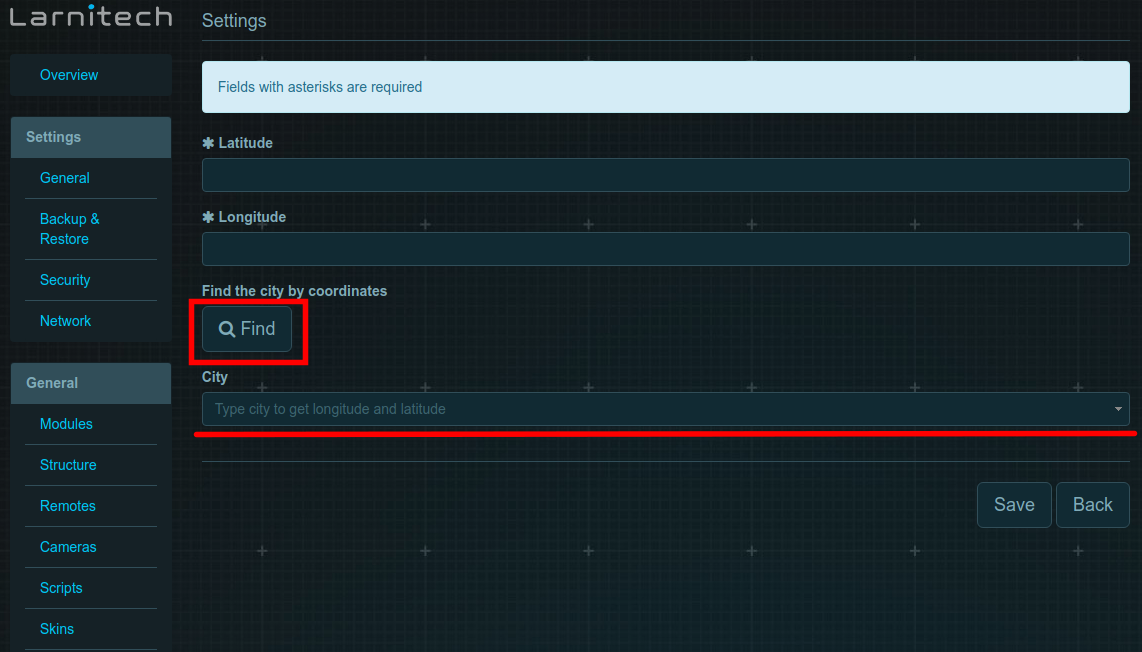
- После обновления окна нажмите кнопку Найти (Find) и выберите свое местоположение в раскрывающемся списке. Нажмите кнопки Сохранить (Save) и ОК во всплывающем окне.
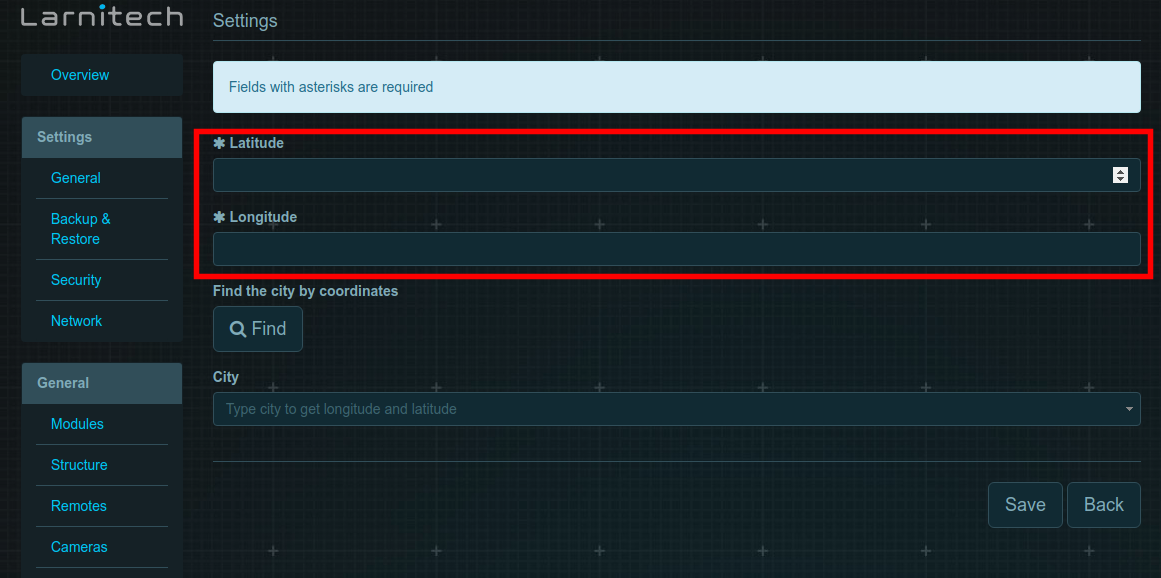
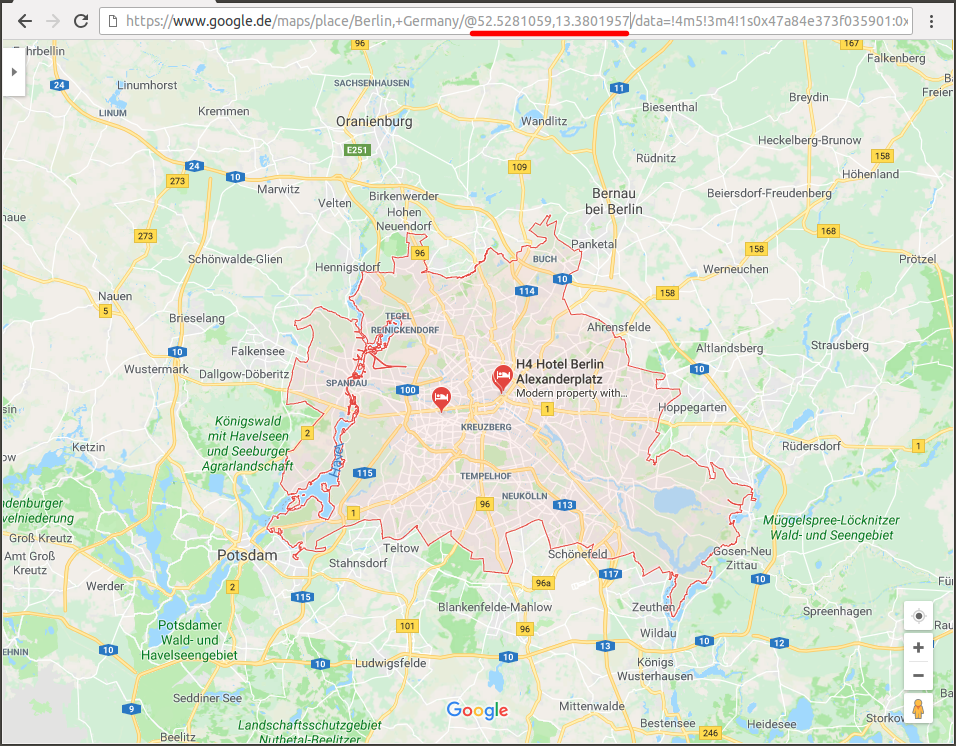
- Вы также можете задать свои координаты вручную. Для этого заполните поля Широта (Latitude) и Долгота (Longitude). Значения можно найти с помощью сервиса Google карты, введя свой адрес. Затем нажмите кнопки Сохранить (Save) и ОК во всплывающем окне.
- Вы также можете задать свои координаты вручную. Для этого заполните поля Широта (Latitude) и Долгота (Longitude). Значения можно найти с помощью сервиса Google карты, введя свой адрес. Затем нажмите кнопки Сохранить (Save) и ОК во всплывающем окне.
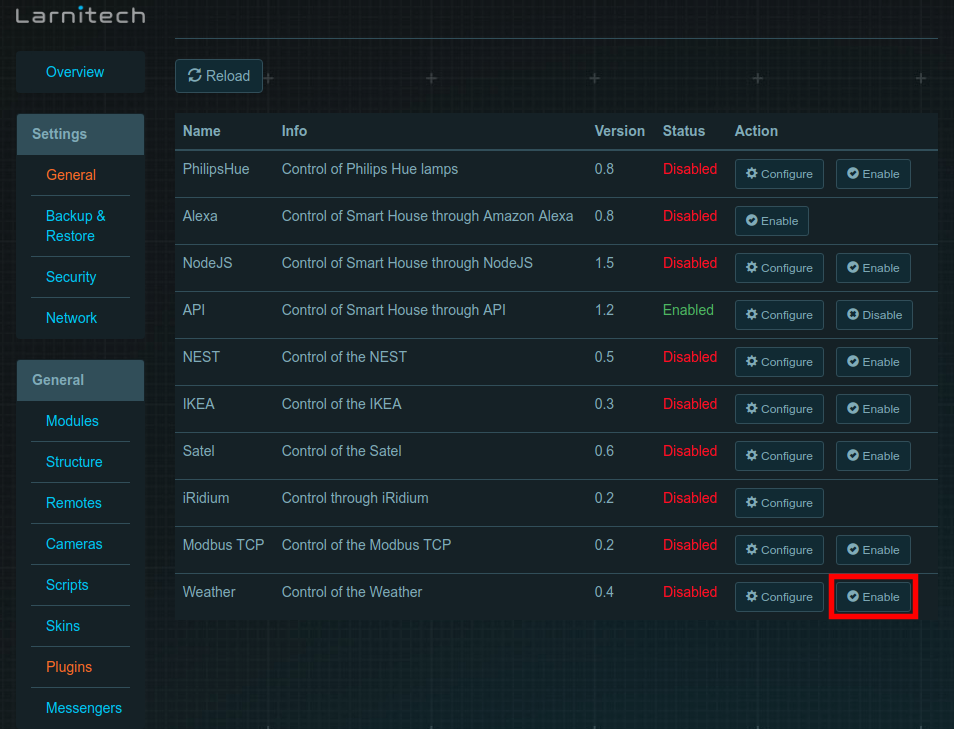
- After all of the above, it is required to turn on the plug-in in the "Plugins" tab by pressing "Enable".
- Enjoy your Larnitech weather plugin!
Lighting sensor description
The readings of weather plugin's lighting sensor (999:1) correspond to the astronomical position of the sun. The readings change during the day as follows: two hours before dawn 0% -> sensor readings start to increase -> 25% dawn -> 100% sun at the zenith -> sensor readings decrease -> 25% dusk -> 0% two hours after dusk and stay at 0% until two o'clock until dawn