Configuring the Smart Home System
Adding Rooms
After binding the Smart Home system, you will see the following screen (the screenshot on the left). It displays items that are already connected to the system.
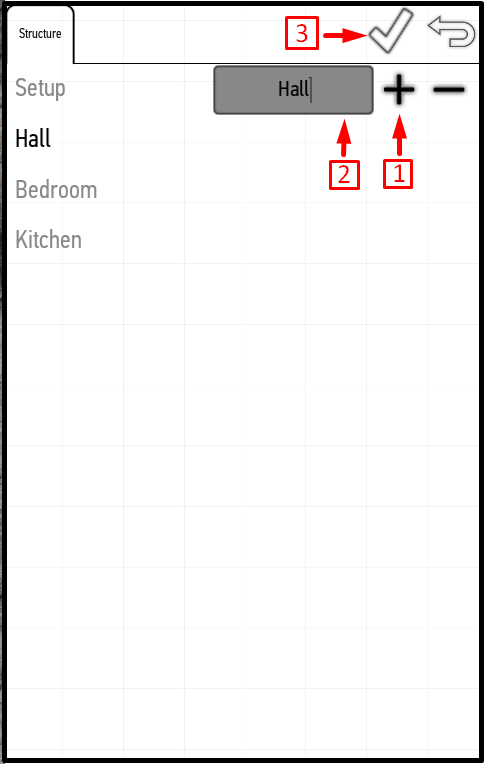
To add rooms to your home, open the menu (the button in the right upper corner), and click the Setup button.

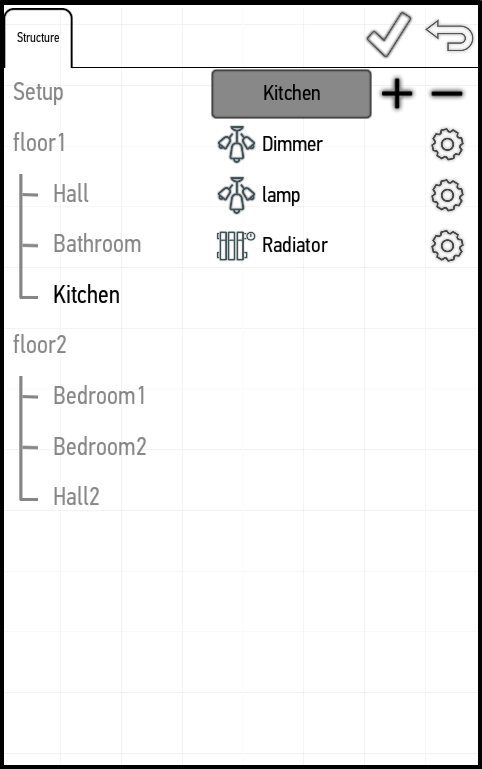
In the window that appears, click on the plus and enter the name in the corresponding field on the left. In the screenshot we add the following rooms: “Kitchen”, “Bedroom”, and “Hall”. When you complete adding rooms, click on the tick mark in the right upper corner of the screen. To exit without changes, click on the arrow in the right upper corner of the screen.
Now you can switch between existing rooms. To do this, go to the main screen and click the button in the left upper corner of the screen. The menu opens with a list of rooms – to select the desired room, click on it.
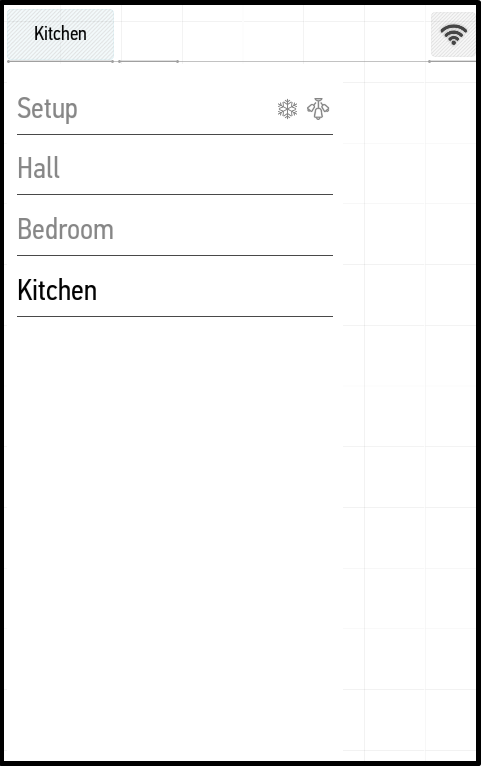
In the last screenshot, we have chosen the kitchen. The screen is empty because no items have been added yet.
Adding floors
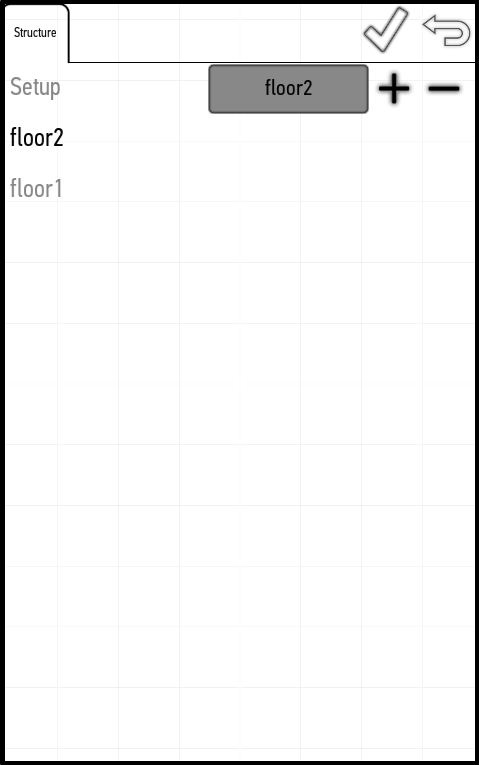
If your house has several floors, you can group the rooms by the floors. To do this, enter the Setup menu item. Similar to the previous examples, add rooms and name them "Floor 1", "Floor 2", etc., depending on the number of floors.
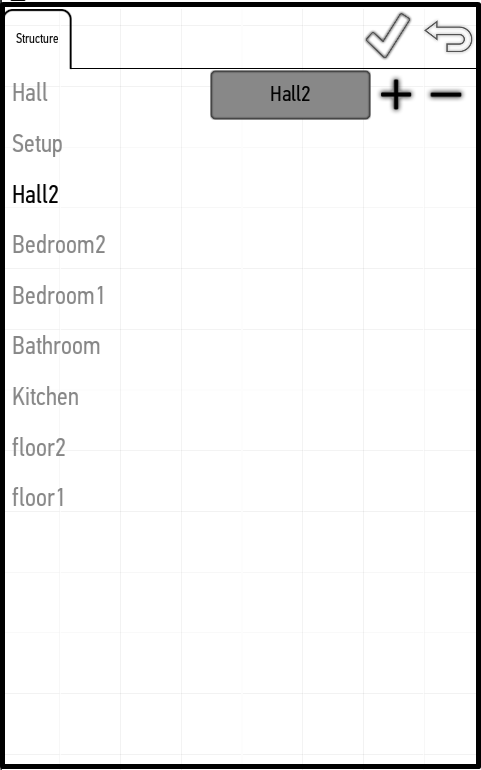
After that, add all the rooms in the home.
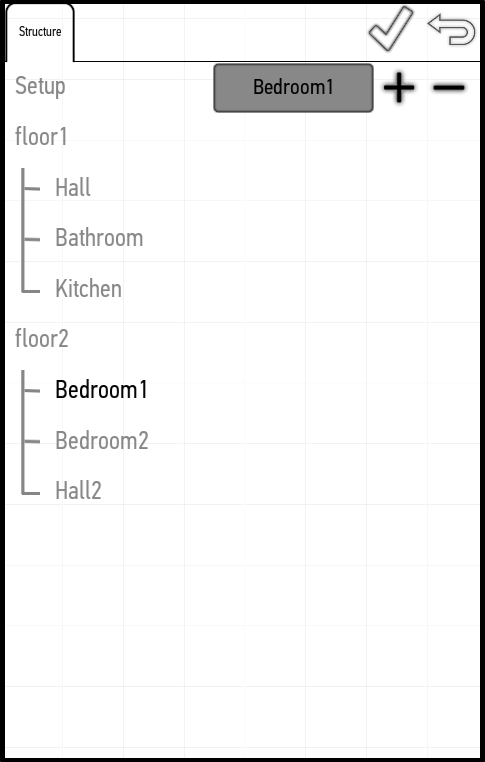
To group the rooms by floors, press and hold the desired room, drag it to the desired floor and release. If you need to remove the room from the floor, press and hold it, drag it to the very top row and release. Grouping by floors makes it easier to navigate the rooms of the home, and create a clear logical structure of the rooms.
Adding Items to Rooms
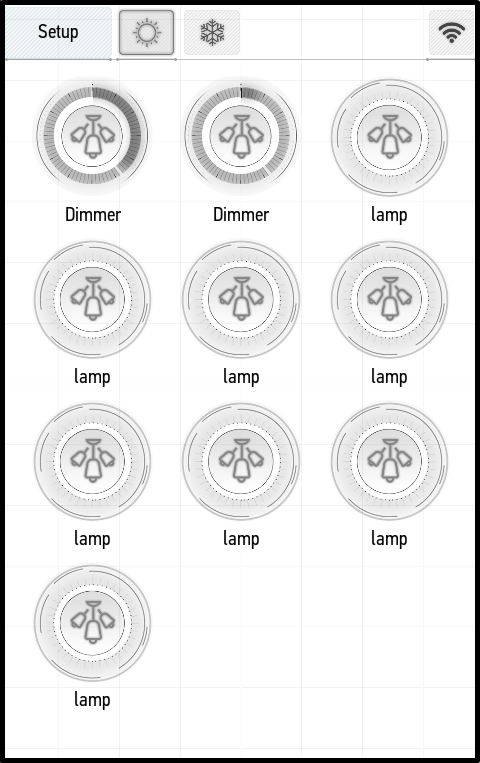
To add items, enter the menu (right upper corner of the screen) and click the Setup button. In the window that appears, you will see the list of rooms and the Setup item – select it. All items of your home will appear on the screen.
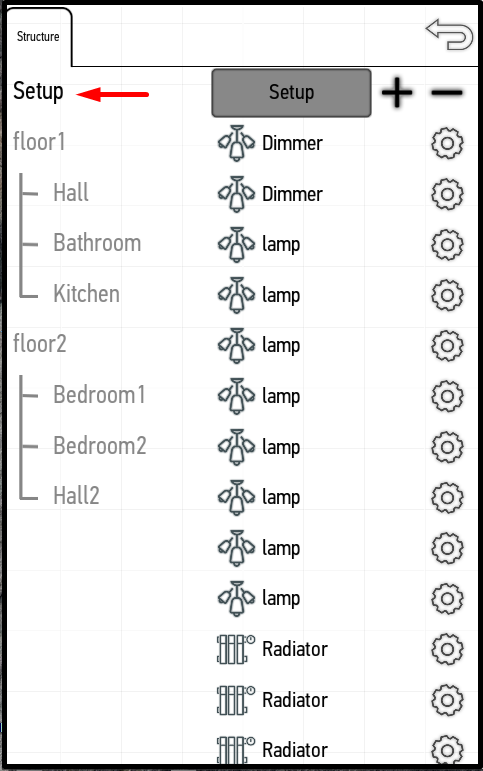
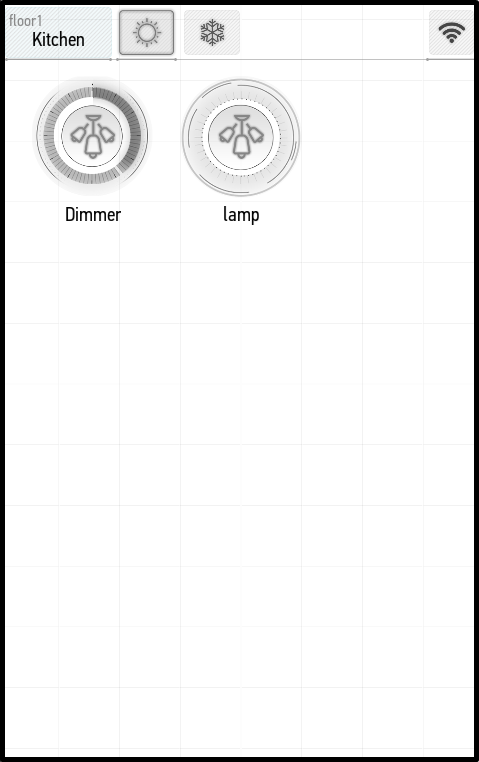
Press and hold the desired item and drag it onto the name of the desired room. We have chosen Dimmer, Lamp and Radiator. Now, after clicking on the Kitchen in the Setup menu, we see the added items.
In this way, you can drag the required items around the rooms. Upon completion, click the tick mark in the right upper corner.
Now the items are displayed on the main screen and available for control.