Light Scheme
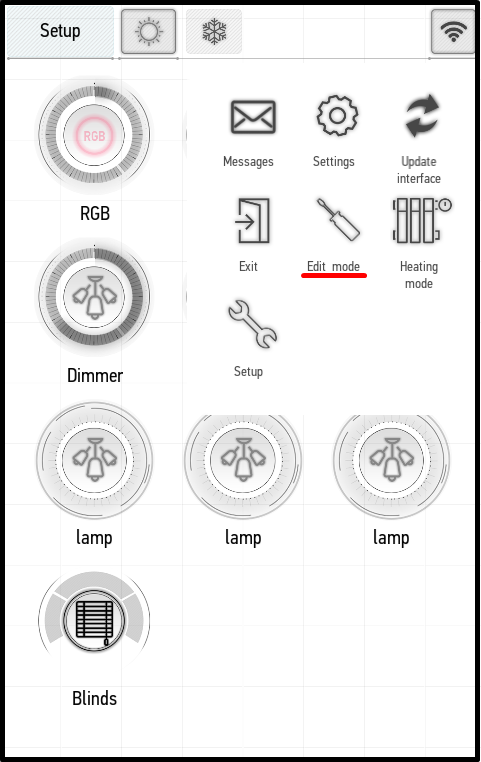
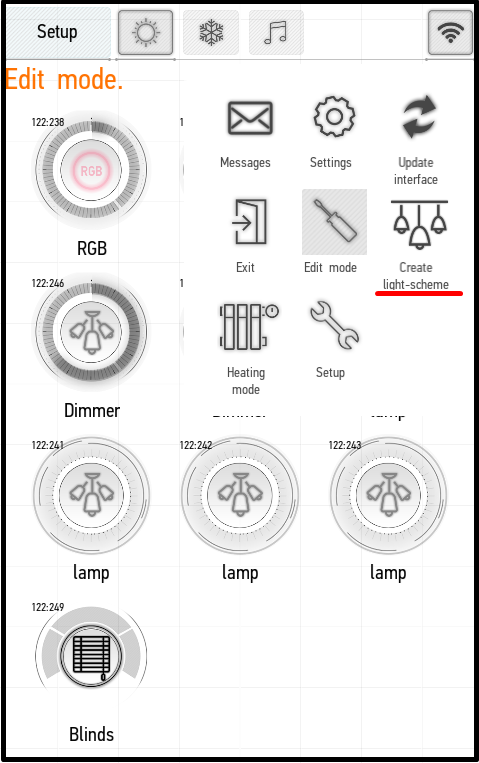
A light scheme is a combination of lighting items switched to a certain state. To create light schemes, you need to activate the edit mode: enter the application menu and click Edit mode (the left screenshot). After the edit mode activation, the Create light-scheme button will appear in the menu (the right screenshot) – click it to create a light scheme.
The edit panel appears.
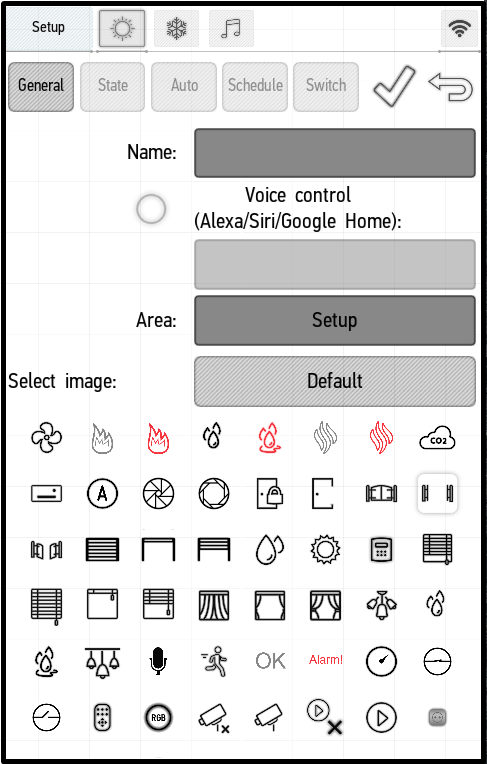
In the General tab you can:
- specify the name of the light scheme in the Name box;
- activate voice control by ticking the box next to Voice Control and entering the name in the box below;
- select the room in which the light scheme will be located in the Area box;
- add to Favorites using the Favorite in menu;
- set the desired icon using the Select image menu.
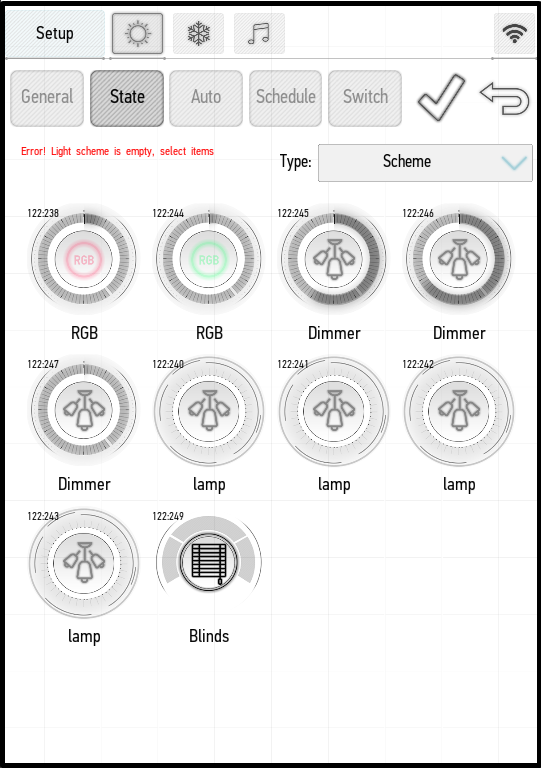
All items that can be used in the light scheme will be available in the State tab. Initially, there are no items in the scheme (the screenshot on the left). To add actuators to the scheme, press and hold the desired item until it is transferred to the top window and its name is highlighted in green (the screenshot on the right). For example, we have added the RGB backlight, the dimmer, the lamp and the jalousie to the light scheme. After changing the room with the button in the left upper corner, you can add items from other rooms too.
 |
 |
After the items are added to the scheme, you need to select their parameters: set the brightness of the dimmer, the position of jalousie, the color and the brightness of the RGB backlight.
You can use the Type menu to select one of 4 types of the light scheme:
- Scheme – the scheme will be represented as an actuator which can be turned on and off. When you turn the scheme, all items that are used in the scheme will be enabled and configured to the specified parameters. When you turn off the scheme, all used items will be turned off.
- Scene – the scheme will be represented as an actuator which is turned on, sets specified parameters for all used items, and turned off.
- Scene+ – the items are turned on when the circuit is activated and turned off as soon as the item values no longer correspond to those specified in the scene.
- Scheme Rev – the scheme with two positions. You can set the item states for each mode separately. You can switch the states using the Rev button.
On the Auto, Schedule, and Switch tabs you can configure the automatic turn on, set the schedule, and bind the light scheme to a button. For detailed instructions, see the Edit Items section.