Translations:Automation/1/en
Automation Settings
Automation allows you to configure the system to suit your everyday needs. You get things done when and the way you want them to happen, depending on the time and other parameters. In the Larnitech application you can enable and adjust automation settings for most items.
Enabling Automation
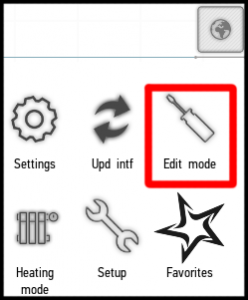
You can configure and activate automation mode for actuators and multiroom. To enable it, enter the menu and click Edit mode.
After that select the item whose automation you want to configure, click on it and hold until the edit menu appears. Go to Auto tab.

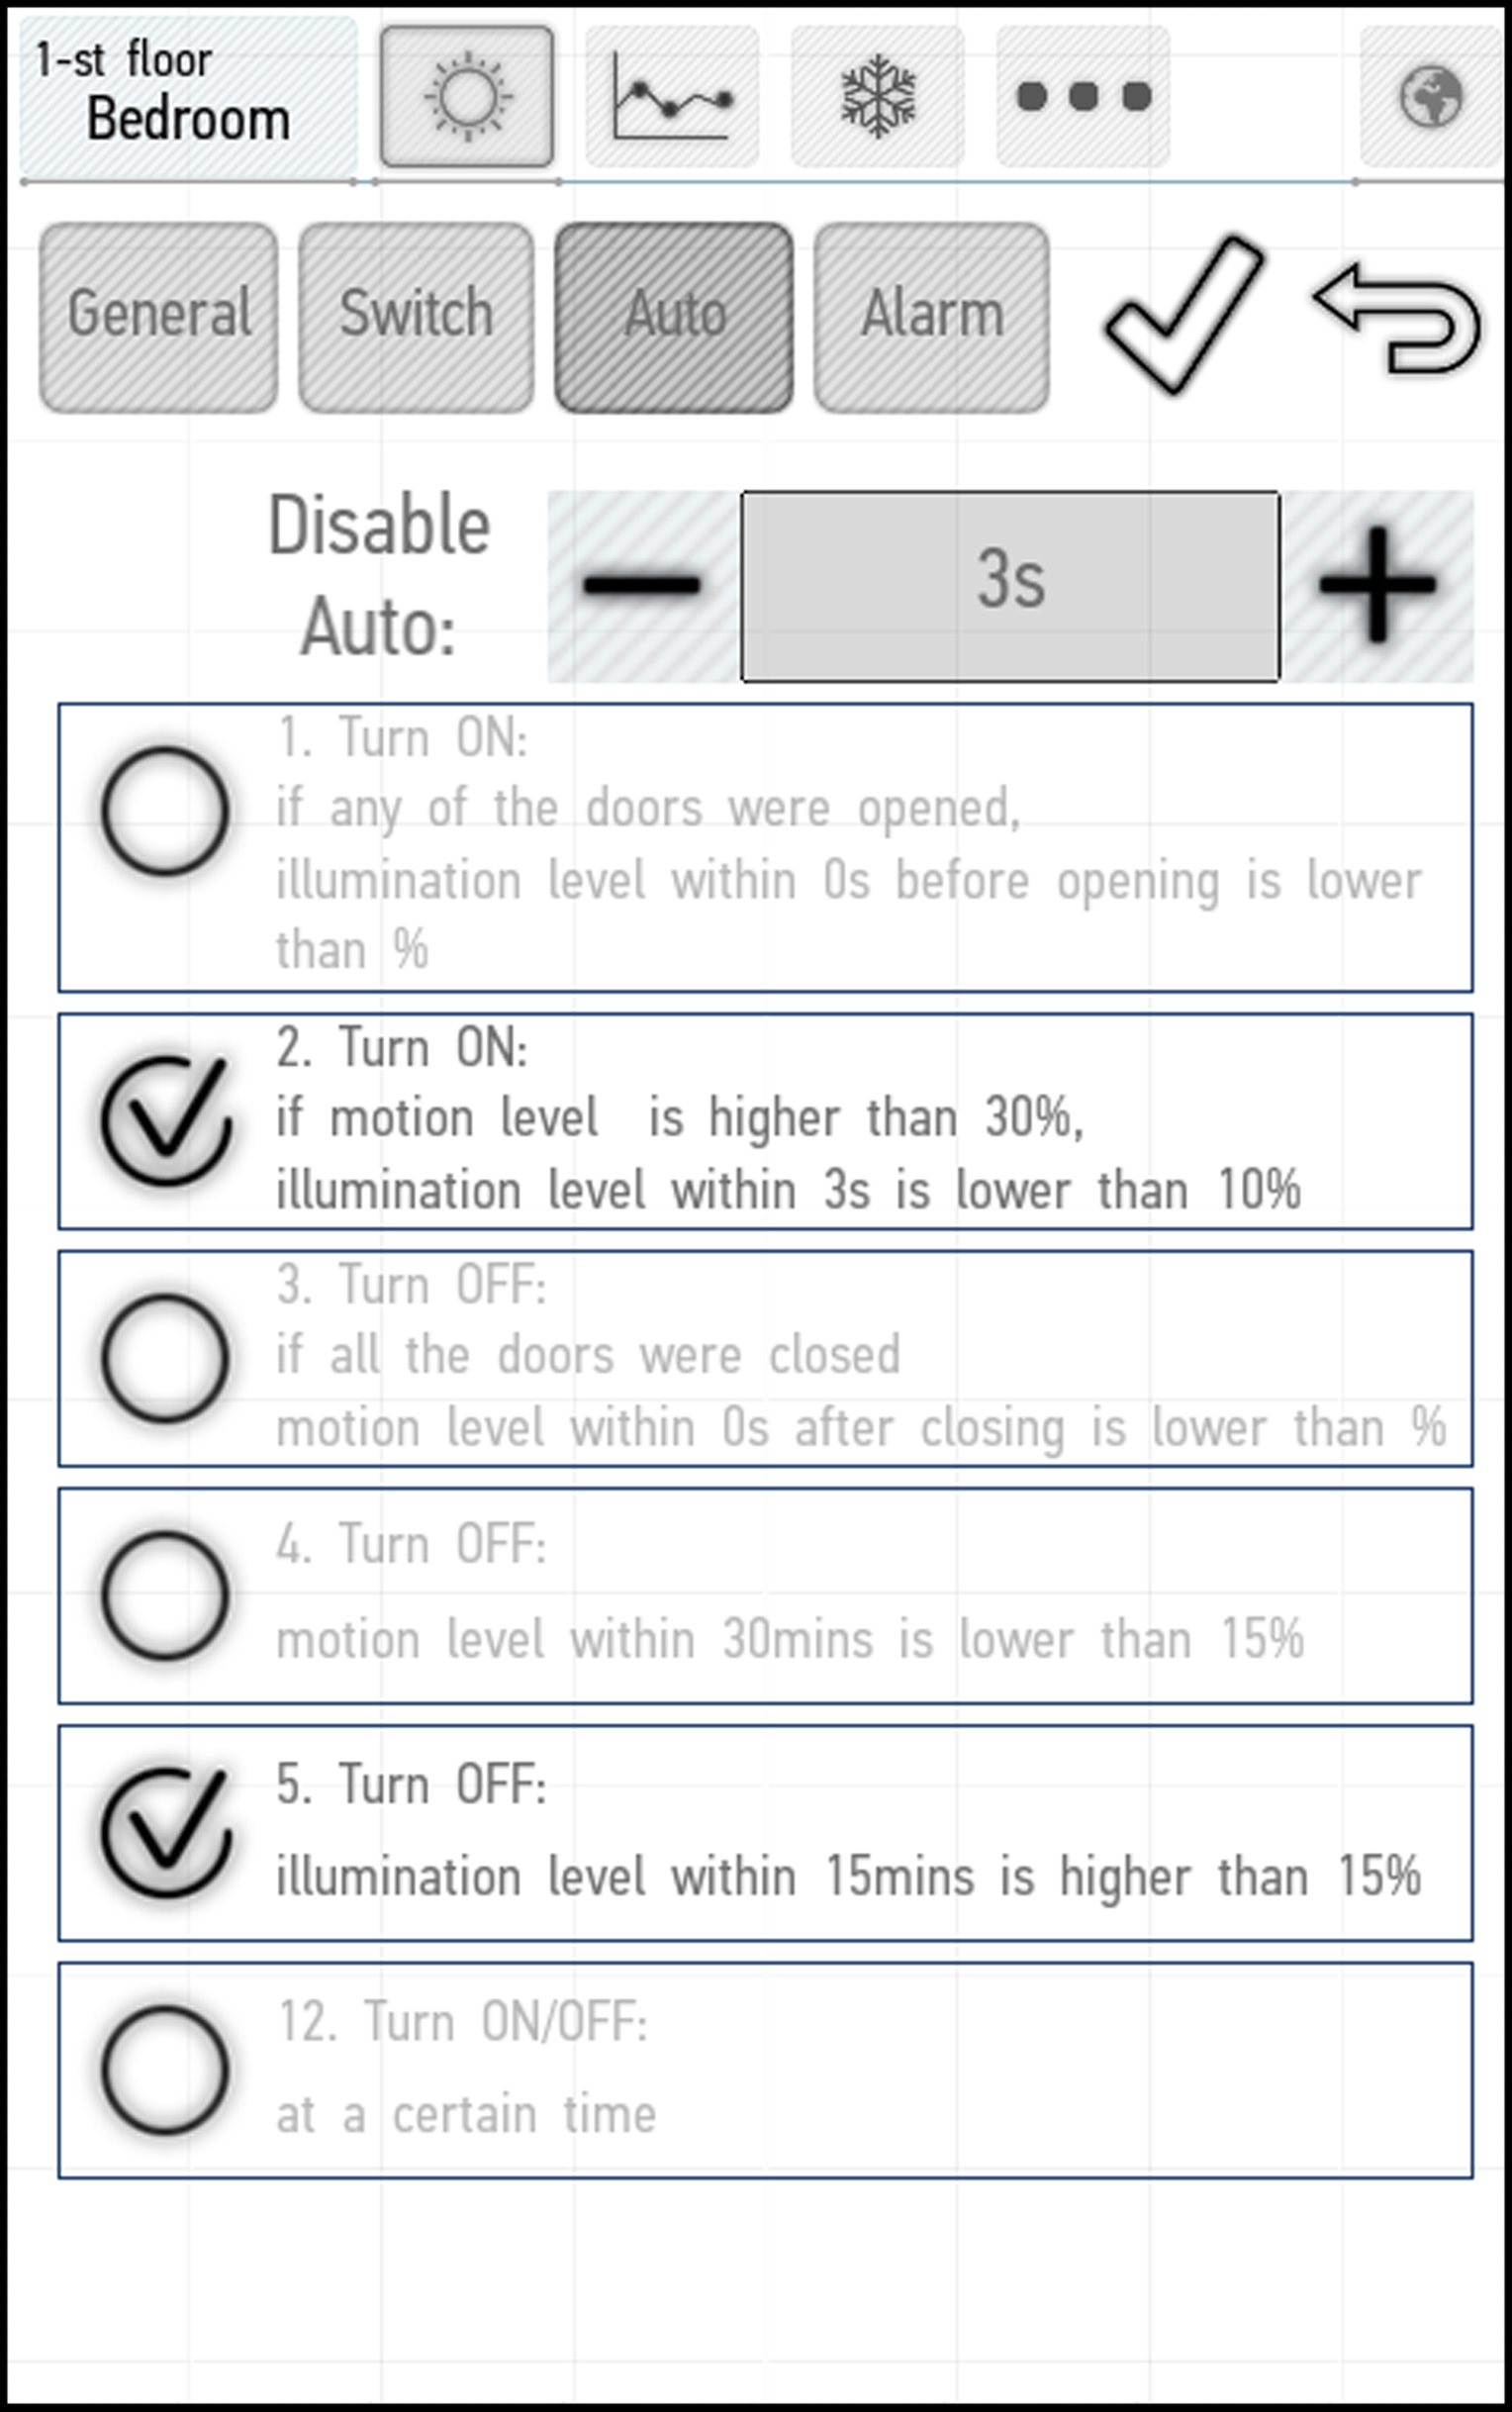
The tab presents available automation settings. There are 13 settings options that are available for various items in various combinations.
To activate the desired setting, tick the box next to it. Multiple settings options can be selected at once.
List of Settings
- Turn on if any door was opened and the illumination level was below 10% 3 seconds before that happened.
- Turn on if the illumination level within the last 10 seconds was lower than 10%, and the motion level within the last second was higher than 30%.
- Turn off if all doors were closed, and the motion level within 15 seconds after closing the doors was below 15%.
- Turn off if the motion level within last half hour was less than 15%.
- Turn off if the illumination level within last 15 minutes was higher than 15%.
- Reserved
- Turn on if the lighting was on within the last 2 minutes. Turn off after 2 minutes of operation (for an exhaust fan).
- Turn off if the humidity within the last minute was 20% higher than the humidity within the last hour. Turn off if the humidity within the last minute was 10% lower than the humidity within the last hour (for an exhaust fan).
- Open the blinds if the illumination level within last 10 minutes was higher than 20%.
- Close the blinds if the illumination level within last 10 minutes was lower than 10%, the motion level was higher than 30%, or the lights were on.
- Valve maintenance: opening and closing. It is recommended for longer lifetime of the valve.
- Turn on and off at the specified time.
- Turn on and off simultaneously with another device.
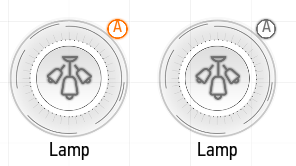
The orange letter “A” in the upper right corner indicates activated automation mode. If the icon is grey, the automation is temporarily disabled.
Changing Parameters
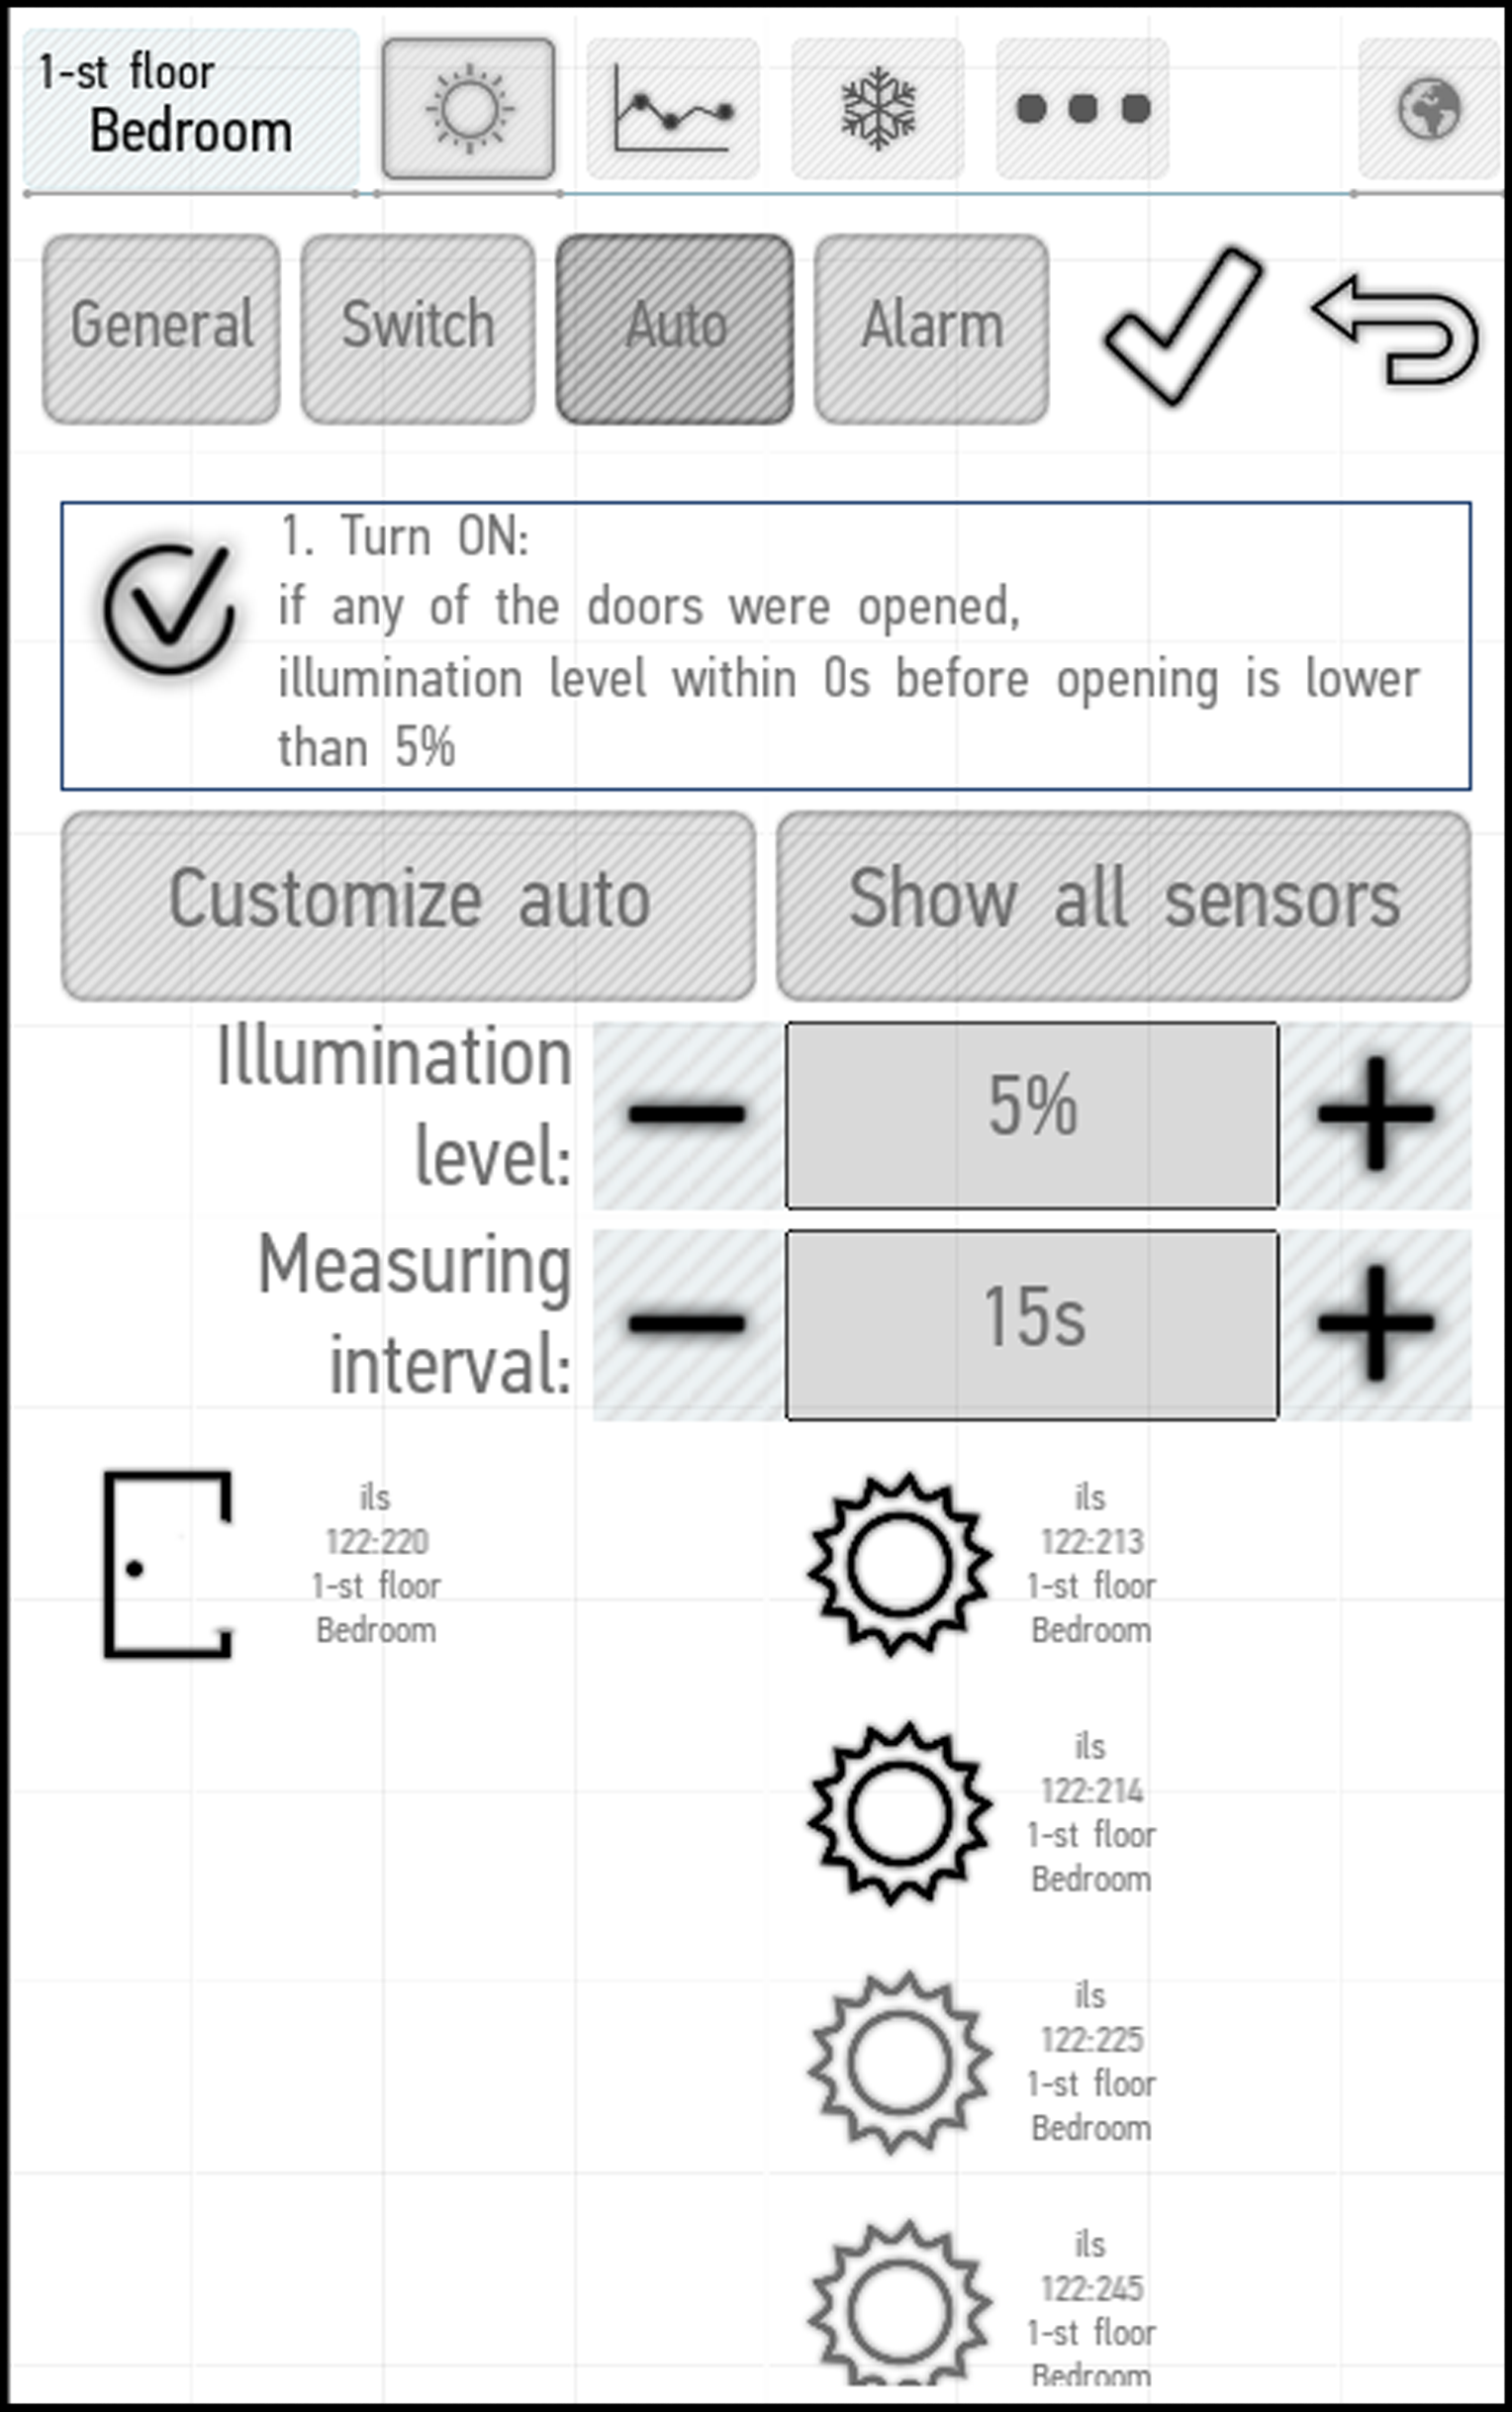
By clicking on the name and description of the mode, you will open a menu in which you can change the parameters. Disabling/enabling sensors changes functionality respectively. For example, in the automation Setting No. 2, which requires data from motion and lighting sensors, if only one sensor type is selected, the system will only be using this selected type (and be triggered either by lighting/motion only).
In the screenshot below, we have opened the corresponding menu for Setting No.1.