Translations:Managing the Items/7/en

Climate
This section allows you to control radiators, air conditioners and fans installed in the room.
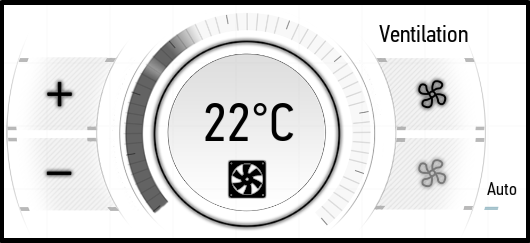
Ventilation
The ventilation control is carried out using the following interface (in the screenshot, the ventilation is turned off):
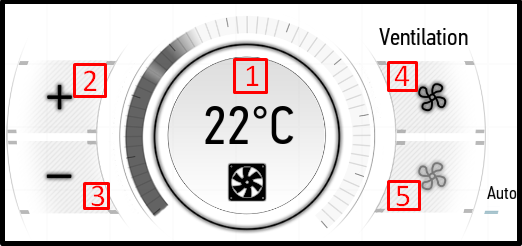
- – turning the ventilation on and off.
- – increasing the temperature.
- – decreasing the temperature.
- – increasing the air flow strength.
- – decreasing the air flow strength.
When setting the minimum level of the air flow strength, the automatic adjustment is enabled (it is enabled in the screenshot above).
The ventilation is turned on:
Radiators
The radiator control is carried out using the following panel.
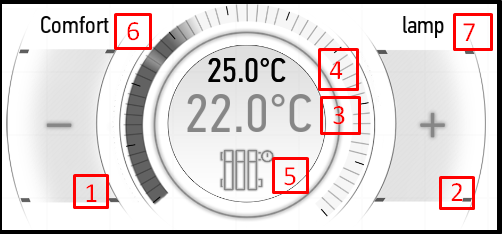
- The button for decreasing the temperature.
- The button for increasing the temperature.
- The temperature setting for the radiator.
- The temperature received from the bound sensor.
- Status: in the heating mode the button is highlighted in orange; in the inactive mode it is highlighted in gray.
- Active option of heating mode (see Heating Modes).
- Item name.
The + and - buttons can be used to set the desired temperature. Below this temperature the radiator will be turned on. In our case, the radiator is configured to a temperature of 26 degrees. If the room is colder, it will be turned on and start to heat the air. When the room temperature is 33.9 degrees, the radiator will be turned off.
If a particular temperature is specified in the settings for the current time period, then you can use the + and - buttons to change it for the current period.
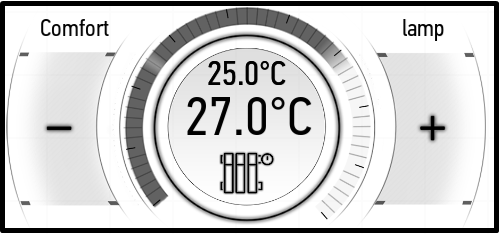
In the screenshot above, we have configured the radiator for a temperature higher than the temperature in the room. As a result, it has been turned on and started to heat the room.
If no temperature sensors are bound to the radiator, then no measured temperature will be displayed.
The active heating mode is indicated in the upper left corner. It can be set in the Heating mode menu, and you can create and configure them in the edit menu (see Edit Items -> Edit Radiators). There are also manual control (Manual) mode and always off (Always off) mode. In manual control mode, you can turn on and off the radiator yourselves. In Always off mode, the radiator will always be off.
Air conditioner
The air conditioner control is carried out using the following item (in the screenshot below it is turned off).
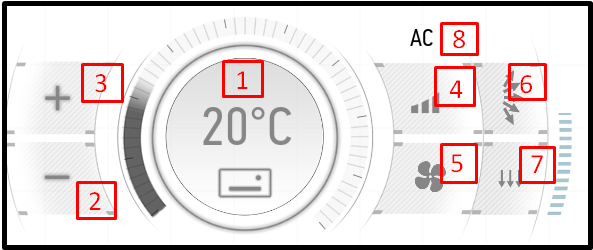
- turning the air conditioner on and off.
- decreasing the temperature.
- increasing the temperature.
- adjusting the air flow intensity.
- selecting the mode of operation.
- vertical shutter control.
- horizontal shutter control.
- item name.
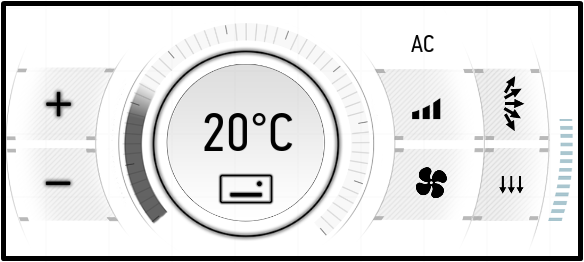
In the screenshot above, the air conditioner is configured for a temperature of 24 degrees in the heating mode at full fan power.

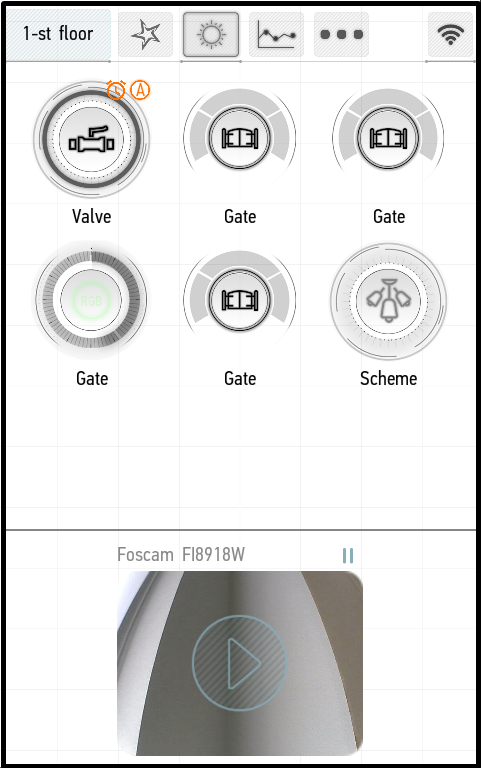
Cameras
The camera menu allows you to view images from cameras connected to the system. You can start and stop the broadcast by a single click on the image.
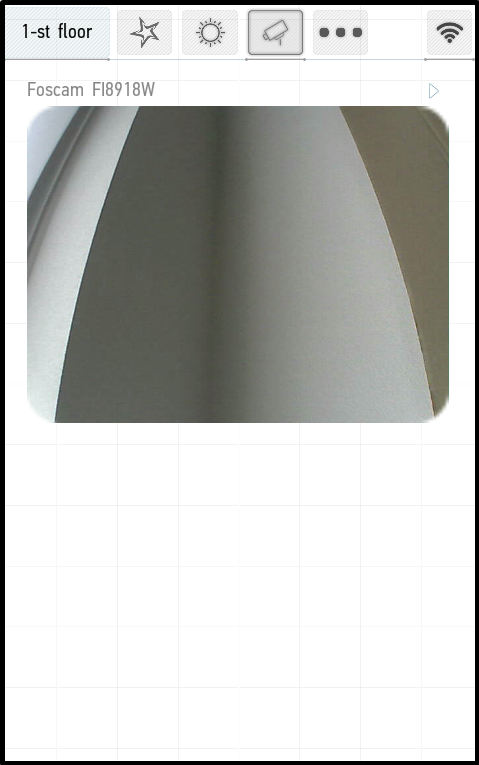
Double click on the image will open the full screen mode. If the camera supports appropriate functions, the control panel will be displayed, which you can use to control the camera position.
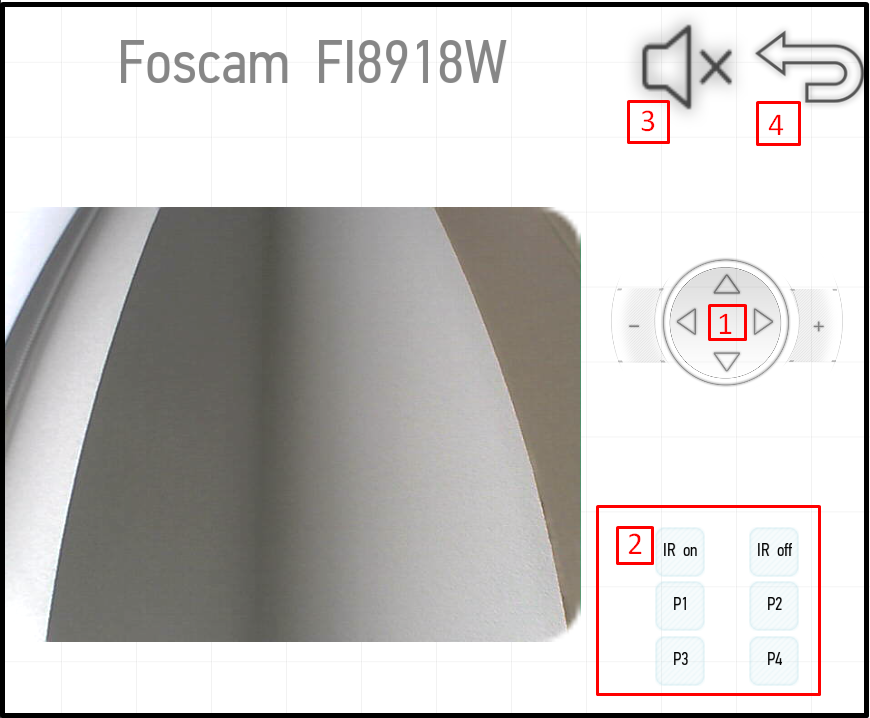
The panel contains the following buttons:
- joystick for the camera movement and buttons for zoom in and out ("+" and "-") on the sides;
- buttons for position preset (if supported by the camera): set the desired camera position, than press and hold one of the four keys (P1, P2, P3, or P4); subsequently you can quickly switch to this position by pressing the corresponding button;
- sound on/off button (if supported by the camera);
- exit button.
You can fix the image from the camera in order to go to other pages of the application and watch the image from the camera. To do this, press and hold the camera screen by your finger until an additional panel appears at the bottom of the screen (see the screenshot below).
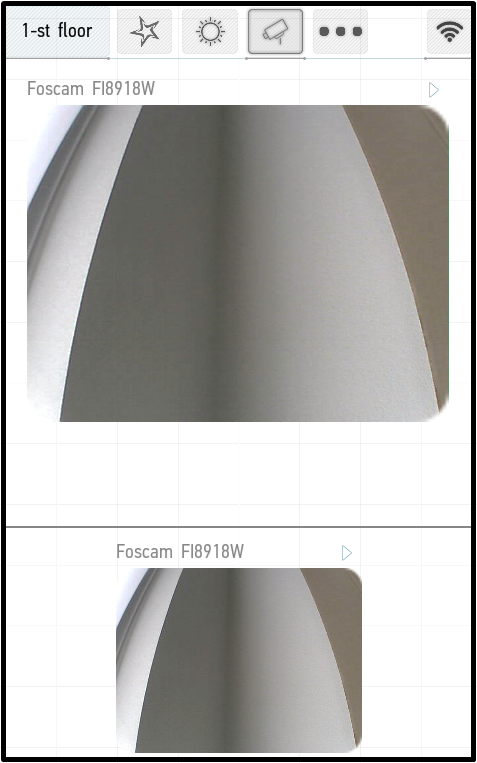
This panel will also be available in other application menus, and the broadcast will continue. You can also fix multiple cameras.
To close the panel, press and hold the additional screen until the panel disappears.