Difference between revisions of "Translations:IFTTT (IF This, Then That)/3/en"
From Larnitech wiki page
Jump to navigation
Jump to search
Tags : Mobile web edit Mobile edit
(No difference)
Latest revision as of 17:36, 15 January 2022
Information about message (contribute ) This message has no documentation.
If you know where or how this message is used, you can help other translators by adding documentation to this message.
Message definition (IFTTT (IF This, Then That) )
<ol><li class="nummered">Follow to the IFTTT website ([https://ifttt.com/ https://ifttt.com/]).</li> <li class="nummered">Sign up/log into your account. <br>[[file:ifttt1.png|500px]]<br></li> <li class="nummered">Choose My Applets at the top menu. <br>[[file:ifttt2.png|500px]]<br></li> <li class="nummered">Follow to Services.</li> <li class="nummered">Find and connect the Webhooks sevice. <br>[[file:ifttt3.png|500px]]<br></li> <li class="nummered">Press Settings on the Services page. <br>[[file:ifttt4.png|500px]]<br></li> <li class="nummered">Copy the URL end-code of the account (the last word in the URL-string). <br>[[file:ifttt5.png|500px]]<br></li> <li class="nummered">Open the Webhooks Tab in LTSetup. <br>[[file:ifttt6.png|250px]]<br></li> <li class="nummered">At the Events tab, add an event (You can see the examples by clicking the Help button). <br>[[file:ifttt7.png|500px]]<br> <br>[[file:ifttt8.png|800px]]<br></li> <li class="nummered">At the URL string change the key to the copied one at 1.7 and save event. <br>[[file:ifttt9.png|800px]]<br> <br>[[file:ifttt10.png|800px]]<br></li> <li class="nummered">Follow to IFTTT – My Applets</li> <li class="nummered">Press New Applet <br>[[file:ifttt11.png|800px]]<br></li> <li class="nummered">Press "this". <br>[[file:ifttt12.png|500px]]<br></li> <li class="nummered">Find and choose Webhooks. <br>[[file:ifttt13.png|500px]]<br> <br>[[file:ifttt14.png|500px]]<br></li> <li class="nummered">At the "Event Name" field it is required to enter the event’s name from the page Events in LTSetup – Webhooks. After filling "Event Name", press "Create trigger" button. <br>[[file:ifttt15.png|500px]]<br> <br>[[file:ifttt16.png|500px]]<br></li> <li class="nummered">Choose any service and connect it. <br>[[file:ifttt17.png|800px]]<br></li> <li class="nummered">Finish the adding of an applet. <br>[[file:ifttt18.png|500px]]<br></li> <li class="nummered">The last required step is adding the script into Blockly, using the following instruciton:
<ol><li class="nummered">Follow to the IFTTT website ([https://ifttt.com/ https://ifttt.com/]).</li>
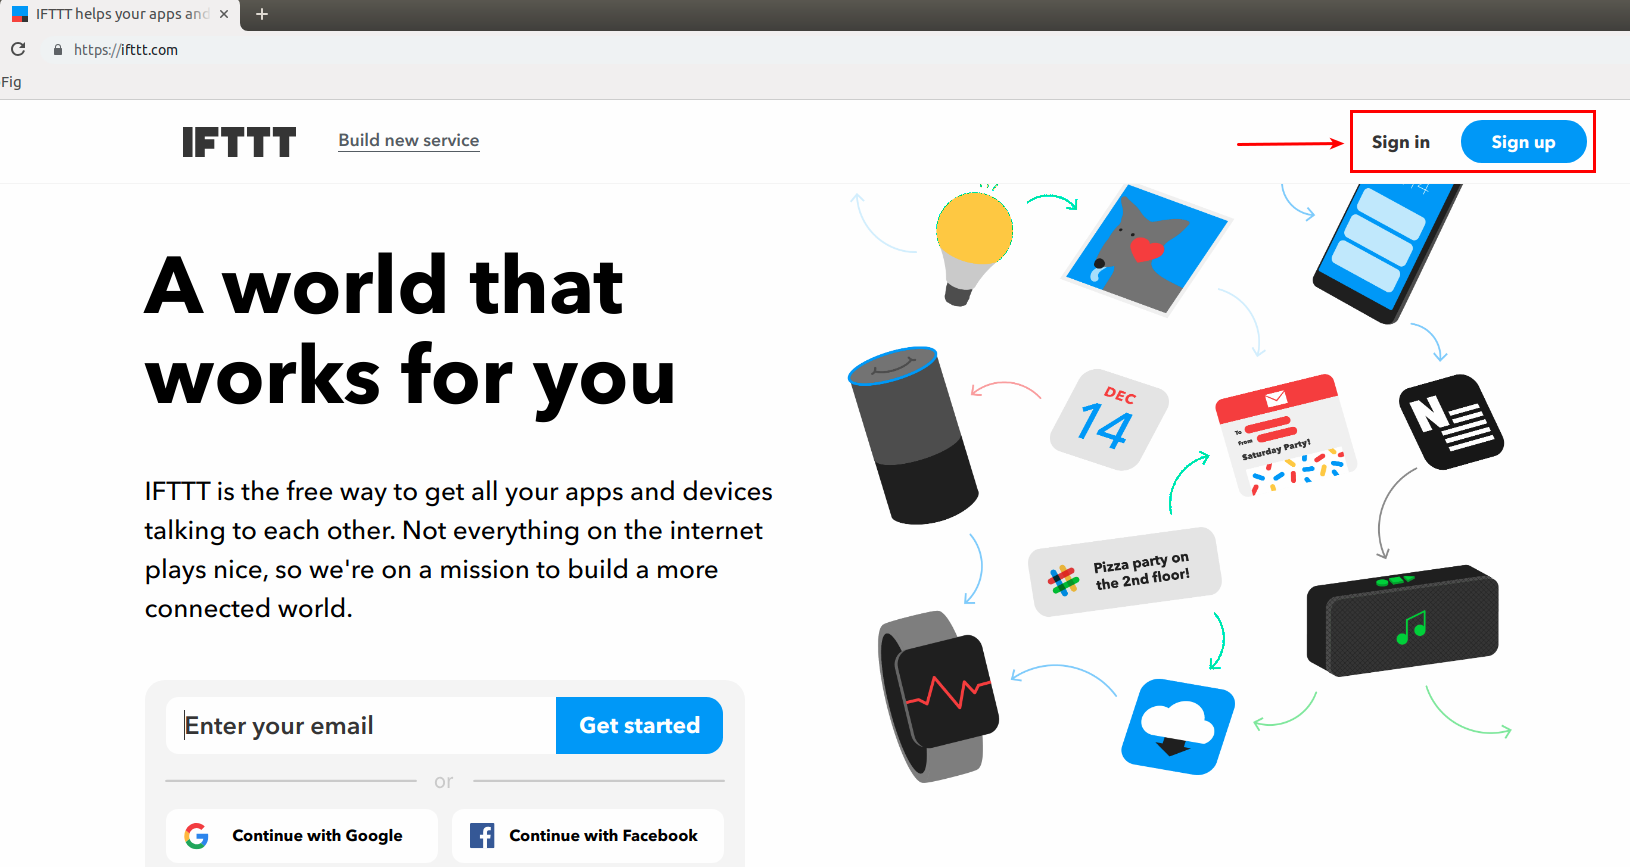
<li class="nummered">Sign up/log into your account.
<br>[[file:ifttt1.png|500px]]<br></li>
<li class="nummered">Choose My Applets at the top menu.
<br>[[file:ifttt2.png|500px]]<br></li>
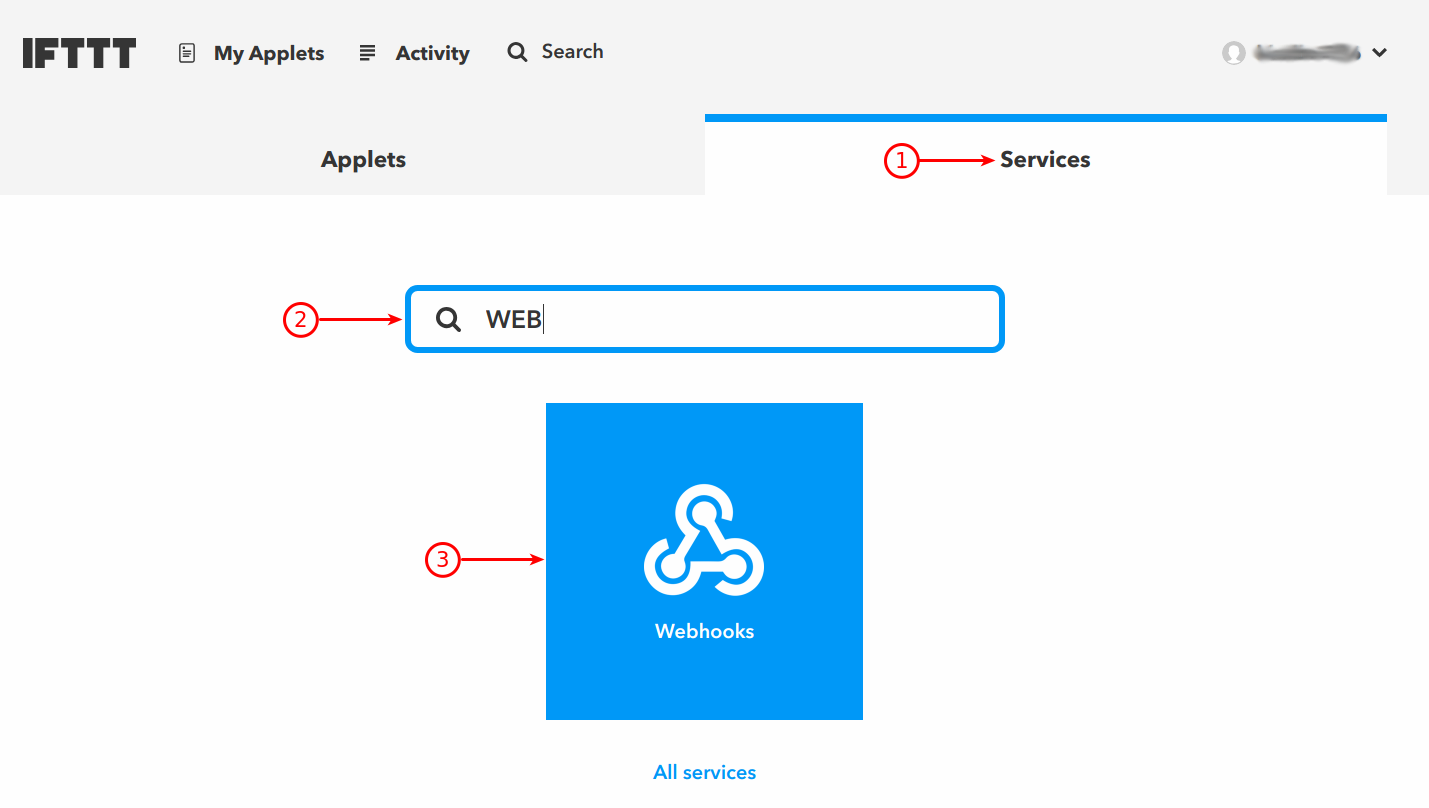
<li class="nummered">Follow to Services.</li>
<li class="nummered">Find and connect the Webhooks sevice.
<br>[[file:ifttt3.png|500px]]<br></li>
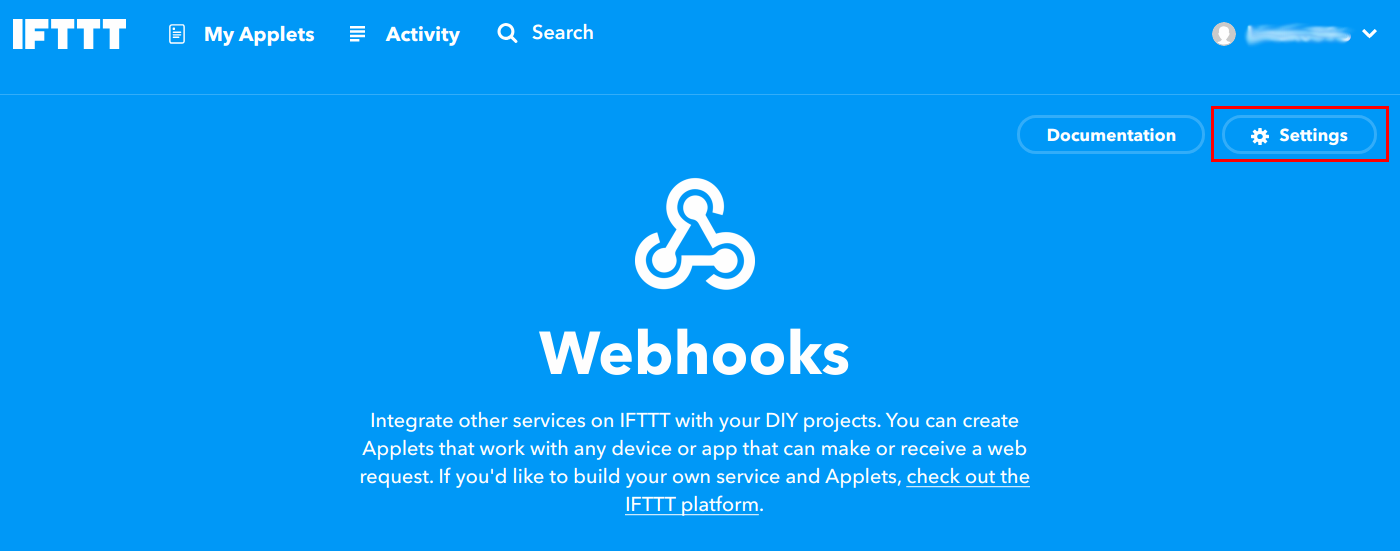
<li class="nummered">Press Settings on the Services page.
<br>[[file:ifttt4.png|500px]]<br></li>
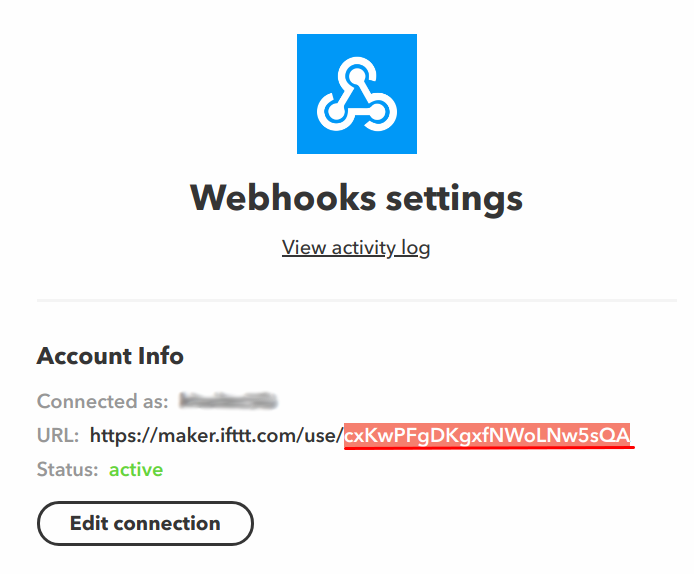
<li class="nummered">Copy the URL end-code of the account (the last word in the URL-string).
<br>[[file:ifttt5.png|500px]]<br></li>
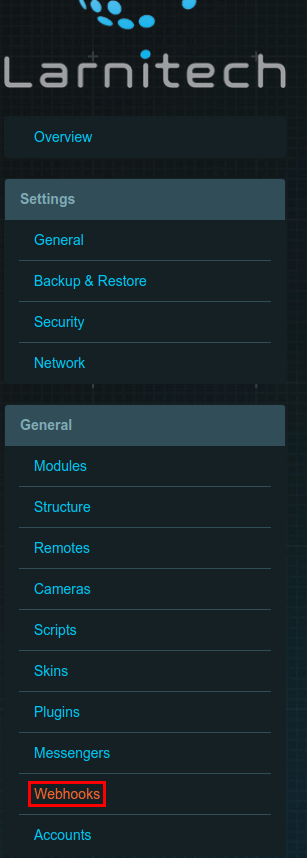
<li class="nummered">Open the Webhooks Tab in LTSetup.
<br>[[file:ifttt6.png|250px]]<br></li>
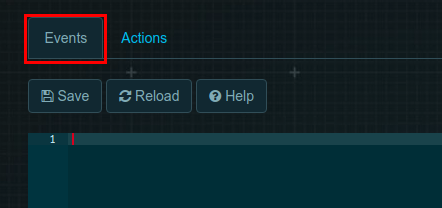
<li class="nummered">At the Events tab, add an event (You can see the examples by clicking the Help button).
<br>[[file:ifttt7.png|500px]]<br>
<br>[[file:ifttt8.png|800px]]<br></li>
<li class="nummered">At the URL string change the key to the copied one at 1.7 and save event.
<br>[[file:ifttt9.png|800px]]<br>
<br>[[file:ifttt10.png|800px]]<br></li>
<li class="nummered">Follow to IFTTT – My Applets</li>
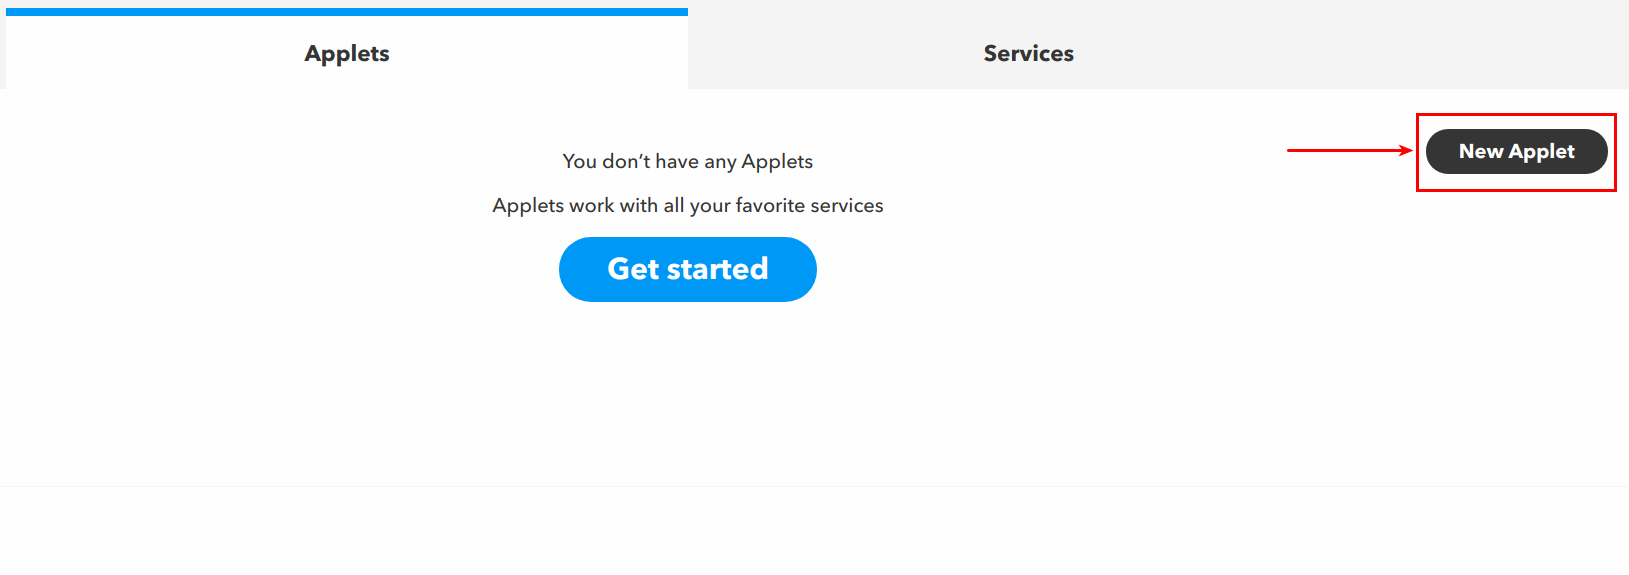
<li class="nummered">Press New Applet
<br>[[file:ifttt11.png|800px]]<br></li>
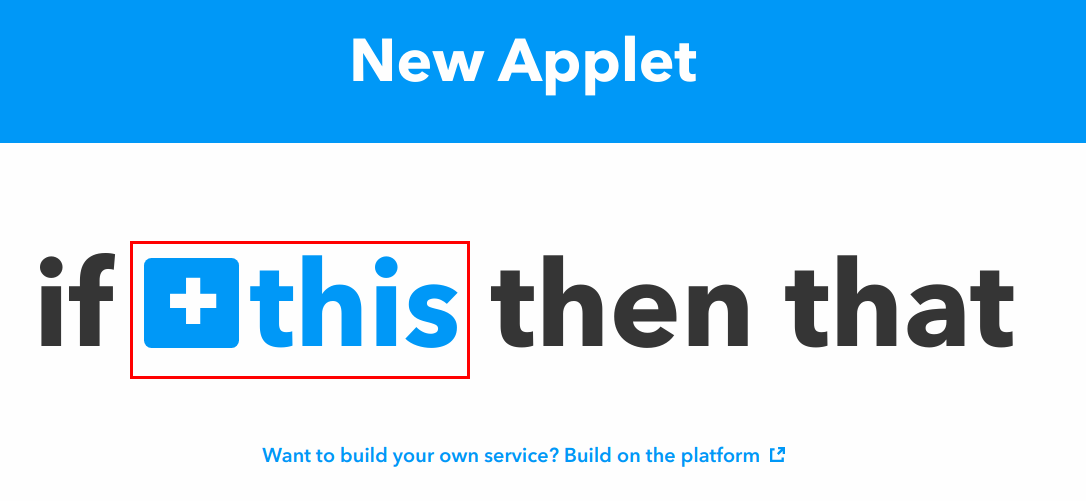
<li class="nummered">Press "this".
<br>[[file:ifttt12.png|500px]]<br></li>
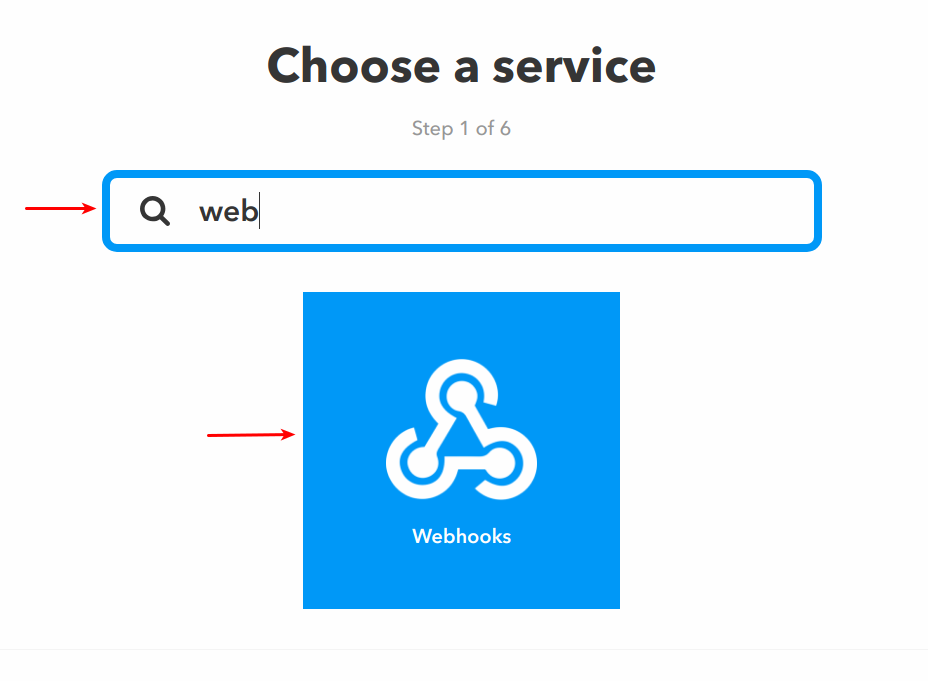
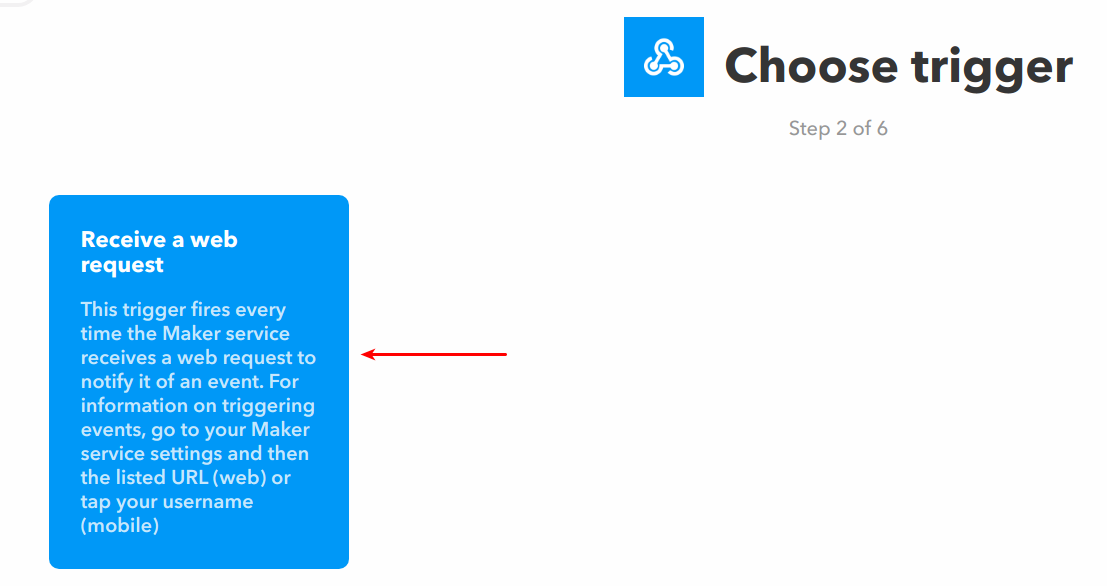
<li class="nummered">Find and choose Webhooks.
<br>[[file:ifttt13.png|500px]]<br>
<br>[[file:ifttt14.png|500px]]<br></li>
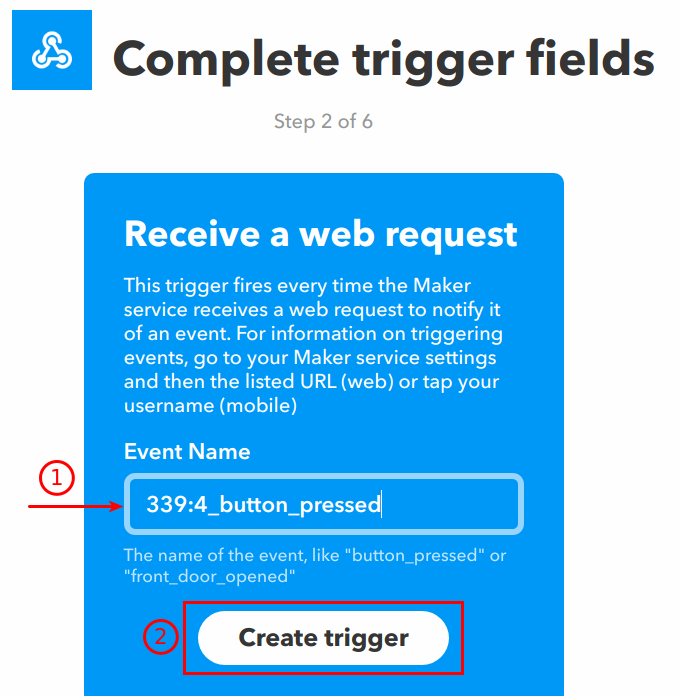
<li class="nummered">At the "Event Name" field it is required to enter the event’s name from the page Events in LTSetup – Webhooks. After filling "Event Name", press "Create trigger" button.
<br>[[file:ifttt15.png|500px]]<br>
<br>[[file:ifttt16.png|500px]]<br></li>
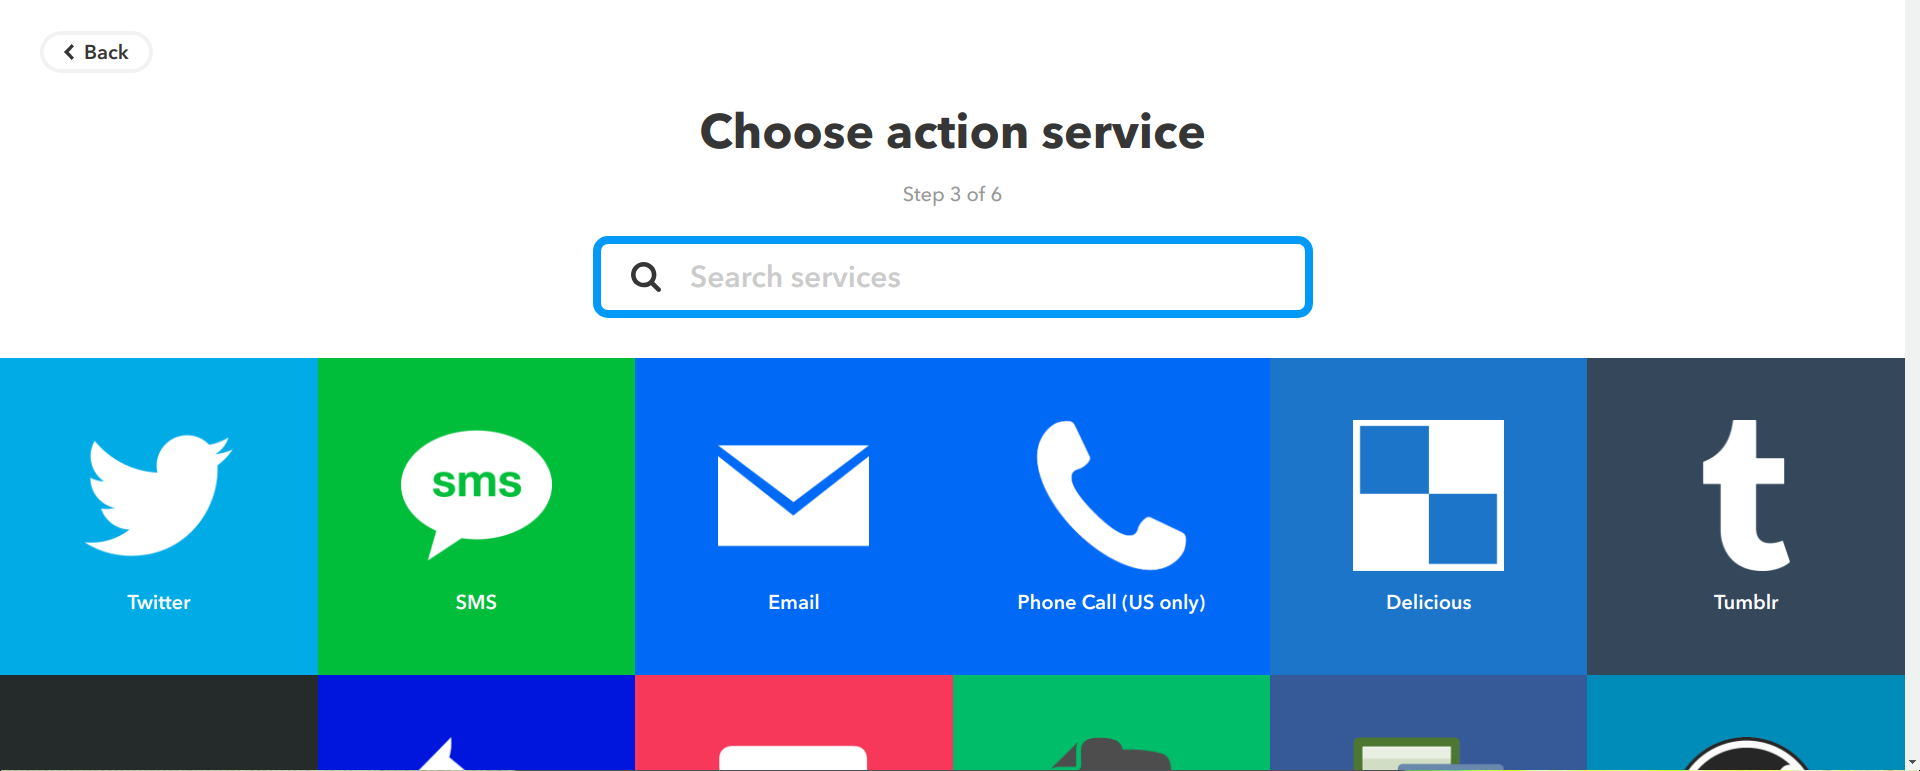
<li class="nummered">Choose any service and connect it.
<br>[[file:ifttt17.png|800px]]<br></li>
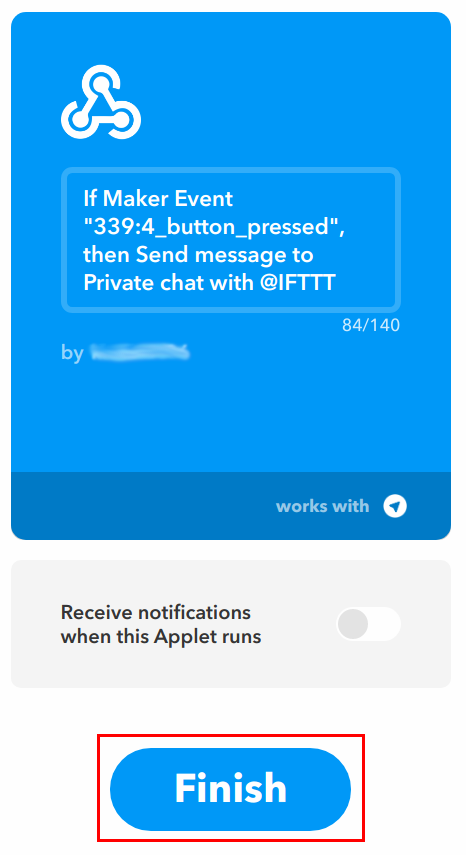
<li class="nummered">Finish the adding of an applet.
<br>[[file:ifttt18.png|500px]]<br></li>
<li class="nummered">The last required step is adding the script into Blockly, using the following instruciton:
Translation <ol><li class="nummered">Follow to the IFTTT website ([https://ifttt.com/ https://ifttt.com/]).</li> <li class="nummered">Sign up/log into your account. <br>[[file:ifttt1.png|500px]]<br></li> <li class="nummered">Choose My Applets at the top menu. <br>[[file:ifttt2.png|500px]]<br></li> <li class="nummered">Follow to Services.</li> <li class="nummered">Find and connect the Webhooks sevice. <br>[[file:ifttt3.png|500px]]<br></li> <li class="nummered">Press Settings on the Services page. <br>[[file:ifttt4.png|500px]]<br></li> <li class="nummered">Copy the URL end-code of the account (the last word in the URL-string). <br>[[file:ifttt5.png|500px]]<br></li> <li class="nummered">Open the Webhooks Tab in LTSetup. <br>[[file:ifttt6.png|250px]]<br></li> <li class="nummered">At the Events tab, add an event (You can see the examples by clicking the Help button). <br>[[file:ifttt7.png|500px]]<br> <br>[[file:ifttt8.png|800px]]<br></li> <li class="nummered">At the URL string change the key to the copied one at 1.7 and save event. <br>[[file:ifttt9.png|800px]]<br> <br>[[file:ifttt10.png|800px]]<br></li> <li class="nummered">Follow to IFTTT – My Applets</li> <li class="nummered">Press New Applet <br>[[file:ifttt11.png|800px]]<br></li> <li class="nummered">Press "this". <br>[[file:ifttt12.png|500px]]<br></li> <li class="nummered">Find and choose Webhooks. <br>[[file:ifttt13.png|500px]]<br> <br>[[file:ifttt14.png|500px]]<br></li> <li class="nummered">At the "Event Name" field it is required to enter the event’s name from the page Events in LTSetup – Webhooks. After filling "Event Name", press "Create trigger" button. <br>[[file:ifttt15.png|500px]]<br> <br>[[file:ifttt16.png|500px]]<br></li> <li class="nummered">Choose any service and connect it. <br>[[file:ifttt17.png|800px]]<br></li> <li class="nummered">Finish the adding of an applet. <br>[[file:ifttt18.png|500px]]<br></li> <li class="nummered">The last required step is adding the script into Blockly, using the following instruciton: Follow to the IFTTT website (https://ifttt.com/ ).
Sign up/log into your account.
Choose My Applets at the top menu.
Follow to Services.
Find and connect the Webhooks sevice.
Press Settings on the Services page.
Copy the URL end-code of the account (the last word in the URL-string).
Open the Webhooks Tab in LTSetup.
At the Events tab, add an event (You can see the examples by clicking the Help button).
At the URL string change the key to the copied one at 1.7 and save event.
Follow to IFTTT – My Applets
Press New Applet
Press "this".
Find and choose Webhooks.
At the "Event Name" field it is required to enter the event’s name from the page Events in LTSetup – Webhooks. After filling "Event Name", press "Create trigger" button.
Choose any service and connect it.
Finish the adding of an applet.
The last required step is adding the script into Blockly, using the following instruciton: