Translations:Settings/1/ru
Открыть настройки
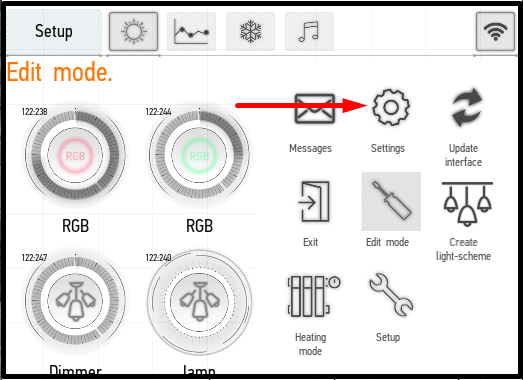
Чтобы открыть настройки, войдите в меню и выберите
пункт Настройки (Settings). Некоторые элементы могут быть недоступны, если добавлены пользователи с разными правами доступа (они настраиваются с помощью LT Setup).
Общие свойства (General)
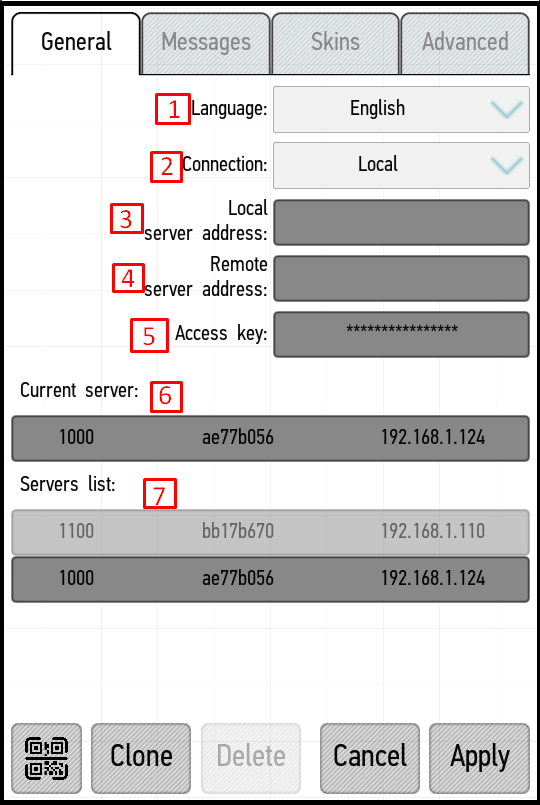
Вкладка Общие свойства (General) содержит следующие элементы:
- Язык (Language) — выбор языка приложения.
- Подключение (Connection) — выбор способа подключения к серверу (локальный, удаленный, облачный, см. Configuring the Type of Connection)
- Адрес локального сервера (Local server) — адрес локального сервера
- Адрес удаленного сервера (Remote server) — адрес удаленного сервера.
- Ключ доступа (Access key) – код доступа к серверу.
- Текущий сервер (Current server) — сервер, к которому в данный момент подключено устройство.
- Список серверов (Servers list) — список серверов в локальной сети.
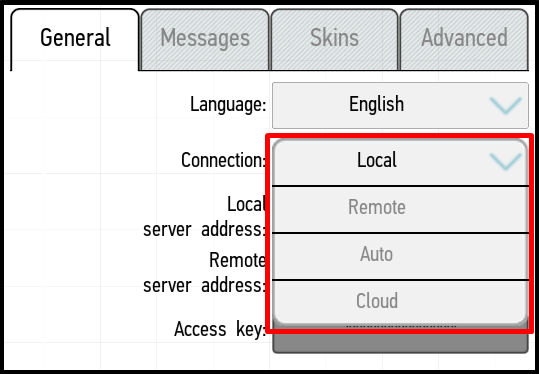
Configuring the type of connection
In the Connection box you can select the type of connection to the server – local, remote, automatic or cloud.
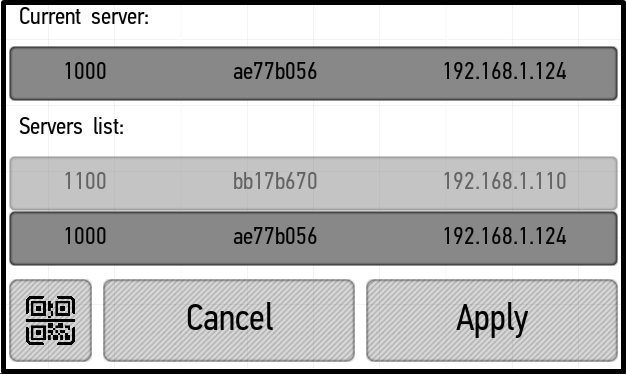
Local type (Local) implies the connection to the server that is in the same LAN with your device. All servers that will be detected on your LAN appear in the Servers List below. To connect to one of them, simply click on it and click Apply. The selected server will be added to the Current Server box (the screenshot below).
You can also connect to the local server by manually entering its IP address in the appropriate field. If you manually enter the local IP address, the list with available servers will not be displayed.
Remote type of connection (Remote) allows you to connect to your server via the Internet. To connect, the router must be configured to forward the port to the DE-MG/Metaforsa module (55555 by default).
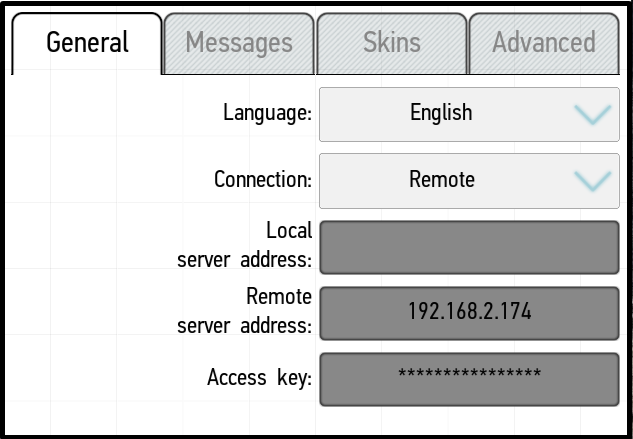
In order to connect to your server, you would simply enter the external IP address of your router in the Remote server address field, enter the access key in the Access key field and click Apply. Now, your device can be connected to any network.
Automatic type (Auto) allows you to always communicate with your server. The application tracks the network which you are connected to, and if you are in the same network with your server, the application connects you to it with a local type of connection, and if not, then with a remote one. To work with the automatic type of connection, you need to enter both the local server address (or select it from the list and connect), and the remote one, and then click the Apply button.
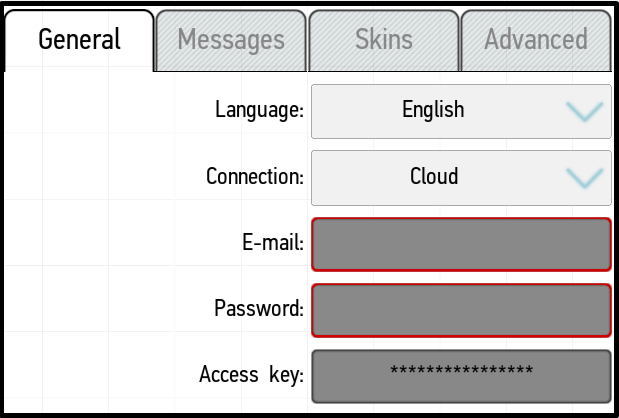
The cloud type (Cloud) assumes connecting to your server through the Larnitech cloud service. To connect, you need to enter the E-mail and password from your Larnitech account and click Apply. If you do not have a Larnitech account, you can register it on the toolbar of the Smart Home system administration (LT Setup).
If you have a cloud type of connection active, but you are connecting to the same LAN with your server (and you have a local server address bound), then the connection type will be automatically changed to local.
The button design of the main menu of the application varies depending on the type of current connection:
 local connection (Local);
 remote connection (Remote);
 cloud connection (Cloud).
Messages
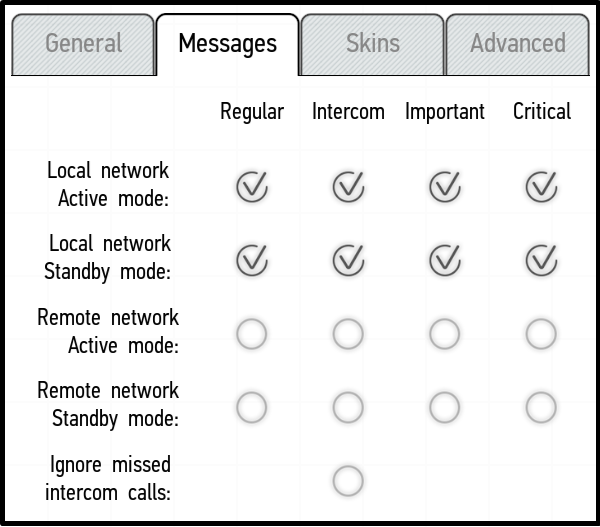
In the Messages section you can customize when and what types of messages you will receive.
You can activate or remove the receipt of four types of messages – Regular, from the Intercom, Important, and Critical. The connection can be enabled and disabled for the following modes of operation:
- Local network. Active mode – when the application is active and the connection type is local.
- Local network. Standby mode – when the application is folded and the connection type is local.
- Remote network. Active mode – when the application is active and the connection type is local.
- Remote network. Standby mode – when the application is hidden and the connection type is remote.
Tick the boxes near the desired types of messages in the desired modes, and you will allow the messages to be received; otherwise, unmarked message types in unmarked modes of operation will not come and be saved in the Messages section. If you tick the box next to Ignore missed intercom calls, you will not receive messages about the missed calls via Intercom regardless of the application activity and connection method. To confirm the changes made, click Apply at the bottom of the screen.
Skins
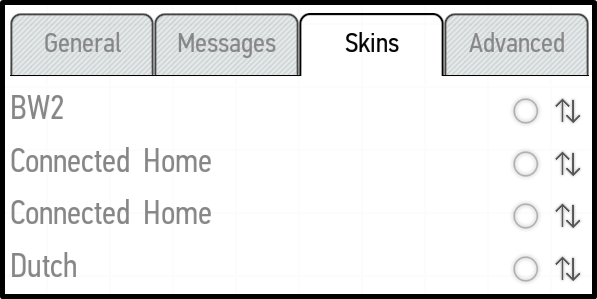
You can use the Skins menu to select a skin (the option of application design). The screenshot on the left shows the available skins.
To select the desired skin, tick the box next to it. Pulling the arrows on the right side of the window up and down you can move the skin within the list (selected skins are applied in the order from top to bottom).
To apply the changes, click the Apply button at the bottom of the window.